Make your artwork look like they're from an alternate universe. These Cyberpunk presets work with Photoshop (via the Camera Raw filter) and Lightroom. Download all 788 presets for 90% off.
This tutorial will take you through the steps of drawing and painting a street in Venice. Part I is the drawing, Part II the blocking in, and Part III the final painting and detail.
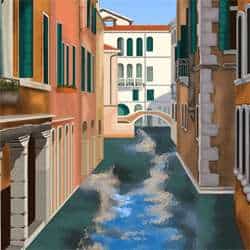
Preview of Final Results
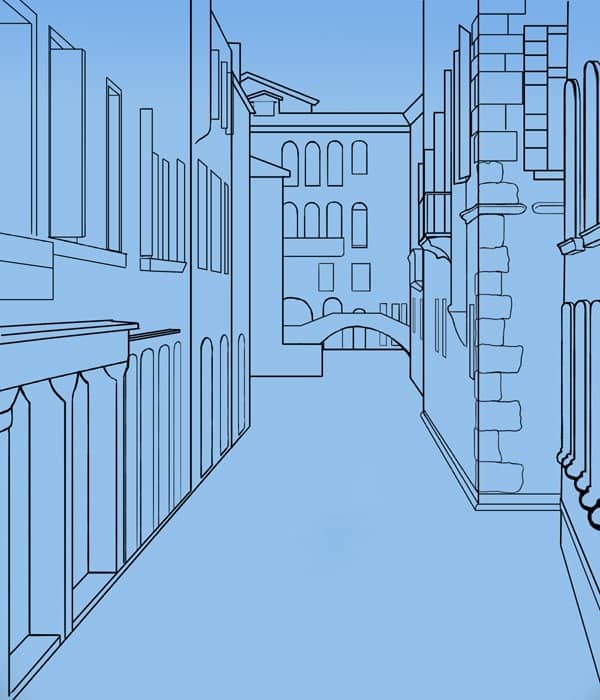
Painting a Venetian Street: Part I
Resources
Step 1
Open a new project 2400 x 2800 pixels at 300 pixels/inch.
![clip_image006[4] clip_image006[4]](https://cdn.photoshoptutorials.ws/images/stories/c9329086a76d_11664/clip_image0064.jpg?strip=all&lossy=1&quality=70&webp=70&avif=70&w=1920&ssl=1)
Step 2
I will be using a reference photograph from Dreamstime for this digital painting.
Step 3
Fill the background with color #7BB0E9.
![clip_image010[4] clip_image010[4]](https://cdn.photoshoptutorials.ws/images/stories/c9329086a76d_11664/clip_image0104.jpg?strip=all&lossy=1&quality=70&webp=70&avif=70&w=1920&ssl=1)
Step 4
Set the front swatch to color #93C0EA. Use the gradient tool to set a soft blue grading background, the light on bottom and dark blue at the very top of the picture.

Step 5
Make a new layer, “outline”.
![clip_image014[4] clip_image014[4]](https://cdn.photoshoptutorials.ws/images/stories/c9329086a76d_11664/clip_image0144.jpg?strip=all&lossy=1&quality=70&webp=70&avif=70&w=1920&ssl=1)
Step 6
Drag two slices onto the picture at 4” and 4.75”. Where the two meet will be the vanishing point.
![clip_image016[4] clip_image016[4]](https://cdn.photoshoptutorials.ws/images/stories/c9329086a76d_11664/clip_image0164.jpg?strip=all&lossy=1&quality=70&webp=70&avif=70&w=1920&ssl=1)
Step 7
We are going to build a very basic protractor. This will help you duplicate the lines I am drawing and will help you get the correct proportions.
Step 8
Draw a long horizontal line.
![clip_image020[4] clip_image020[4]](https://cdn.photoshoptutorials.ws/images/stories/c9329086a76d_11664/clip_image0204.jpg?strip=all&lossy=1&quality=70&webp=70&avif=70&w=1920&ssl=1)
Step 9
Shift + Click using the ellipse tool to draw a circle. It should automatically be on a different layer. Right clock on the layer box and rasterize the layer.
![clip_image022[4] clip_image022[4]](https://cdn.photoshoptutorials.ws/images/stories/c9329086a76d_11664/clip_image0224.jpg?strip=all&lossy=1&quality=70&webp=70&avif=70&w=1920&ssl=1)
Step 10
Copy the circle and paste it onto a new, temporary layer. Fill the circle with white (#FFFFFF paint bucket tool) and resize it so that it is slightly smaller than the first circle. Lay it over the first circle so that there appears to be an outline of a circle. Merge the layer down so that the two are on one layer.
Step 11
Erase the bottom half of the circle.
Step 12
Transform the circle (Ctrl + T) so that the two ends touch the horizontal line and make a half-circle.
Step 13
Copy and paste the half circle. Re size it so that it is a smaller half-circle inside the larger one.
![clip_image030[4] clip_image030[4]](https://cdn.photoshoptutorials.ws/images/stories/c9329086a76d_11664/clip_image0304.jpg?strip=all&lossy=1&quality=70&webp=70&avif=70&w=1920&ssl=1)
Step 14
Sharpen the edges of the circle. Make a dot at the midpoint of the horizontal line. Draw a line straight up from there to the top of the circle.
Mark this 90 degrees. Mark the left side of the horizontal line 180 degrees and the right side 0 degrees.
![clip_image032[4] clip_image032[4]](https://cdn.photoshoptutorials.ws/images/stories/c9329086a76d_11664/clip_image0324.jpg?strip=all&lossy=1&quality=70&webp=70&avif=70&w=1920&ssl=1)
Step 15
Draw two more lines halfway between the 90 degrees and the 0 degrees and the 180 degrees. Mark them 45 degrees and 135 degrees.
![clip_image034[4] clip_image034[4]](https://cdn.photoshoptutorials.ws/images/stories/c9329086a76d_11664/clip_image0344.jpg?strip=all&lossy=1&quality=70&webp=70&avif=70&w=1920&ssl=1)
Step 16
Mark off eight lines on each side of the 90 degree lines at even intervals.
![clip_image036[4] clip_image036[4]](https://cdn.photoshoptutorials.ws/images/stories/c9329086a76d_11664/clip_image0364.jpg?strip=all&lossy=1&quality=70&webp=70&avif=70&w=1920&ssl=1)
Step 17
Mark each as its degree mark (starting from the right, 10, 20, 30, 40, 50, 60, 70, 80, (90 degrees), 100, 110. 120, 130,140, 150, 160, 170).
Merge all the layers onto one layer, erase the long 45 degree and 135 degree lines, and your protractor is done!
![clip_image038[4] clip_image038[4]](https://cdn.photoshoptutorials.ws/images/stories/c9329086a76d_11664/clip_image0384.jpg?strip=all&lossy=1&quality=70&webp=70&avif=70&w=1920&ssl=1)
Step 18
Copy and past the protractor onto your project and set the layer opacity to 60%. Re size it so that you can easily read all the numbers. For now, turn it upside down and line the midpoint up with the vanishing point.

Step 19
Using the line tool with a weight of 5 pixels (color #000000), draw a diagonal line from the vanishing point to a point slightly to the right of the left outer corner. The angle of the line should be approximately 48 degrees.
![clip_image042[4] clip_image042[4]](https://cdn.photoshoptutorials.ws/images/stories/c9329086a76d_11664/clip_image0424.jpg?strip=all&lossy=1&quality=70&webp=70&avif=70&w=1920&ssl=1)
Step 20
Draw a second line at an angle of 122 degrees.
![clip_image044[4] clip_image044[4]](https://cdn.photoshoptutorials.ws/images/stories/c9329086a76d_11664/clip_image0444.jpg?strip=all&lossy=1&quality=70&webp=70&avif=70&w=1920&ssl=1)
Step 21
Draw two more lines, one at a 122 degree angle from the vanishing point. Start the other halfway between the right side of the vantage point and draw it to slightly above the right side of the image. Draw both with the 5 pixel line tool.
![clip_image046[4] clip_image046[4]](https://cdn.photoshoptutorials.ws/images/stories/c9329086a76d_11664/clip_image0464.jpg?strip=all&lossy=1&quality=70&webp=70&avif=70&w=1920&ssl=1)
Step 22
Draw two horizontal lines at approximately 2.5” and 3”. Erase right portion of the top line.
![clip_image048[4] clip_image048[4]](https://cdn.photoshoptutorials.ws/images/stories/c9329086a76d_11664/clip_image0484.jpg?strip=all&lossy=1&quality=70&webp=70&avif=70&w=1920&ssl=1)
Step 23
Draw another line from the vanishing point at 120 degrees. Draw a straight line down from that to the line below.
![clip_image050[4] clip_image050[4]](https://cdn.photoshoptutorials.ws/images/stories/c9329086a76d_11664/clip_image0504.jpg?strip=all&lossy=1&quality=70&webp=70&avif=70&w=1920&ssl=1)
Step 24
Erase the extra length of that line and then draw a vertical line from the end of the second line we originally drew. Add a horizontal line connecting that line with the one to its right.
![clip_image052[4] clip_image052[4]](https://cdn.photoshoptutorials.ws/images/stories/c9329086a76d_11664/clip_image0524.jpg?strip=all&lossy=1&quality=70&webp=70&avif=70&w=1920&ssl=1)
Step 25
Draw a line at an 89 degree angle connecting the bottom right line to the top of the picture.
![clip_image054[4] clip_image054[4]](https://cdn.photoshoptutorials.ws/images/stories/c9329086a76d_11664/clip_image0544.jpg?strip=all&lossy=1&quality=70&webp=70&avif=70&w=1920&ssl=1)
Step 26
Erase the lines this building overlaps.
![clip_image056[4] clip_image056[4]](https://cdn.photoshoptutorials.ws/images/stories/c9329086a76d_11664/clip_image0564.jpg?strip=all&lossy=1&quality=70&webp=70&avif=70&w=1920&ssl=1)
Step 27
Draw a vertical line connecting to the right row of buildings at approximately 5.66”.
![clip_image058[4] clip_image058[4]](https://cdn.photoshoptutorials.ws/images/stories/c9329086a76d_11664/clip_image0584.jpg?strip=all&lossy=1&quality=70&webp=70&avif=70&w=1920&ssl=1)
Step 28
Erase the end of the right line that connects the building strand. In its place draw another line at 130 degrees.
![clip_image060[4] clip_image060[4]](https://cdn.photoshoptutorials.ws/images/stories/c9329086a76d_11664/clip_image0604.jpg?strip=all&lossy=1&quality=70&webp=70&avif=70&w=1920&ssl=1)
Step 29
Erase the end of the left main line. Draw a rectangle with its longer side at 3.75”, and the top and bottom sides at 2.33” and 5”.
![clip_image062[4] clip_image062[4]](https://cdn.photoshoptutorials.ws/images/stories/c9329086a76d_11664/clip_image0624.jpg?strip=all&lossy=1&quality=70&webp=70&avif=70&w=1920&ssl=1)
Step 30
Draw a short horizontal line at 4.5” and a connecting Vertical line down to 5”.
![clip_image064[4] clip_image064[4]](https://cdn.photoshoptutorials.ws/images/stories/c9329086a76d_11664/clip_image0644.jpg?strip=all&lossy=1&quality=70&webp=70&avif=70&w=1920&ssl=1)
Step 31
Draw a horizontal line at 5” that give the rectangle a base. Erase the lines inside this base. Extend the top line by approximately 1/8 of an inch bout to the right and then a second 1/8 of an inch line vertically. Connect the shape to the building to its left with a slight angle. This will give the impression of a slanting roof.
![clip_image066[4] clip_image066[4]](https://cdn.photoshoptutorials.ws/images/stories/c9329086a76d_11664/clip_image0664.jpg?strip=all&lossy=1&quality=70&webp=70&avif=70&w=1920&ssl=1)
Step 32
At 5.5” draw a 3.5” vertical line and connect it to the right buildings with a line at a 45 degree angle.
![clip_image068[4] clip_image068[4]](https://cdn.photoshoptutorials.ws/images/stories/c9329086a76d_11664/clip_image0684.jpg?strip=all&lossy=1&quality=70&webp=70&avif=70&w=1920&ssl=1)
![clip_image070[4] clip_image070[4]](https://cdn.photoshoptutorials.ws/images/stories/c9329086a76d_11664/clip_image0704.jpg?strip=all&lossy=1&quality=70&webp=70&avif=70&w=1920&ssl=1)
Step 33
Draw two horizontal lines connecting the two rows of buildings at 1.75” and 4.33”. Erase the extra length of the bottom right line we drew in step 28.
![clip_image072[4] clip_image072[4]](https://cdn.photoshoptutorials.ws/images/stories/c9329086a76d_11664/clip_image0724.jpg?strip=all&lossy=1&quality=70&webp=70&avif=70&w=1920&ssl=1)
Step 34
Draw another horizontal line 1/16 of an inch above the top line we just drew. Draw another line at a 45 degree angle right above the first.
![clip_image074[4] clip_image074[4]](https://cdn.photoshoptutorials.ws/images/stories/c9329086a76d_11664/clip_image0744.jpg?strip=all&lossy=1&quality=70&webp=70&avif=70&w=1920&ssl=1)
Step 35
Connect the two lines at 45 degree angles with the line tool. Draw a horizontal line connecting the intersection to the other set of buildings to the left.
![clip_image076[4] clip_image076[4]](https://cdn.photoshoptutorials.ws/images/stories/c9329086a76d_11664/clip_image0764.jpg?strip=all&lossy=1&quality=70&webp=70&avif=70&w=1920&ssl=1)
Step 36
At approximately 3.75” draw a little “roofed rectangle”. Connect the building to the left to the rooftop. While they do not actually connect, they do appear to touch in the photograph.
![clip_image078[4] clip_image078[4]](https://cdn.photoshoptutorials.ws/images/stories/c9329086a76d_11664/clip_image0784.jpg?strip=all&lossy=1&quality=70&webp=70&avif=70&w=1920&ssl=1)
Step 37
Draw a little window in the section and erase the to roof line that goes through it. Make the little roof 3D by adding a second line above it and connecting the two parts.
![clip_image080[4] clip_image080[4]](https://cdn.photoshoptutorials.ws/images/stories/c9329086a76d_11664/clip_image0804.jpg?strip=all&lossy=1&quality=70&webp=70&avif=70&w=1920&ssl=1)
Step 38
Draw a larger roof above the last roof we drew as well as a small, rectangular chimney to the left of it.
![clip_image082[4] clip_image082[4]](https://cdn.photoshoptutorials.ws/images/stories/c9329086a76d_11664/clip_image0824.jpg?strip=all&lossy=1&quality=70&webp=70&avif=70&w=1920&ssl=1)
Step 39
Make a new layer, “Outline Top”.
![clip_image084[4] clip_image084[4]](https://cdn.photoshoptutorials.ws/images/stories/c9329086a76d_11664/clip_image0844.jpg?strip=all&lossy=1&quality=70&webp=70&avif=70&w=1920&ssl=1)
Step 40
Draw two line radiating from the vanishing point to the left side of the picture and cut it off with a vertical line at 1.75”.
![clip_image086[4] clip_image086[4]](https://cdn.photoshoptutorials.ws/images/stories/c9329086a76d_11664/clip_image0864.jpg?strip=all&lossy=1&quality=70&webp=70&avif=70&w=1920&ssl=1)
Step 41
Make a “shelf” on top of this section.
![clip_image088[4] clip_image088[4]](https://cdn.photoshoptutorials.ws/images/stories/c9329086a76d_11664/clip_image0884.jpg?strip=all&lossy=1&quality=70&webp=70&avif=70&w=1920&ssl=1)
Step 42
Use a 9 pixel hard-edged brush to draw three columns under the “shelf.” It is okay if the edges start getting a little rough, they will be covered up in the next part.
![clip_image090[4] clip_image090[4]](https://cdn.photoshoptutorials.ws/images/stories/c9329086a76d_11664/clip_image0904.jpg?strip=all&lossy=1&quality=70&webp=70&avif=70&w=1920&ssl=1)
Step 43
Ctrl + T to extend the “shelf” a little.
![clip_image092[4] clip_image092[4]](https://cdn.photoshoptutorials.ws/images/stories/c9329086a76d_11664/clip_image0924.jpg?strip=all&lossy=1&quality=70&webp=70&avif=70&w=1920&ssl=1)
Step 44
Draw two lines (5 pixel line tool) very close to each other from the vanishing point to right below the top of the “shelf”.
![clip_image094[4] clip_image094[4]](https://cdn.photoshoptutorials.ws/images/stories/c9329086a76d_11664/clip_image0944.jpg?strip=all&lossy=1&quality=70&webp=70&avif=70&w=1920&ssl=1)
Step 45
Erase the end of the two lines and draw a third line to turn it into a small ledge.
![clip_image096[4] clip_image096[4]](https://cdn.photoshoptutorials.ws/images/stories/c9329086a76d_11664/clip_image0964.jpg?strip=all&lossy=1&quality=70&webp=70&avif=70&w=1920&ssl=1)
Step 46
Draw four slim arches beneath the outcropping.
![clip_image098[4] clip_image098[4]](https://cdn.photoshoptutorials.ws/images/stories/c9329086a76d_11664/clip_image0984.jpg?strip=all&lossy=1&quality=70&webp=70&avif=70&w=1920&ssl=1)
Step 47
Draw three more arches, two in the middle section, and one in the last building. They should grow progressively thinner.
![clip_image100[4] clip_image100[4]](https://cdn.photoshoptutorials.ws/images/stories/c9329086a76d_11664/clip_image1004.jpg?strip=all&lossy=1&quality=70&webp=70&avif=70&w=1920&ssl=1)
Step 48
Draw two lines on the right building for the bottom of the two sets of windows.
![clip_image102[4] clip_image102[4]](https://cdn.photoshoptutorials.ws/images/stories/c9329086a76d_11664/clip_image1024.jpg?strip=all&lossy=1&quality=70&webp=70&avif=70&w=1920&ssl=1)
Step 49
Draw a second line below the top line and connect the two with a shorter vertical line. Erase the part of the outline that passes through the section.

Step 50
Draw to arches on top the ledge you just drew.

Step 51
Make the arches 3D by adding a second curve the the right side of each.

Step 52
Repeat steps 49-50 for three more columns on the bottom row.

Step 53
Add two rounded bases to the bottom of each arch.

Step 54
Draw the outer corner of a window on the second building to the right (use 5 pixel the line tool).

Step 55
Use the same tool to draw a window shutter with short lines inside the rectangle.

Step 56
Draw three rectangles, one under the window, one two thirds of the way up, and one at the top of the window.

Step 57
Begin to draw a balcony on the middle building.

Step 58
Draw a vertical line attaching to the balcony. Also draw an outcropping on the building. The best advice I can give for this step is to reference the drawing and replicate what you see.

Step 59
Begin fleshing out the balcony. Draw a rectangle within the front side and add a thick band around the bottom.

Step 60
Draw a curving base attaching the balcony to the outcropping.

Step 61
Draw two open shutters on the balcony.

Step 62
Draw two more shutters open at an angle.

Step 63
Draw two more shutters on the building behind the balcony.

Step 64
Draw a row of windows across the right building.

Step 65
Draw another balcony and divide the ledge below the top tight windows into two ledges. Draw a second molding on the right building next to the first that wraps around the corner of the building.

Step 66
Draw a rounded base on the middle right building.

Step 67
Turn the bottom line of the right building into a line of molding. Draw two lines above the base of the middle building.

Step 68
Roughly draw the stack of stones on the middle right building.

Step 69
Use the line tool to draw the top stones.

Step 70
Draw another line from the vanishing point at a 140 degree angle.

Step 71
Draw another line at a 170 degree angle.

Step 72
Use the line tool (4 pixels) to sketch in all the windows on those lines on the left buildings. There should be six in all with two shutters.

Step 73
Erase the top line.

Step 74
Draw the last three windows.

Step 75
Erase the bottom line.

Step 76
Draw another line from the vanishing point at a 130 degree angle.

Step 77
Draw a second line at a 22 degree angle.

Step 78
Draw three shutters with the line tool.

Step 79
Using an opaque, 9 pixel hard-edged brush, draw a second outcropping from this building. It appears to be a chiminey.

Step 80
Erase the two lines.

Step 81
Draw an elongated rectangle beneath the first three windows. Draw the inside of the windows.

Step 82
Draw a square flower box in front of the first window.

Step 83
Erase the lines beneath it.

Step 84
Draw a rectangular prism under the second set of windows. This is another window box.

Step 85
Draw an arch from the “L” shaped building to the building on the other side.

Step 86
Draw the top of the bridge with the line tool (4 pixels).

Step 87
Draw three arches behind the bridge.

Step 88
Draw three windows to the right of the arches.

Step 89
Draw two windows above the bridge at 4”.

Step 90
Use the 9 pixel hard-edged brush to draw a balcony at 3.5”.

Step 91
Draw three arched windows above the balcony.

Step 92
Draw three more arched windows directly above the others.

Step 93
Draw another arched window to the right of the ones you just drew. The top of the arch should be on the same later, but it is shorter than the others.

Step 94
Draw the last window. It should be shaped like an arch, but have a rectangle inside it.

Step 95
Make a new layer, “Color Block”.

Step 96
Fill in the back building with color #FFF8E7 (34 pixel square brush, opaque). We will be using this brush through step 47. Make sure to cover up the outline lines.

Step 97
Fill in the building to its right and the section of roof above it with color #B9ACA1 (same brush).

Step 98
Block in the two back roofs with color #B7512B and the closer “L” shaped building with color #

Step 99
Block in the right building closest to the right with color #9F6128 and the building to the left with color #D78941.

Step 100
Color the middle building with color #EA875D and the building behind it with color #DE9E7E.

Step 101
Block in the last building on the left side with color #F1D09E.

Step 102
Tip the tops of the gray roofs with color #786352 using a 15 pixel square brush.

Step 103
Use the same brush (turn on shape dynamics, and set control to pen pressure) and make little rectangles across the lengths of the bottom of the pink and red roofs.

Step 104
Line above the rectangles with color #E8FAFF (soft-edged round brush, 40% opacity).

Step 105
Use the blur tool (100% strength) on the rectangles. Block in the top roof area with color #FAEFD9 (15 pixel soft-edged round brush, opaque).

Step 106
Paint the chimney with color #E8D7B9. Block in the last building with color #BF895E (Front side) and color #9B7251 (side facing out).

Step 107
Fill the little roof with color#C29B5F and add shadows around it with color #593B36 (17 pixel soft-edged brush, 40% opacity). Highlight the roof with color #FAEFD9.

Step 108
Highlight the window glass with color # and add a shadow to right above the glass with color # (both 40% opacity soft-edged brush). Use color #644844 and the same brush to add shadows to the roof above it.

Step 109
Begin blocking in shadows in the water with color #293535 (38% opacity, 210 pixel brush).

Step 110
Use the same brush and color #24322E to deepen the shadows.

Step 111
Fill the top center of the water with color #1280C8 (same brush) and then use the smudge tool to shape it.

Step 112
Continue using the same brush to highlight the blue with color #CFCCC7.

Step 113
Brush color #406A62 (50% opacity, soft-edged brush) where the reelections are cast by the boats in the reference photo.

Step 114
Highlight the light reflections with color #DCC3AC and the same brush.

Step 115
We are going to use three filters to give the canal a “watery” appearance. Begin by applying a Glass filter to the “background” layer. Set the Distortion to 14, the Smoothness to 10, and Texture to “Frosted”, and the Scaling to 200%. Check the “Invert” box if you wish.


Step 116
Next, apply a “Watercolor” filter. Set the Brush Detail to 14.


Step 117
Apply as last filter, “Smudge Stick,” to the layer. Set the Stroke Length to 0, the Highlight Area to 9, and the Intensity to 4.


Step 118
Make a new layer, “Color Block”.

Step 119
Fill in most of the windows with color #106358 (opaque). Use the same color to fill the bottom left arch of the middle “connector” building as well as all the shutters.

Step 120
Fill in the rest of the windows in the middle building with color #8CA394 (opaque). Fill in the balcony as well.

Step 121
Fill the inside of the bridge with color #BF895E . Leave a white trim on its edges.

Step 122
Draw a short line at a 157 degree angle off the “L” shaped building. Connect the line to the building with another horizontal line.


Step 123
Color the bottom left columns with color #D5CEBC.

Step 124
Use color #838992 to block in the column of stones in the building to the right as well as coloring the windows on the far right building. Block in the two balconies on the right as well.

Step 125
Color the chimney-like outcropping, the bottom side of the closest balcony, and some of the molding with color #5F4C47.

Step 126
Color in arches inside the far right windows with color #221917.

Step 127
Paint the inside of the open window to the right color #281408 (opaque).

Step 128
Use the same color to fill the remaining row of windows, and to add shadows to the far left windows as well.

Step 129
Use the same color (58% opacity) to paint the shadows at the top of the columns.

Step 130
Paint the left windows with color #D5CEBC (opaque).

Step 131
Fill the bottom half of the space between the first and second columns on the left with color #281408. Fill the entire space between the second and third with the same color.

Step 132
Fill the four middle arches with color #D5CEBC (opaque).

Step 133
Draw arched shadows inside them with color #AB9773.

Step 134
Add the darkest shadows to the arches with color #66553D.

Step 135
Fill the small window box with color #D25E1D.

Step 136
Use the color #66553D to paint the shadows inside the last three arches.

Step 137
Use the same color to fill the bottom half of the larger flower box. Outline the top half as well.

Step 138
Use the same color to draw the rain pipe on the “L” shaped building.

Step 139
Paint the vertical and horizontal lines on the back building with color #767879. Use the same color to draw two windows on the building to the right.

Step 140
On “Color block” layer add shadows to the right and left orange buildings with color #321B10 (20% opacity, soft-edged brush).

Step 141
Paint the shadows on the middle right building with color #9F644B (32% opacity).

Step 142
Paint the shadows on the next building with color #9A6141 (32% opacity, soft-edged brush).

Step 143
Use the same brush with color #B0874E to paint shadows on the yellow building.

Step 144
Block in the shadows on the “L” shaped building with color #EDB58E (same brush).

Step 145
Color the left outcropping with color #EDB58E (40% opacity).

Step 146
Block in the shadows on the white building with color #9CA1AE (35% opacity, soft-edged brush).

Step 147
Fill the top of the “L” shaped building with color #8D5A37.

Step 148
Ring the top of the area you just filled with color #FFF8E7.

Step 149
Finish the basic block-in by adding shadows the the middle right building with color #5C4431 (30% opacity).

Step 150
Use the same brush and color #7A7F8F add a cast shadow from the buildings to the right hand side of the bridge.

And you are done!
Final Results

Finish painting a venetian street. Learn how to recreate brick textures, plants, and tiled roofs.
Preview of Final Results

Venetian Street Part II
Resources
Step 1
Select the front part of the middle right building (“Color Block” layer).

Step 2
Apply a Texturizer filter to the section. Set the texture to “Brick”, the Scaling to 157%, and the Relief to 6.


Step 3
Select the slanted side of the building. Copy and paste this selection onto a new, temporary layer.

Step 4
Use the Skew tool to turn the selection into a rectangle.

Step 5
Apply the same filter to the layer and skew the rectangle to match the building.

Step 6
Use steps 3-5 to texturize the far right building.

Step 7
Make a new layer, “Detail” above all other layers.

Step 8
Turn the “Top Outline” layer off. Paint the top of the middle building balcony with color #FCF6E5 (75% opacity, 8 pixel hard-edged brush). Paint the bars between the bottom and the top bar with color #DFE0D0 (same brush, opaque).

Step 9
Add shadows to the light green windows in the middle building with color #3B4841 (15% opacity, 10 pixel soft-edged brush).

Step 10
Add shadows to the dark green windows with color #123139 (same brush).

Step 11
Highlight the largest arch of the middle building with color #4B9E81 (40% opacity, 25 pixel soft-edged brush).

Step 12
Paint shadows in the rest of the middle arches with color #4B9E81 (same brush).

Step 13
Select the two sections of red roof and apply a brick texture. Set the Scaling to 66%, the Relief to 5, the Light Direction to Top Right, check the Invert box.


Step 14
Use the dodge tool (highlights mode, 44% exposure) to add vertical lines to both sections of roofs.

Step 15
Apply a burlap texture to the bridge using the texturizer tool.


Step 16
Draw a rectangle at the bottom of the “L” shaped building with color #E89150 (87% opacity, hard-edged brush).

Step 17
Apply a sandstone filter to the light gray building to the right of the middle building. Set the Texture to sandstone, Scaling to 148%, the Relief to 2, and the light direction to top right. Check the Invert box.


Step 18
Highlight the left side of the stones on the corner of the middle right building with color #BEABAC (opaque). Use the same color on the bottom half of the building base.

Step 19
Use the same color to outline the bottom row of windows on the same building.

Step 20
Draw a vertical line to the right of each window you just outlined with color #6E585A (opaque, hard-edged brush).

Step 21
Use the burn tool (midtones mode, 20% exposure) on the “Color Block” layer underneath the windows.

Step 22
Use the same color to highlight the windows on the right windows (30% opacity, soft-edged brush).

Step 23
Shadow the window frames with color #6E585A (same brush).

Step 24
Add shadows to the right side of the stones with color #6E585A (20% opacity, soft-edged brush)

Step 25
Paint a film of color #897E82 over the stones at 55% opacity.

Step 26
Paint shadows on all of the window shutters with color #072222 (30% opacity, 70 pixel soft-edged brush).

Step 27
Draw the rails of the balcony on the right building with color #5F4C47 (opaque, 10 pixel hard-edged brush).

Step 28
Highlight the bars with color #A18D8C (25% opacity, 7 pixel soft-edged brush), paint shadows on the bars with color #443936 (same brush).

Step 29
Use the burn tool on the “Color Block” layer to add shadows beneath the window frames.

Step 30
Paint window frames on the middle row of windows on the left buildings with color #BEABAC (opaque, hard-edged brush).

Step 31
Block in the shadow side of the window box with color #8D3504 (opaque, 25 pixel hard-edged brush).

Step 32
Start adding shadows to the row of left columns with color #767164 (25% opacity, hard-edged brush).

Step 33
Draw the final shadows on the columns with color #322E25 (25% opacity, 50 pixel soft-edged brush).

Step 34
Select the two outcroppings and apply a Texturizer filter to them. Set the Texture to Brick, the Scaling to 66%, the Relief to 6, the Light Direction to Top Right.


Step 35
Use the burn tool on its previous settings to add shadows to the two outcroppings.

Step 36
Use the blur tool on the “color block” layer to blue out the back of the right middle building. This will give the impression that the bricks are disappearing into the distance.

Step 37
Draw a shadow behind the middle arches on the left buildings with color #AB9773 (opaque, hard-edged brush).

Step 38
Fill the bottom half of the two windows on the bottom left row with color #A27C69 (opaque).

Step 39
Fill the bottom section of the three back windows with color #AB9773 (opaque). Draw a short stripe above the section.

Step 40
Use color #C6B28F (opaque) to extend the sections onto the outer wall.

Step 41
Select the left buildings and apply a Burlap texture with the Texturizer filter. Set the scaling to 50%, the Relief to 2, and the Light Direction to Top Left.


Step 42
Use color #66553D (opaque) to add three “X”s in the left window box.

Step 43
Add shadows to the window box using the burn tool on the same settings.

Step 44
Highlight the window box with the dodge tool on its previous settings.

Step 45
Add shadows to the back balcony on the right side with the burn tool. Highlight with color #BDC9DB (20% opacity, soft-edged brush).

Step 46
Apply the brick texture to the chimney. Use the same settings as before.


Step 47
Block in plants in the two window boxes and on the floor of the middle-building's balcony with color #3A4C16 (opaque).

Step 48
Highlight using the dodge tool (highlights mode, 31% opacity) and add shadows with burn tool (midtones mode, 16% exposure).

Step 49
Use the dodge tool and burn tool to add dimension to the base of the middle right building.

Step 50
Apply a Craquelure filter to the left pillars. Set the Crack Spacing to 16, Depth to 1, and the Brightness to 7.

![Venice Part II HTML_html_m5ecf24a7[1] Venice Part II HTML_html_m5ecf24a7[1]](https://cdn.photoshoptutorials.ws/images/stories/c9329086a76d_11664/Venice-Part-II-HTML_html_m5ecf24a71.jpg?strip=all&lossy=1&quality=70&webp=70&avif=70&w=1920&ssl=1)
And you are done!
Final Results
![Venice Part II HTML_html_m5ecf24a7[2] Venice Part II HTML_html_m5ecf24a7[2]](https://cdn.photoshoptutorials.ws/images/stories/c9329086a76d_11664/Venice-Part-II-HTML_html_m5ecf24a72.jpg?strip=all&lossy=1&quality=70&webp=70&avif=70&w=1920&ssl=1)
2 comments on “How to Paint Venice in Photoshop”
Link is working for my computer
can you give a new link to the photo please