Step 7
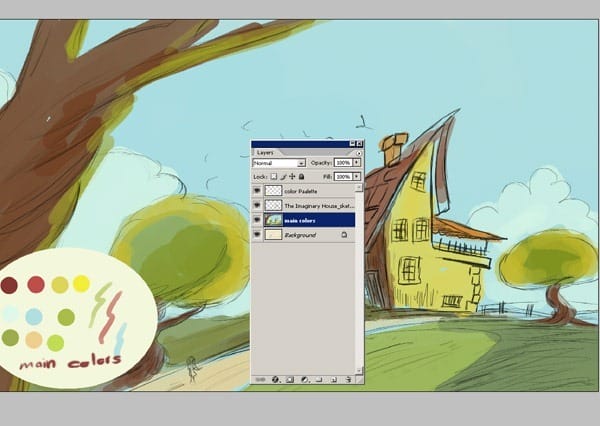
While worked on the colors, I tried to figure out the main light first. Where the light came from? What color is it?. There is a yellow light at the background and there is another color on the front…..Now that the general details are almost fixed.

Step 8
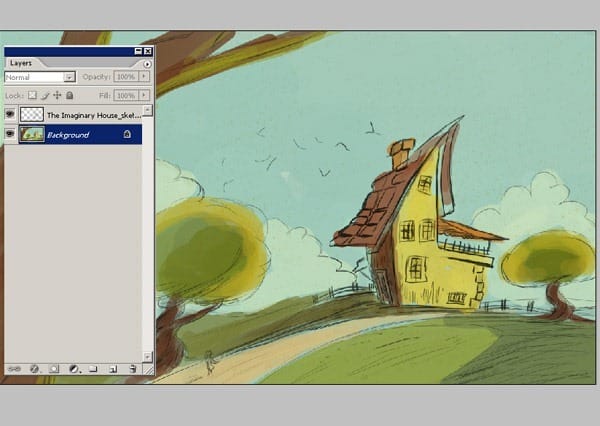
Here I have 3 layers, one is main color another is sketch and the other is background. Now here I have closed the “main color” layer. And here see the at the background colors. Now I am giving you the main sketch so you can see the layers.

Step 9
Now I am going to show you how to merge two layers. Firstly change main color layer setting to Multiply. And then click on the right on the mouse or with main color layer selected, go up to the Layer menu at the top of the screen and choose Merge Layers down near the bottom of the list. Or for a faster way, press the keyboard shortcut Ctrl+E (Win) / Command+E (Mac). Here we leave the sketch layer. You don’t need to merge the sketch layer.

Step 10
Here, two layer is merged down and now we can continue to coloring process. You must do the same on your own project. We have now only two layers. And at this step I would like to change the size of my file because I’ll begin to add more details so I’ll need a bigger file size. So open Image/Image Size and make the settings as you see 2000×3072 and 300.

Step 11
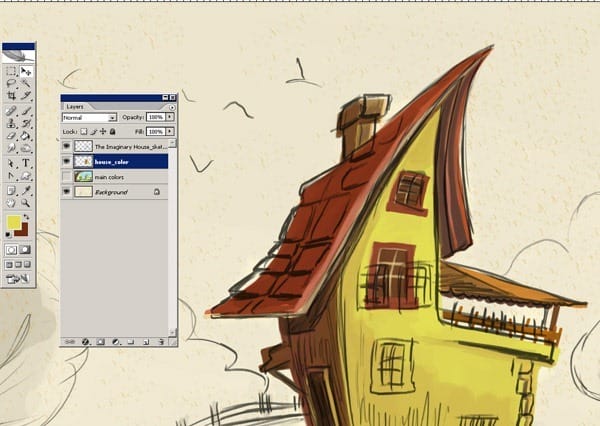
Here now we can began to open new layers for each main objects in the canvas. Here is a new layer for the house. And also I have closed the other layer. As you see it was just a try for to see the main idea and the main colors. Here we did see the image as a whole in this step. On the next steps I’m going to create some more layers. The reason for painting on such new layers because of you need to make corrections later in the painting. It is much easier to fix errors if the main elements of your painting are separate entities. This step is really really very important.

Step 12
Firstly make a selection the upper window then copy and paste (Ctrl+C/Ctrl+V), save the top and merge down the layers (Ctrl+E). Here now we have two window and one layer for both of them , I continue work with the windows .
3 responses to “Painting “The Imaginary House” in Adobe Photoshop”
-
Very useful tutorial, thanks a lot!
-
That is really nice !
Did you use mouse for drawing it? -
Wow!!! you are amazing, I am initiating scarcely in this process of the drawing and the painting in photoshop and have found in this tutorial the first step to paint ‘ My Imaginary House ‘ as well as all the ideas that I have in my imagination thanks to you … I am grateful for it to you.


Leave a Reply