Turn any photo into a dot grid artwork with these Photoshop actions. You'll get great results with dots that change size. They get larger in brighter areas and smaller in darker areas. Free download available.
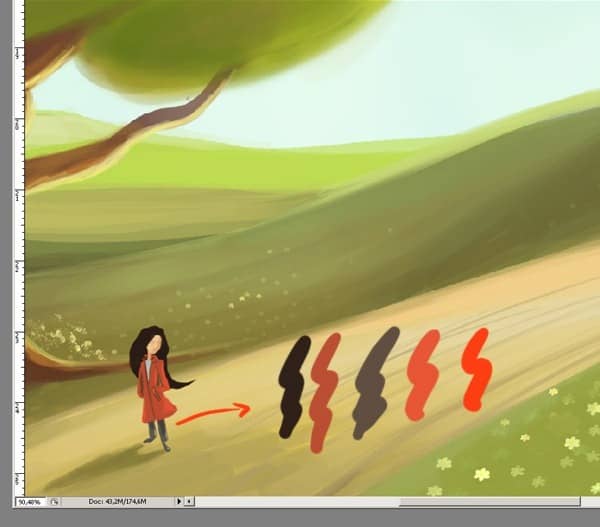
Step 27
Here it is almost finished now and I do think there are only a few details left. I'll now begin to detail the ground, adding more yellow and green colors.
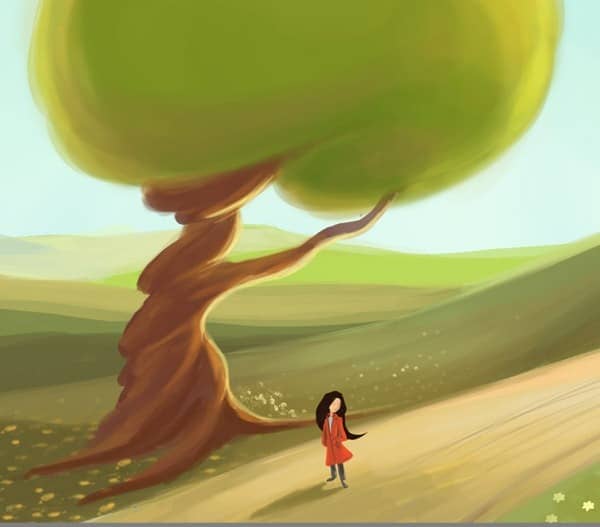
Step 28
I then duplicated the image. Flattening the layer, I adjusted the image using the Brightness/Contrast tool (located under Adjustments in the Image tool list) until I achieved the desired effect. Now this was where things got fun. Here I used Control+U (windows), (Image>Adjust>Hue/Saturation) on pretty much every layer to tweak it for effect.
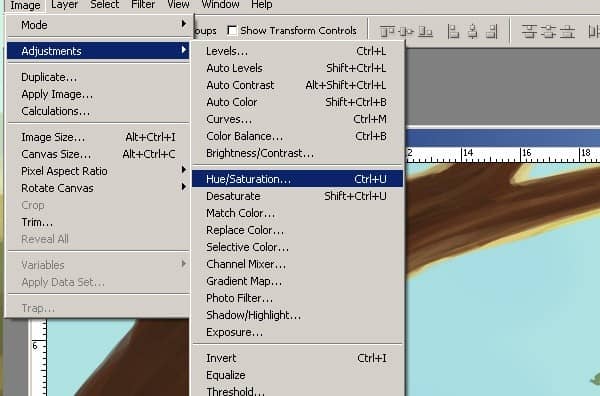
Step 29
If I wanted a warmer light, I would shift the hue of just the Highlights layer. Here (Image>Adjust>Hue/Saturation) settings must be like this one.
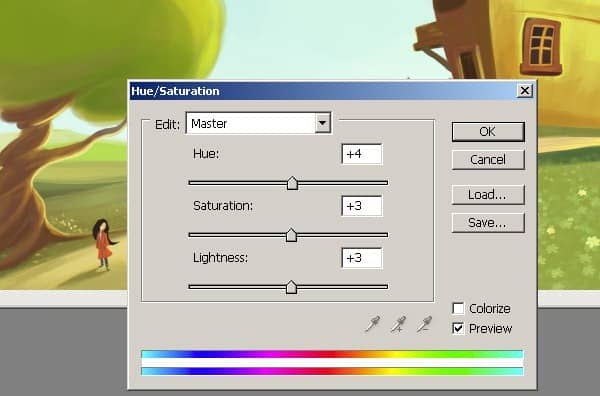
Step 30
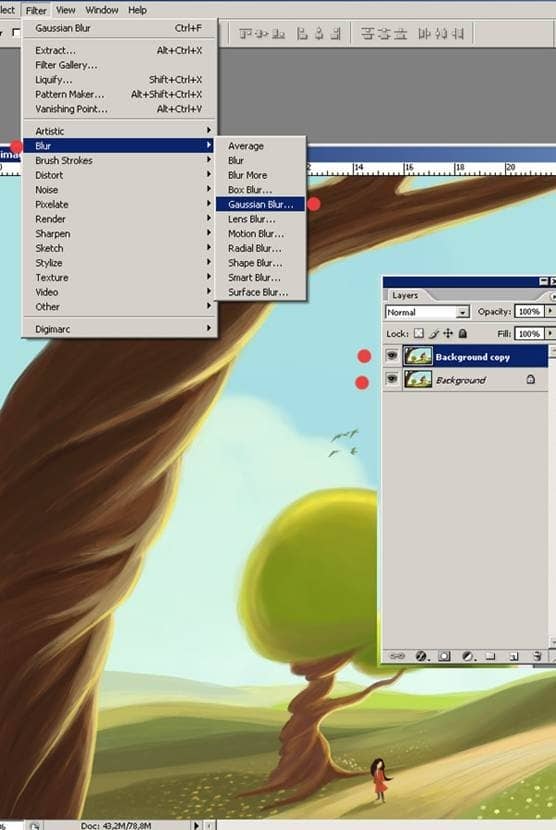
I am going to add some final touches with a different way. firstly I have made a copy of the final illustration layer. I am going to use Blur effect . Choose Filter/Gaussian Blur.
Step 31
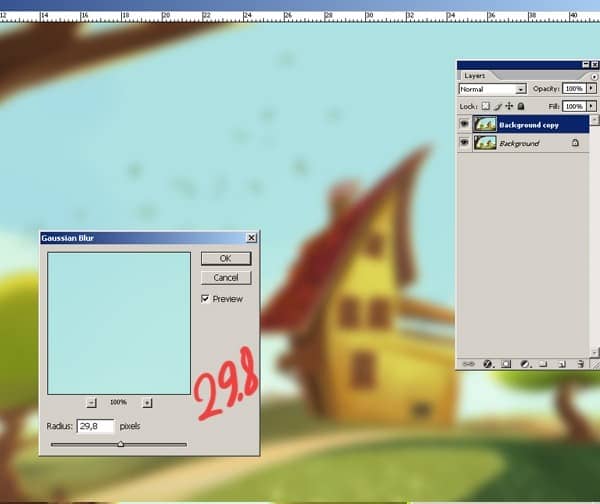
Here make the Radius setting 29.8.
Step 32
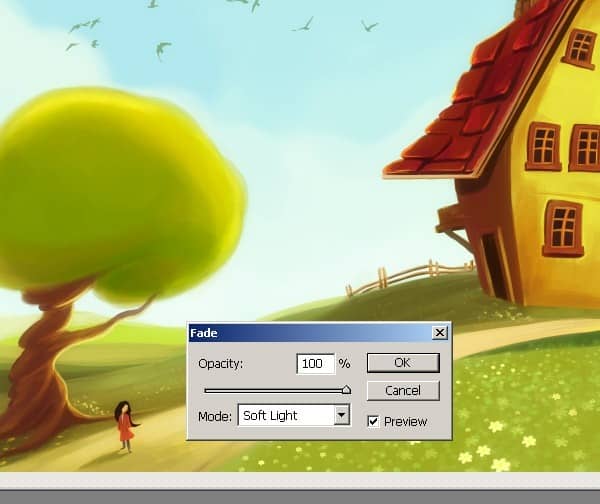
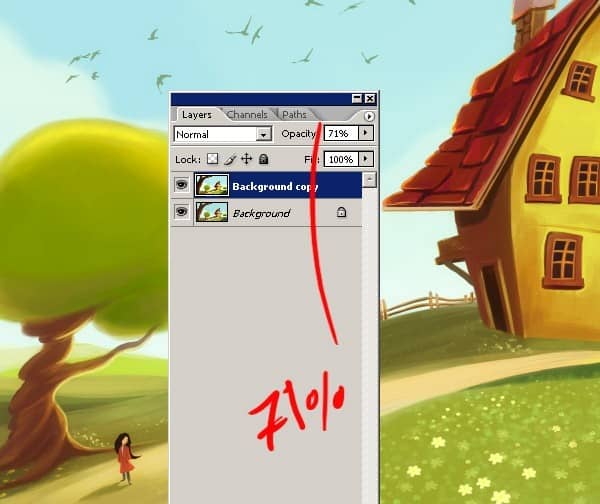
After making Blur , from Edit panel choose Fade Gaussian Blur. And also you must select the Soft Light option from the window too. And now after all those steps and changes, our new layer is looking a little bright so click on Opacity and make the setting as seen on the image.
Step 33
Now make the Opacity setting 71% . Now we need to merge the two layer. To merge all layers, press Shift+Ctrl+E (Win) / Shift+Command+E (Mac). This will flatten the image onto a single layer.
Final Results
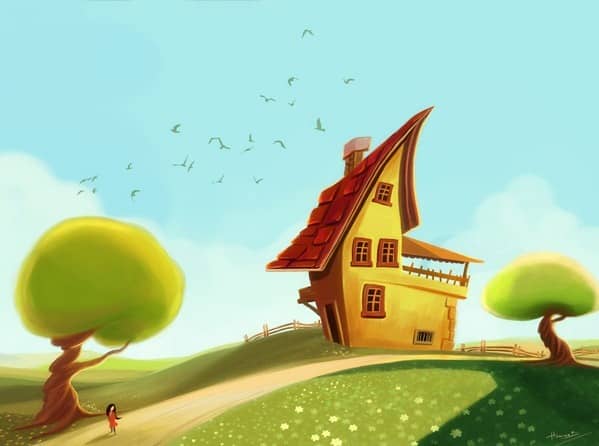
Here now I have decided to finish the illustration otherwise I'll be working on this image forever. I hope you don't think that by reading this tutorial it will be the same as by actually doing it. And this is the final product of the "The imaginary House". I wish I could spend more time on it. I hope this tutorial will be useful to some of you. Of course there are many other ways to get a similar result. Well, if you use this tutorial, it would be very nice to write comments :)

3 comments on “Painting “The Imaginary House” in Adobe Photoshop”
Very useful tutorial, thanks a lot!
That is really nice !
Did you use mouse for drawing it?
Wow!!! you are amazing, I am initiating scarcely in this process of the drawing and the painting in photoshop and have found in this tutorial the first step to paint ' My Imaginary House ' as well as all the ideas that I have in my imagination thanks to you ... I am grateful for it to you.