Make skin look perfect in one-click with these AI-powered Photoshop actions.
Learn how to create a flowery purple-hued fantasy portrait in Photoshop. This tutorial will show you how to blend flowers to the top of a model's head, create a soft floral background, and color grade with adjustment layers.
Preview of the Final Result

Tutorial Resources
Step 1
Create a new 1847x2000 px document in Photoshop and fill it with white. Hit Ctrl+Shift+N to make a new layer and press G to activate the Gradient Tool. Choose Radial Gradient with the colors #413473 and #bfa0d8. Drag a line from the left to right to get a similar result like below:

Step 2
Go to Layer > New Adjustment Layer > Curves and increase the lightness. On this layer mask, hit B to activate the Brush Tool and select a soft round one with black color. Use this brush to reduce the effect on the right and the bottom left.


Step 3
Make a Color Balance adjustment layer to give some warmer color to the canvas. On this layer mask, use a soft black brush to reduce the effect on the top and bottom of the canvas.


Step 4
Create another Curves adjustment layer to brighten the canvas again. On the layer mask, use a soft black brush to decrease the light effect on the left and the top right.

Make a new layer and use a soft white brush with the opacity about 50% to paint around the middle right and bottom of the canvas to make the main light source there.

Step 5
Open the bokeh image and drag it into the main document using the Move Tool (V). Change the layer mode to Screen 100% and convert this layer to a Smart Object. Go to Filter > Blur > Gaussian Blur and set the radius to 66 px:


Step 6
Click the second icon at the bottom of the Layers panel to add a mask to this layer. Use a soft black brush brush to reduce the bokeh effect on the lower part and both sides.

Step 7
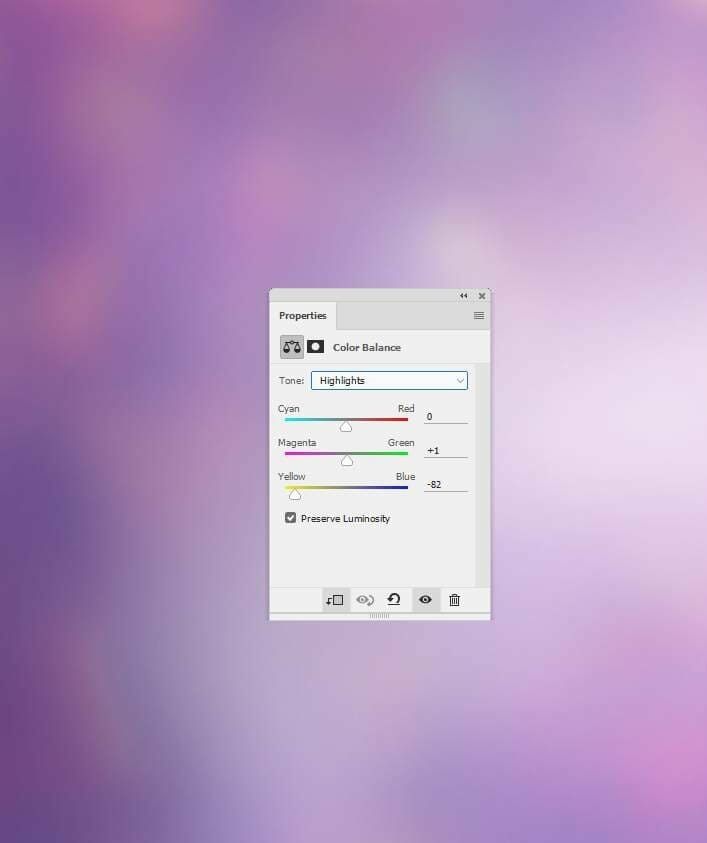
Create a Color Balance adjustment layer and set it as Clipping Mask. Alter the Midtones and Highlights settings.

Step 8
Isolate the branch 1 from the background and add it to the top right of the main canvas. Convert this layer to a Smart Object..

Apply a Gaussian Blur of 10 px to this layer:

Step 9
Make a Curves adjustment layer (set as Clipping Mask) to brighten the lower part of the branch. On this layer mask, paint on the upper part to keep its lightness.

Step 10
Cut out the branches 2 and place it in the left of the main document. Convert this layer to a Smart Object and change this layer mode to Soft Light 100%. Add a mask to this layer and use a soft black brush , the opacity about 30% to reduce the visibility of the part in the middle.


Step 11
Apply a Gaussian Blur of 18 px to this layer.

Step 12
Make a Curves adjustment layer (set as Clipping Mask) and increase the lightness.

Create a Hue/Saturation adjustment layer and change the Saturation values to -52:

Step 13
Open the branch 3 image and use the Move Tool to drag it into the main document and convert it to a Smart Object. Place it in the top right of the canvas and change its layer mode to Soft Light 100%. Use the Free Transform Tool (Ctrl+T) to rotate it a bit as shown below:

Add a mask to this layer and use a soft black brush to remove the part in the middle, making the branch fade into the background.

Step 14
Apply a Gaussian Blur of 15 px to make it softer and integrated with the background.

Duplicate this layer and change the mode to Overlay 80%. Right click this layer, choose Delete Layer Mask and use Ctrl+T to place it in the bottom right of the canvas. Change the radius of the Gaussian Blur filter to 12 px.

Step 15
Isolate the branch 4 and place it in the top left of the main document. Apply a Gaussian Blur of 15 px to this layer.


Step 16
Create a Hue/Saturation adjustment layer to change the leaves' color:

Step 17
Make a Curves adjustment layer to darken the branch. On this layer mask, paint on the leaves on the front to reveal the lightness there.

Step 18
Isolate the model and place her in the middle of the canvas.

Step 19
Create a Hue/Saturation adjustment layer and change the Saturation values to -33:

Step 20
Add a Color Balance adjustment layer and alter the Midtones settings. On this layer mask, use a soft black brush with the opacity about 10-15% to reduce the effect on the neck and shoulder.


Step 21
Make a Curves adjustment layer and increase the lightness. On this layer mask, use a soft black brush to erase the front of the shoulders and face so they won't become too bright.

Step 22
Isolate the flower image and add it to the head of the model. Use Ctrl+T with the Warp mode to bend it as shown below:

Add a mask to this layer and use a hard black brush to erase the part on the forehead and the top of the head.

Step 23
Drag the flower from the original image to our working document again and place it onto the existing one. Use Ctrl+T with the Warp mode to tweak it a bit.

Add a mask to this layer and use a hard black brush to remove the part on the forehead and both sides of the ears.

Step 24
Use the Magnetic Lasso Tool (L) to select a bud from the flower image to add to the area above the left ear of the model. Set this layer below the flower ones.


Step 25
Select another bud to add to the right of the model's head and then duplicate this layer. Use Ctrl+T to resize it to be smaller to add to the higher position than the first one.

Step 26
Create a new layer and activate the Clone Tool (S) . Use a cloning brush with the opacity about 40% to reduce the highlight on the buds.

Step 27
Select all the flower , bud and cloning layers and hit Ctrl+G to make a group for them. Change this group's mode to Normal 100% and add a Hue/Saturation adjustment layer and alter the Master values:

Step 28
Make a Curves adjustment layer and increase the lightness. On this layer mask, use a soft black brush to remove the light on the right and any details you feel too bright.

Step 29
Make a new layer below the flower group and use a small brush with the color #3d3357, the opacity about 33% to paint shadow for the buds on the model's face.

Step 30
Open the leaves image and take a leaf to add to the model. Go to Filter > Liquify and use the Forward Warp Tool (W) to tweak the leaf into a curve. Place this curve onto the model's back.


Step 31
Take three other leaves and use the same method to turn them into the curves. Place two of them onto the model's back as done with the first one and the rest on another shoulder.

Add a mask to each of these layers to erase the bottom of the curves.

Step 32
Take different leaves to add to the model's head and shoulders. Add a mask to each of these layers to hide the unwanted details.


Step 33
Create a group for the leaves and add a Hue/Saturation adjustment layer to change the color of the leaves.


Step 34
Make a Curves adjustment layer to darken the leaves.

Create another Curves adjustment layer to darken the leaves on the back side. Paint on the rest to reveal the lightness there.

Step 35
Make a new layer below the leaves' group and use a small brush with the color #3d3357, the opacity about 33% to paint shadow of the leaves on the buds and the model's back.

Step 36
Come back to the branch 4 image and drag it again onto the main canvas. Use Ctrl+T to rotate it as shown below and place it onto the right part of the model's body .

Apply a Gaussian Blur of 25 px to this layer.

Step 37
Create a Hue/Saturation adjustment layer to alter the Greens settings:

Step 38
Cut out the branch 5 from the background and add it to the bottom left of the canvas. Apply a Gaussian Blur of 25 px to this layer.


Step 39
Create a Hue/Saturation adjustment layer and change the Master values:

Step 40
Make a new layer, change the mode to Overlay 100% and fill with 50% gray:

Take the Dodge and Burn Tool (O) with Midtones, Exposure about 15% to refine the light and shadow on the flowers and leaves. You can see how I did it with Normal mode and the result with Overlay mode.

Step 41
Open the petals image and take a petal to add to our working document. Use Ctrl+T with the Warp mode to tweak the petal a bit.


Apply a Gaussian Blur of 15 px to this layer.

Step 42
Take other petals to place around the whole canvas. Use Ctrl+T to vary their size and tweak them into different forms. Apply the Gaussian Blur of 2, 4, 8, 12 and 15 px to these petals. This step is to increase the depth of the scene.

Add a mask to some of these petals to soften them and make them fade into the background.

Step 43
Make a group for the petals and use a Curves adjustment layer to brighten the petals. On this layer mask, use a soft black brush to paint on the hidden side of the petals to keep the contrast there.

Create a Hue/Saturation adjustment layer and bring the Saturation values down to -26. On this layer mask, paint on the petal on the top left to keep its vibrance.

Step 44
Add a new layer and use a small brush with the color #e1d0e8 to paint more light on some petals . Change this layer mode to Soft Light 100%.


Step 45
Create a Gradient Map adjustment layer on top of the layers and pick the colors #d16780 and #002b60. Lower the opacity of this layer to 20%.

Make a Color Balance adjustment layer and change the Midtones and Highlights settings:


Step 46
Add a Photo Filter adjustment layer and pick the color #b79ae3.

Make a Curves adjustment layer to increase the contrast of the whole piece.

Create a Vibrance adjustment layer to enhance the final effect.

Final Result

One comment on “How to Create a Flower Portrait Photo Manipulation With Adobe Photoshop”
nice.. very helpful.. thanks for sharing