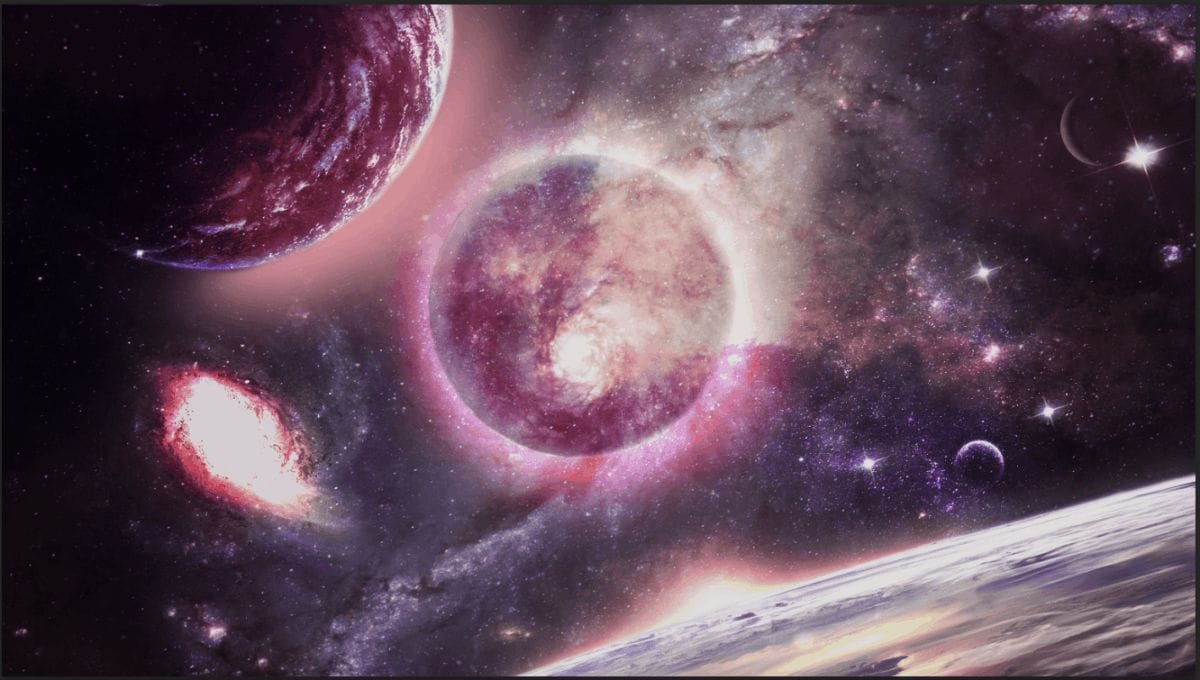
Next use the same color code #d9929c and on second layer paint to the upper part of the planet. Blend mode is Color Dodge with Opacity 7%.

Last layer for central planet is color code #d8919c Soft Round and paint around the planet. Color Dodge 76%.

Step 25
Now create a two layers for left planet adn use Brush Tool (B) Sofr Round with foreground color Soft Red with color code #d28d97 and paint on planet. Blend mode is Color Dodge with Opacity 25%.

And for last layer also use Brush Tool (B) Soft Round with Foreground color code #d48e99 and paint around the planet. Blend mode change from normal to Color Dodge with Opacity 46%.


Step 26
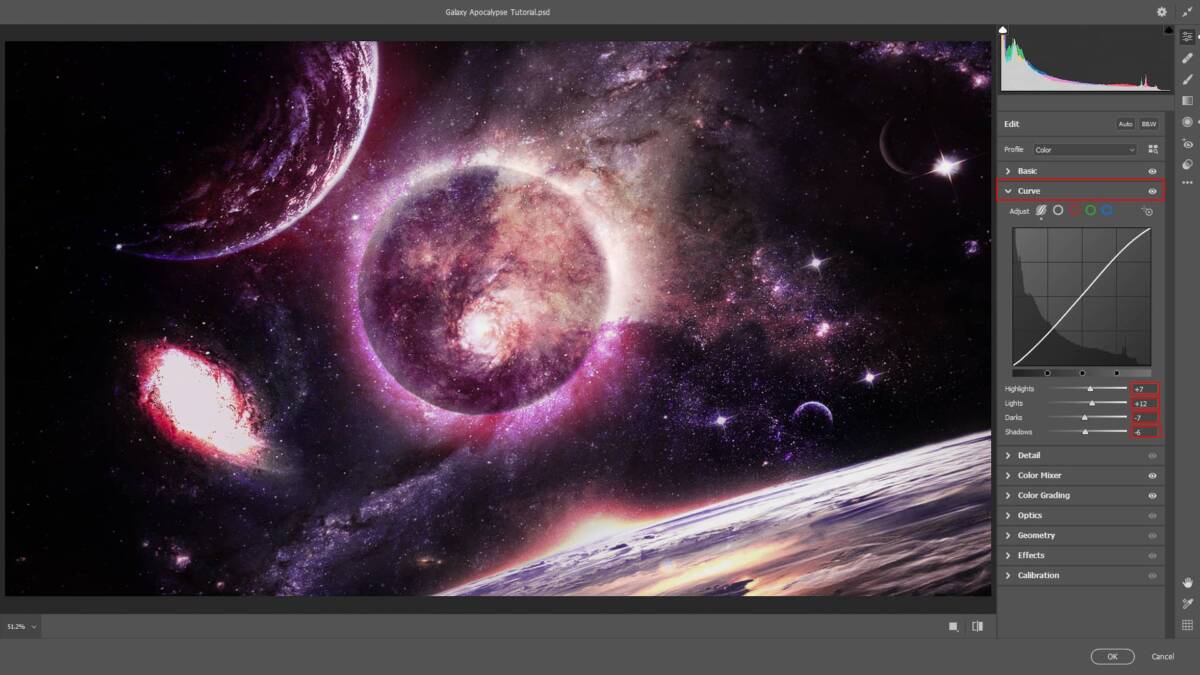
When we finished all this, now merge all layers to one. Slecet the last layer and hold CTRL/CMD + SHIFT + ALT + E. Now we have a final layer, right click on mouse and select Convert to Smart Object. Then go to Filter > Camera RAW Filter. At its most basic, the Photoshop Camera Raw filter allows you to use the functions of the ACR interface at any time within Photoshop. This allows you to make any adjustments within ACR at any time during your workflow instead of just limiting its usage to the raw processing stage.While it would be possible to import your working file into Lightroom to make the same sets of adjustments, doing this in Photoshop saves you from that cumbersome step. It allows you the use of these tools without any extra effort. Opacity set to 50%.

Step 27
Now in Camera Raw Filter, set the Value: Basic
- Exposure: -0.90
- Contrast: +7
- Highlights: -10
- Shadows: -36
- Whites: +4
- Blacks: -7
- Texture: +15
- Clarity: +15
- Vibrance: +6

Curves
- Highlights: +7
- Lights: +12
- Darks: -7
- Shadows: -6

HSL Adjustments Hue
- Blues: +18
- Purples: -18
- Magentas: -14
Saturation
- Blues: +22
- Purples: +7
- Magentas: -18
Luminance
- Aquas: +1
- Blues: -22
- Purples: +2
- Magentas: -9

Color Grading
- Midtones: H329 S13

Radial Filter
- Exposure: +0.15
- Highlights: +18
- Whites: +10

Radial Filter
- Exposure: +0.35
- Highlights: +17

Radial Filter
- Exposure: +0.35
- Highlights: +17

Radial Filter
- Exposure: +0.35
- Highlights: +17

Radial Filter
- Exposure: +0.35
- Highlights: +17

And finally, everything should look like this.

Final Results

Download the PSD
5 responses to “How to create a Galaxy Apocalypse in Photoshop”
-
Измельчал фотошопер…..Раньше все космические объекты создавали в самом Фотошопе, а сегодня всё сводится к склеиванию исходников. Горько смотреть на ваш творческий упадок..
-
I would also like to see a video
-
so true king
-
Video is easier to learn from.
-
In the beginning GOD created the Heaven and the Earth
Genius 1:1Read the whole chapter


Leave a Reply