Luminar AI lets you turn your ideas into reality with powerful, intelligent AI. Download the photo editor and see how you can completely transform your photos in a few clicks.

Step 16
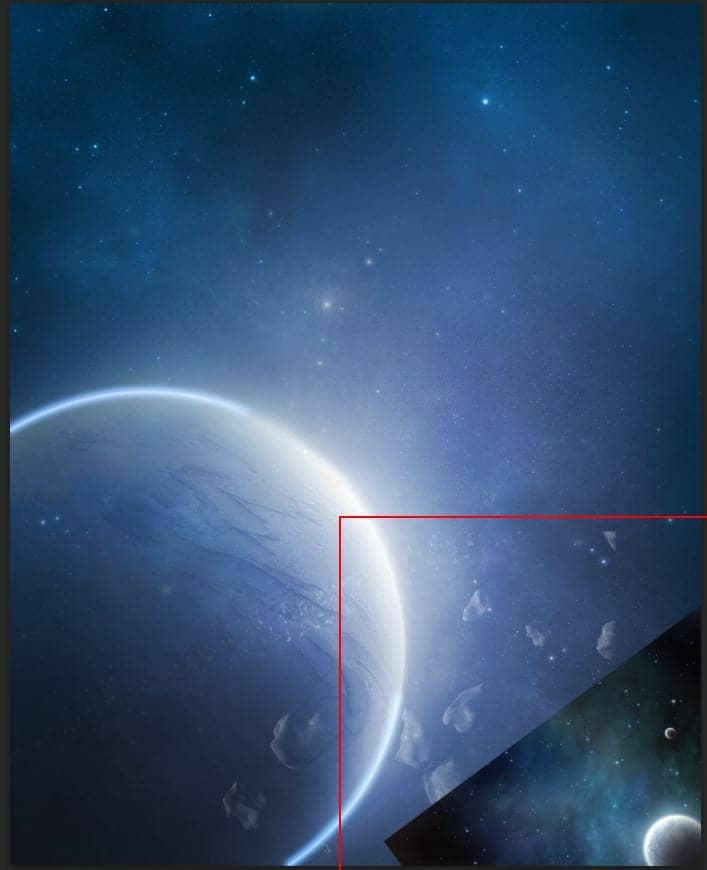
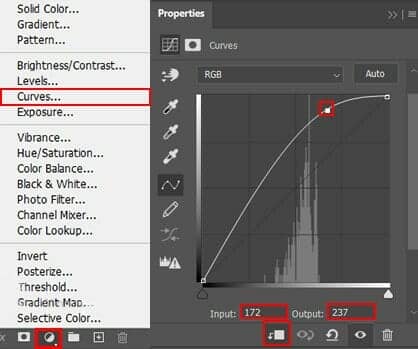
Add Adjustment Layer "Curves" and press Ctrl/Cmd + I to invert and use Brush Tool(B) Soft Round with foreground color white and paint the highlights parts.
Step 17
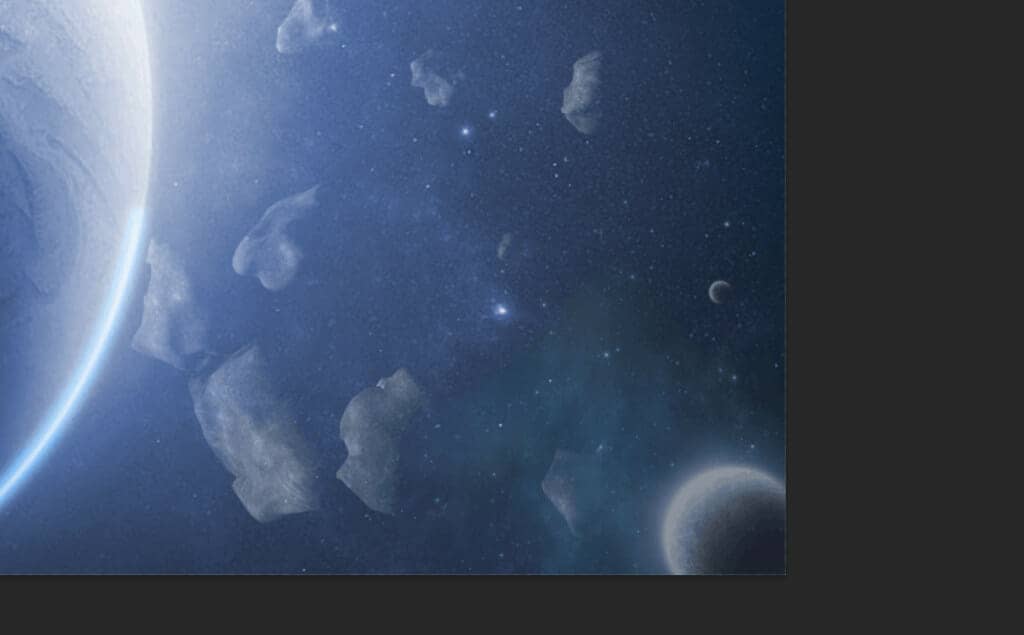
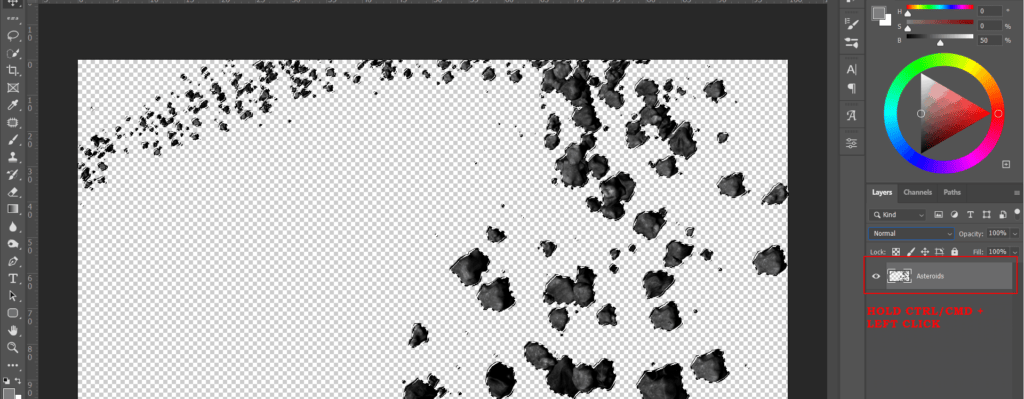
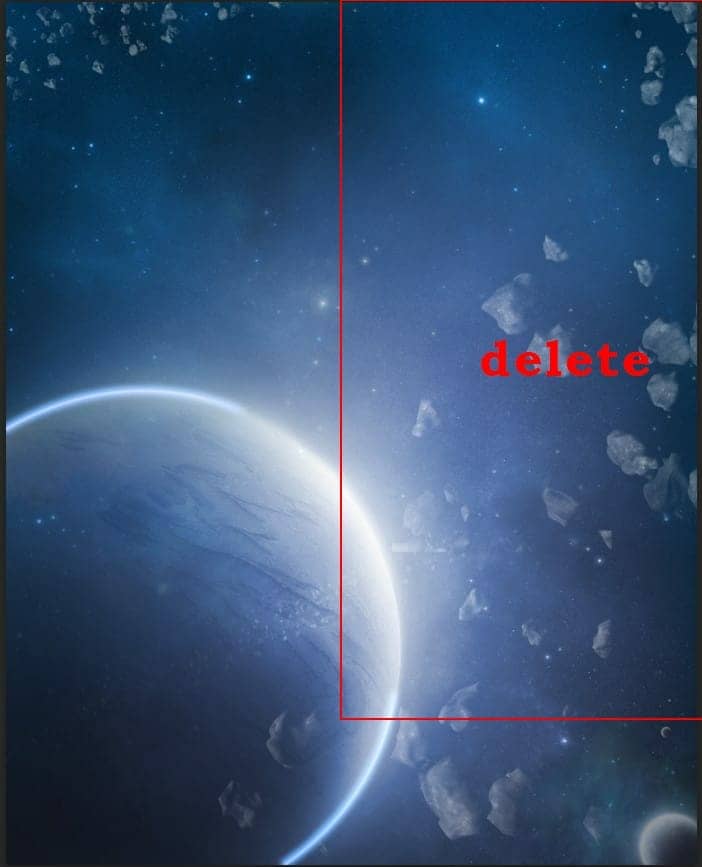
Open second photo of Asteroids and hold Ctrl/Cmd and click on layer and after the selection area has been created, simply copy (Ctrl / Cmd + C) and Paste (Ctrl / Cmd + V) it to our work canvas. Then position the image with the transform tool (Ctrl / Cmd + T). Hold Alt + Shift and resterize like image below. In Photoshop CC only hold Alt to resterize al sides together. Blend mode change to Screen.

Create a layer mask and use Brush Tool(B) Soft Round with foreground color black and delete some parts of Asteroids. Look at the photo below
Step 18
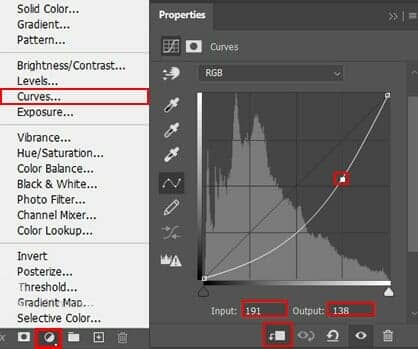
Add Adjustment Layer "Curves"
Step 19
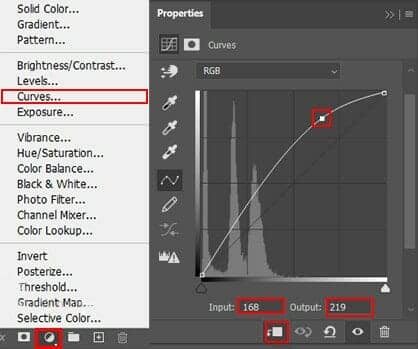
Add Adjustment Layer "Curves" and press Ctrl/Cmd + I to invert and use Brush Tool(B) Soft Round with foreground color white and paint the highlights parts.
Step 20
Place another photo Go to File > Place and Hole. Then place it to our work canvas. Then position the image with the transform tool (Ctrl / Cmd + T). Hold Alt + Shift and rasterize like the image below. In Photoshop CC only hold Alt to rasterize all sides together. Blend mode change to Screen with Opacity 100%. Create a layer mask and use Brush Tool(B) Soft Round with foreground color black and erase some parts with Brush...


Step 21
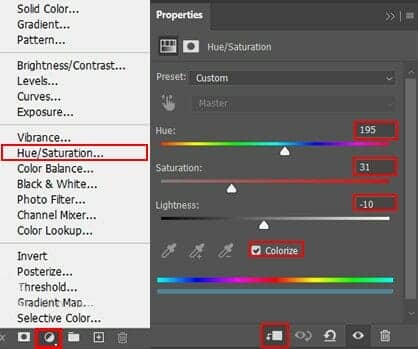
Add Adjustment Layer "Hue/Saturation"
Step 22
Add Adjustment Layer "Curves"
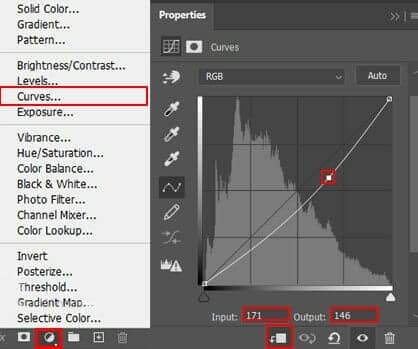
Step 23
Add Adjustment Layer "Curves" and press Ctrl/Cmd + I to invert and use Brush Tool(B) Soft Round with foreground color white and paint the highlights parts
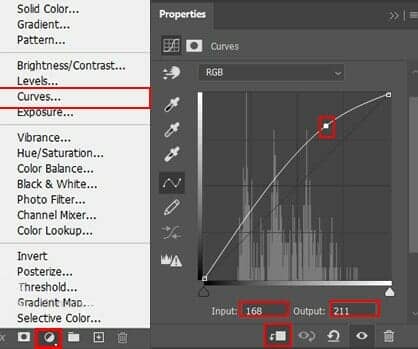
Step 24
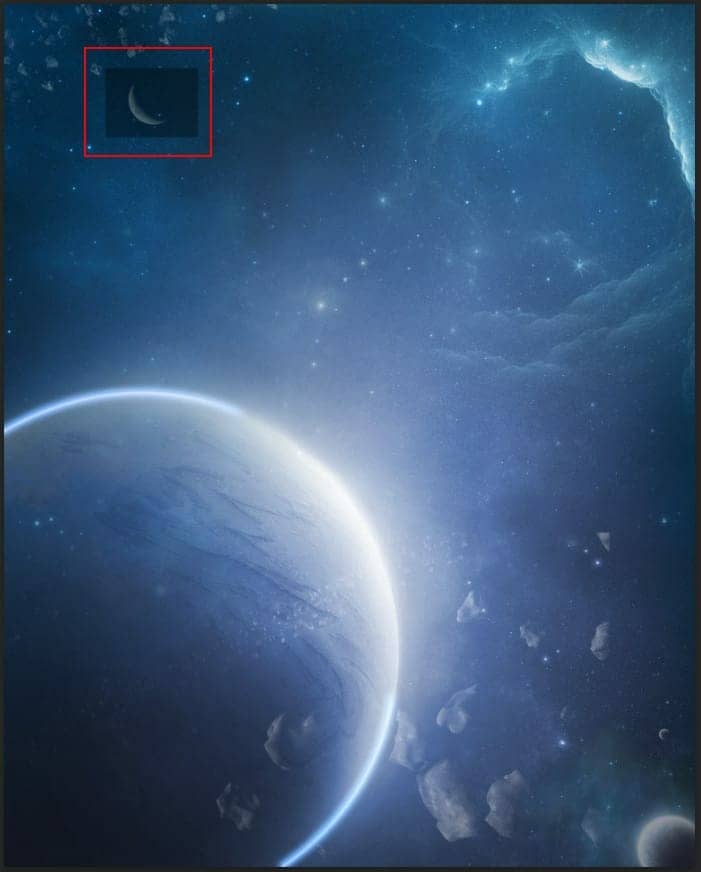
Go to File > Place and Moon. Then place it to our work canvas. Then position the image with the transform tool (Ctrl / Cmd + T). Hold Alt + Shift and rasterize like the image below. In Photoshop CC only hold Alt to rasterize all sides together. Blend mode change to Screen.

Step 25
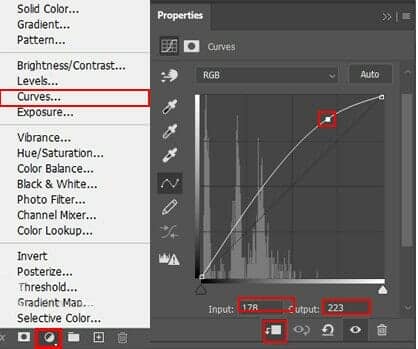
Add Adjustment Layer "Curves" and press Ctrl/Cmd + I to invert and use Brush Tool(B) Soft Round with foreground color white and paint the highlights parts on moon.
Step 26
Next, go to open Stars 2. Go to File > Open and select photo. After you open the image, use Rectangular Marquee Tool(M).
