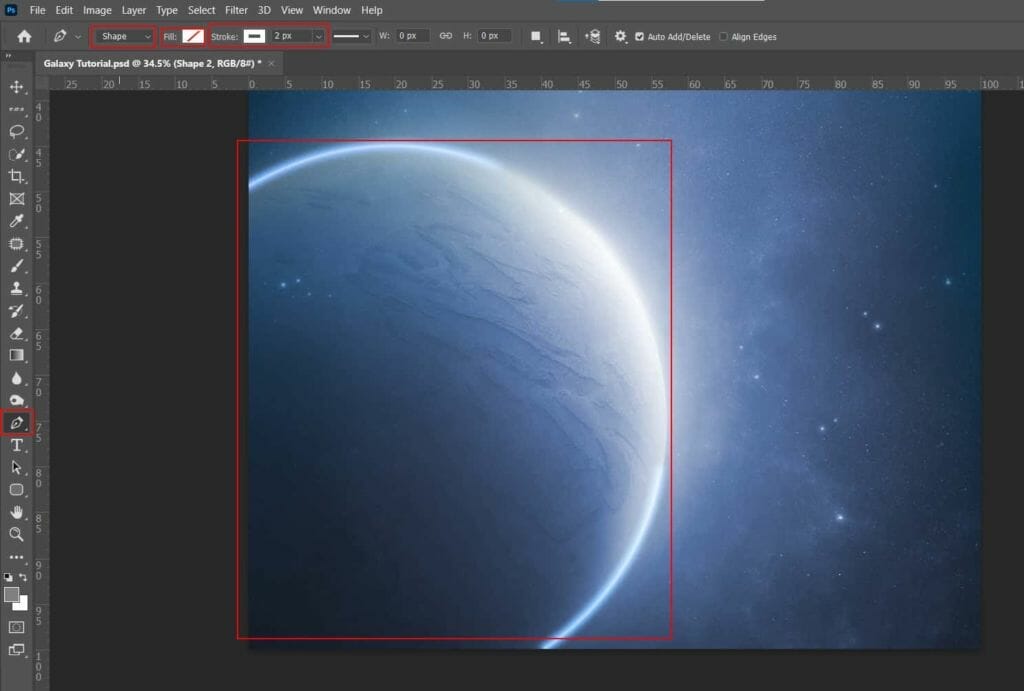
Create another layer and repeat the same process as in the previous steps, take the Pen Tool (P) and draw the rest of the line around the planet with the same settings… Then put all in one group (Ctrl/Cmd + G)


Step 6
Add Adjustment Layer “Curves” and press Ctrl/Cmd + I to invert and use Brush Tool(B) Soft Round with foreground color white and paint the dark parts.


Step 7
Add Adjustment Layer “Curves” and press Ctrl/Cmd + I to invert and use Brush Tool(B) Soft Round with foreground color white and paint the highlights parts.


Step 8
Next, place another photo Go to File > Place and select Galaxy. Then place it to our work canvas. Then position the image with the transform tool (Ctrl / Cmd + T). Hold Alt + Shift and rasterize like the image below. In Photoshop CC only hold Alt to rasterize all sides together. Blend mode change to Soft Light with Opacity 25%.


Step 9
Place another photo Go to File > Place and select Galaxy 2. Then place it to our work canvas. Then position the image with the transform tool (Ctrl / Cmd + T). Hold Alt + Shift and rasterize like the image below. In Photoshop CC only hold Alt to rasterize all sides together. Blend mode change to Lighten with Opacity 25%


Step 10
Add Adjustment Layer “Color Balance”

Step 11
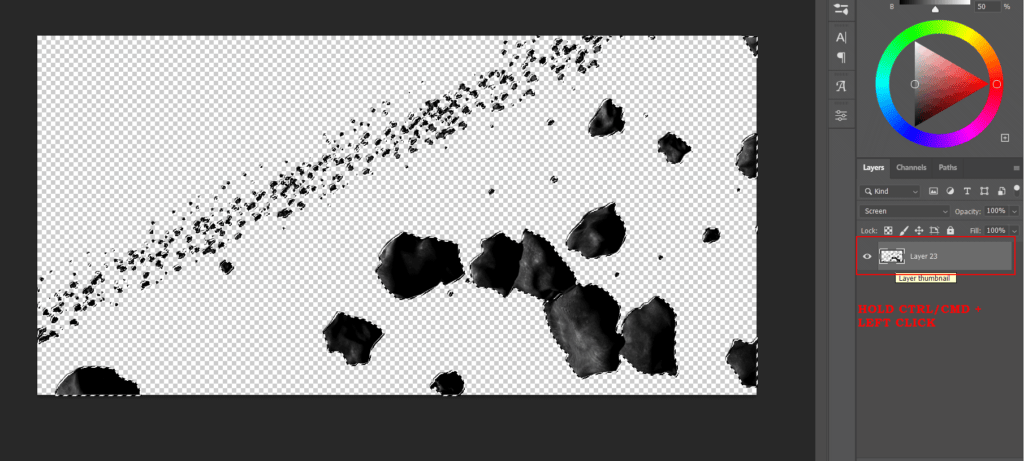
Open Asteroids and hold Ctrl/Cmd and click on layer and after the selection area has been created, simply copy (Ctrl / Cmd + C) and Paste (Ctrl / Cmd + V) it to our work canvas. Then position the image with the transform tool (Ctrl / Cmd + T). Hold Alt + Shift and resterize like image below. In Photoshop CC only hold Alt to resterize al sides together. Blend mode change to Screen.


Step 12
Add Adjustment Layer “Curves”

Step 13
Add Adjustment Layer “Curves” and press Ctrl/Cmd + I to invert and use Brush Tool(B) Soft Round with foreground color white and paint the highlights parts.


Step 14
Add Adjustment Layer “Hue/Saturation” and press Ctrl/Cmd + I to invert and use Brush Tool(B) Soft Round with foreground color white and paint on asteroids.


Step 15
Next, place another photo Go to File > Place and select Planet 2. Then place it to our work canvas. Then position the image with the transform tool (Ctrl / Cmd + T). Hold Alt + Shift and rasterize like the image below. In Photoshop CC only hold Alt to rasterize all sides together. Blend mode change to Lighten with Opacity 50%.


Leave a Reply