
“What’s the matter? I have to be a witch, I have to be a mortal, I have to be a teenager and I have to be a girl all at the same time. That’s what’s the matter.” In this Photoshop tutorial we learn how to create a surreal scene for Halloween. We combine several photos and use Brushes to create a clouds and start. We use a lot of Adjustment Layer like Gradient Map and other Adjustment Layers. For Final Adjustment, we used Camera Raw Filter.
Preview of Final Image

Tutorial Resources
Step 1
Now, let’s start by creating a new image file, go to the Menu bar and click File > New, and then input the following values on their respective fields
- Preset: Custom
- Width: 2580px
- Height: 2580px
- Resolution: 72px
- Color Mode: RGB Color 8 bit
- Background Contents: Transparent

Step 2
Next, go to open Moon photo. Go to File > Open and select Moon. After you open the image, use Rectangular Marquee Tool(M).

After the selection area has been created, simply copy (Ctrl / Cmd + C) and Paste (Ctrl / Cmd + V) it to our work canvas. Then position the image with the transform tool (Ctrl / Cmd + T). Hold Alt + Shift and rasterize like the image below. In Photoshop CC only hold Alt to rasterize all sides together. Right-click and select “Convert to Smart Object”.


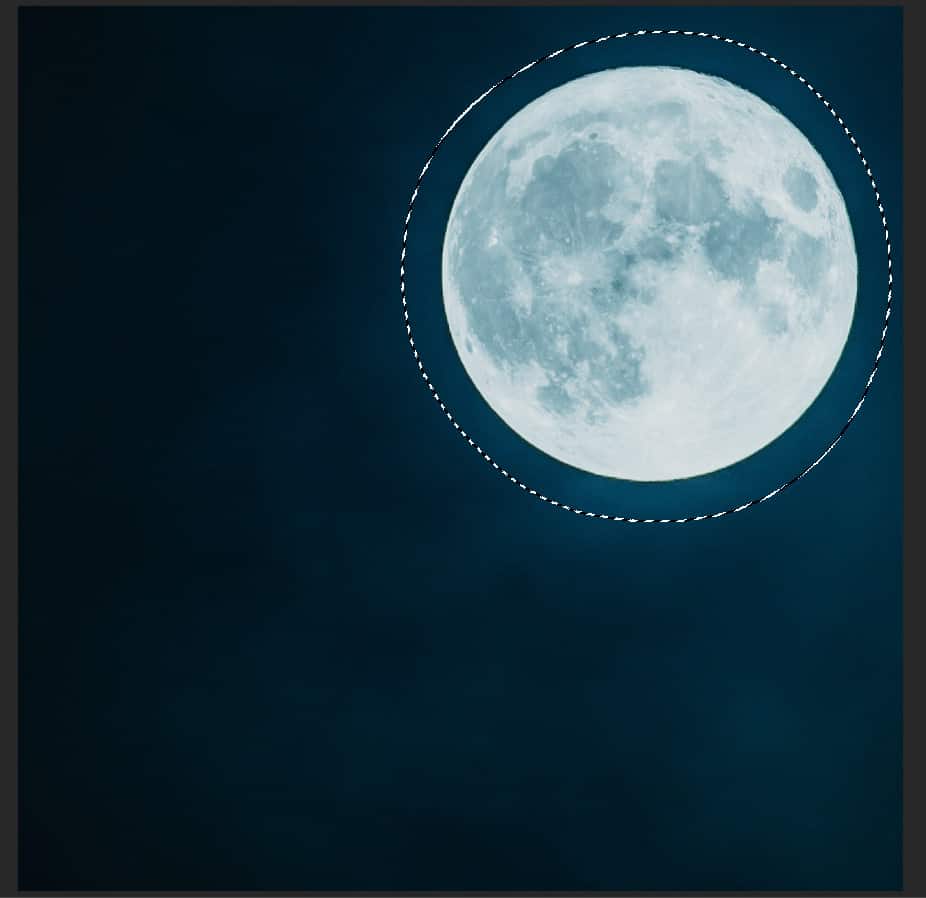
Step 3
Add Adjustment Layer “Levels”
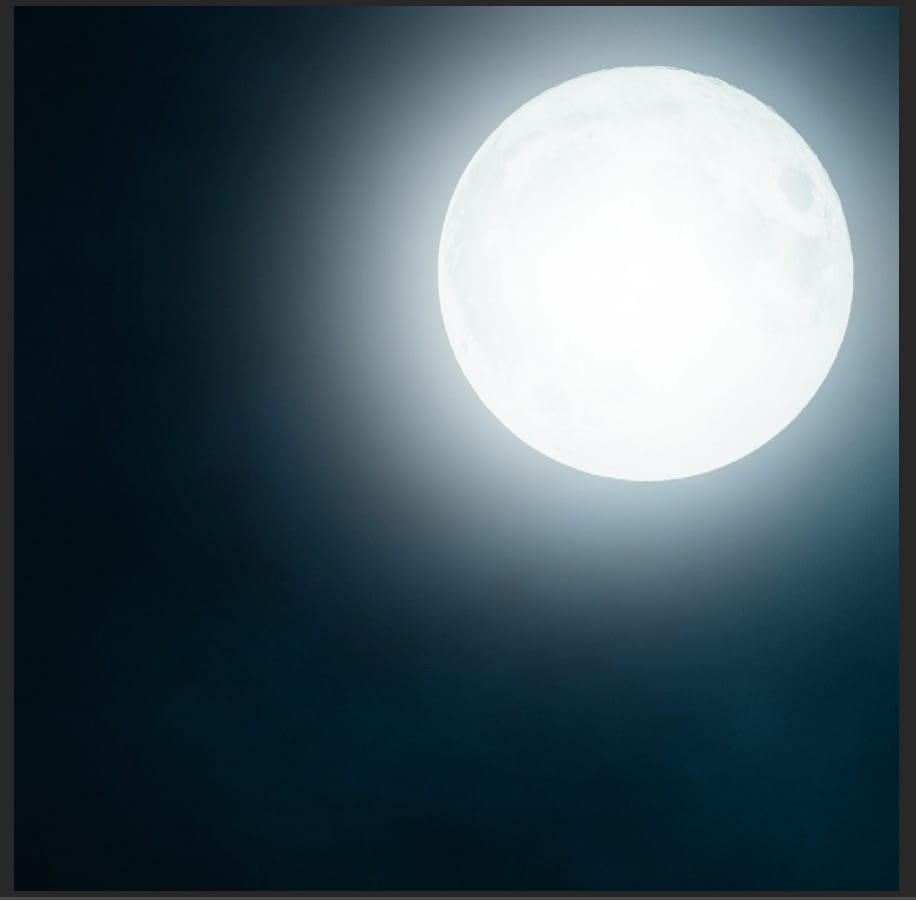
Step 4
Add Adjustment layer “Curves” and press Ctrl/Cmd + I to invert. Then use Brush Tool(B) Soft Round with foreground color white and paint to add brightness only on moon.

Step 5
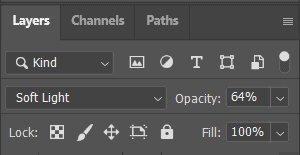
Create a new layer and use Brush Tool(B) Soft Round with foreground color white. Use big Brush and paint to Moon, Blend mode set to Soft Light with Opacity 64%.
Step 6
Next, we add Clouds but first we need to import brushes. Select a Brush Tool(B) and right click on background. Now click on the gear icon and Import Brushes (Select a downloaded brush).

Step 7
Create another new layer and paint clouds. First use Brush Tool(B) with foreground color blue #02557c and select Cloud brush. Now You have to feel this step, with a combination of a couple of brushes with a change of brush size. See in the pictures how it should look like.


Step 8
Go to File > Place and select Birds, then place it into your document. Then position the image with the transform tool (Ctrl / Cmd + T). Hold Alt + Shift and resterize like image below. Blend mode Normal and Opacity 65%.
2 responses to “Create a Halloween scene in Photoshop”
-

i cant download any of the images, because they all link to deviantart, and i dont want to make a account
-
A Halloween tutorial in July?
Leave a Reply to AnonymousCancel reply