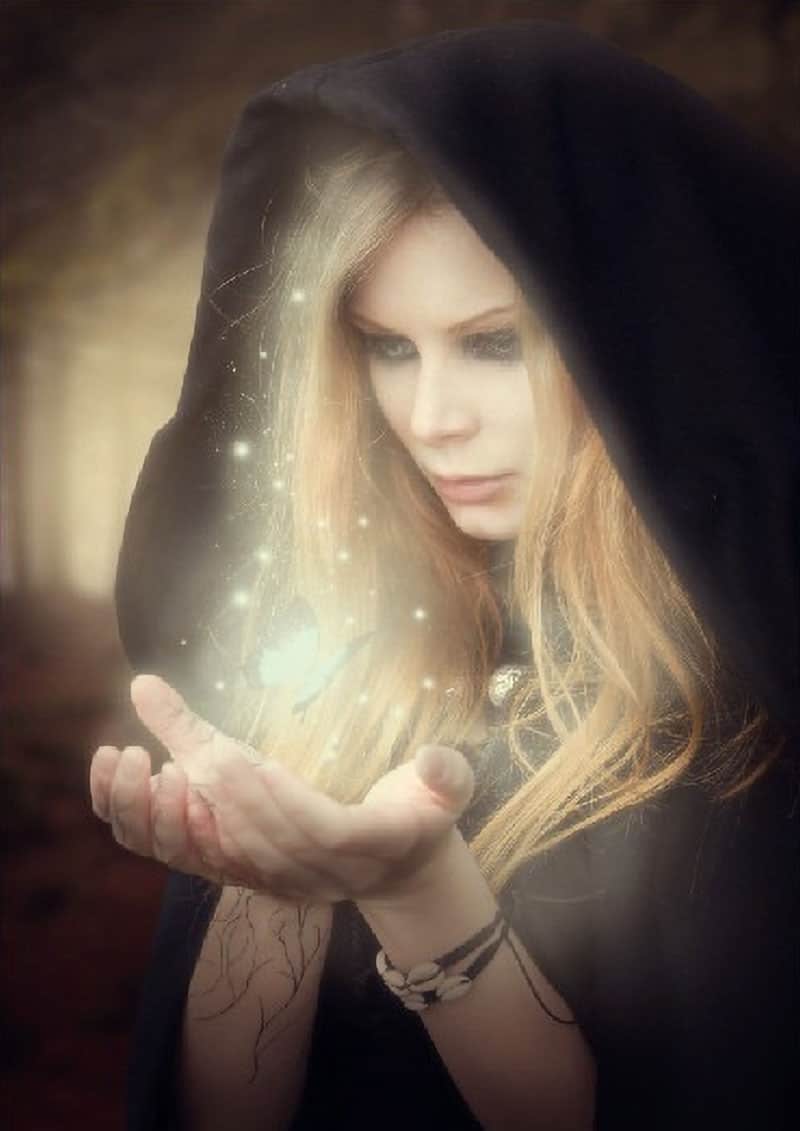
In this fantasy photo manipulation tutorial, we will learn how to create a sorceress with a butterfly energy orb. This tutorial will show you how to blend images together, use Photoshop brushes, and apply photo effects.
Tutorial Resources
- Misty Forest Stock 1 by Angband
- Black Magic 22 by liam-stock
Butterfly-Stock 12 by shoofly-stock(Alternative)- Sparkle Brushes by Tempting-Resources by LilyStox
- Crash_Space by KeRen-R
Step 1: Create the Photoshop document
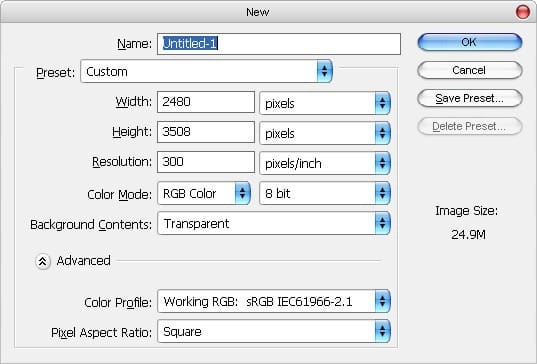
To start, let’s create a new image file, go to the Menu bar and click File > New, and then input the following values on their respective fields:
- Width: 2480 pixels
- Height: 3508 pixels
- Resolution: 300pixels/inch
- Color Mode: RGB Color; 8 bit
- Background Contents: Transparent

Step 2: Create a fantasy background
On this step, we will be creating our fantasy background. Open “Misty Forest Stock 1” by Angband. First, let’s move the image to our canvas using the Move tool (V). To do this, press V and left-click on the image and then press V. Now, drag the image to the canvas. When you have the image on the canvas, rename it to “Background.”
Note: To rename a layer, simply double-click on the words: “layer 1” to prompt a text box to appear. Once that appears, you may now rename the layer.
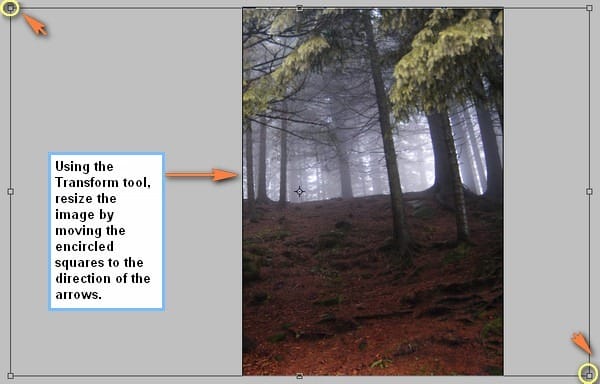
Once on the canvas, transform this image using the Transform tool. To activate it, press Ctrl/Cmd + T). To know that the Transform tool is activated, you would see a box with small boxes in its corners and sides encompassing the image. Let’s now transform the image by following the instructions on the image below:


Next, we will be blurring the image to create a sense of depth against the subject. To achieve this, go to Filter> Blur > Lens Blur. Once the Filter opens, input the following:
- Faster
- Depth map
- Source: None
- Blur Focal Distance: 0
- Invert: Unchecked
- Iris
- Shape: Octagon (8)
- Radius: 64
- Blade Curvature: 0
- Rotation: 0
- Specular Highlights
- Brightness: 0
- Threshold: 255
- Noise
- Amount: 0
- Distribution:
- Gaussian: Checked
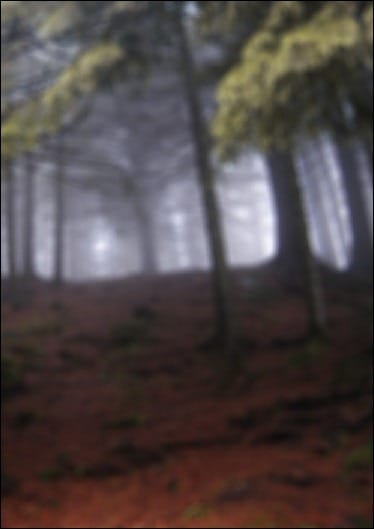
The result should be similar to this:

Next, we will be creating glowing light on our background to give it a much more fantasy-themed look. First, let’s create a new layer. To do that, press Ctrl/Cmd + Shift + N, and then a box would pop up; when this box pops up, type “Light 1” on the name box. This new layer should now be on top of the layer: “Background.” Before we activate our Brush tool, we’ll need to set the Brush’s color. To do that, click on the Foreground color box as shown on the image below:

Once you’ve done that, the Color Picker box would open. Locate the # box and input the following values:
- #: ffffdb

Now the color is ready, let’s activate the Brush tool by pressing B.
6 responses to “How to Create a Magic-Yielding Sorceress Photo Manipulation”
-
Great tutorial!
Thanks!
-
if anyone needs the butterfly stock with out watermarks
http://www.lakii.com/vb/attachments/a-47/140500d1360355267-a-butterfly_stock_12_by_shoofly_stock.jpg -
Dude! This was so fun! I can’t wait to explore the rest of your website! Thanks!!!
-
There is no link to the brushes or anything else :(
-
Thanks for letting us know! Don’t know how the links went missing but we added them back!
-
-
Hi, Im doing this tutorial but I can’t seem to find the CRASH_SPACE.abr brush. I’ve looked everywhere. Is there any other brush that can replace it? Thanks fot your help. Cool tutorial


Leave a Reply