- Brush size: 600px
- Hardness: 0%
- Opacity: 30%
- Flow: 100%
Apply the brush on the region indicated below:

The result should be similar to this:

Next, let’s further darken these areas that wouldn’t be touched by the light. Create a new layer and name it “Darken 2”. Before you proceed, make sure that the brush’s color is still black.
Now, activate the Brush tool (B) and input the following:
- Brush size: 600px
- Hardness: 0%
- Opacity: 30%
- Flow: 100%

The result would be like this:

Create a new layer again; “Darken 3”. Use the black colored brush and then activate the Brush tool (B) then input the following values:
- Brush size: 500px
- Hardness: 0%
- Opacity: 30%
- Flow: 100%
Use the brush on the following region:

The result should be similar to the image below:

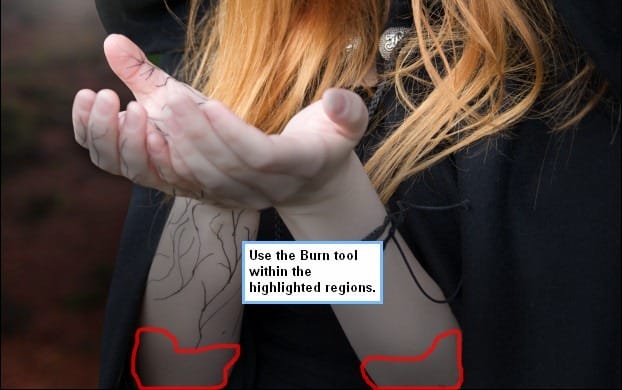
Now, let’s activate the Burn tool (O); we’re going to darken the sorceress’s pale arms because darkening it will just make it black and not darkened. When the Burn tool is activated, input the following values:
- Brush size: 500px
- Hardness: 0%
- Range: Midtones
- Exposure: 25%

The result should be similar to the image below:

When you’re done, select all the layers that you’ve created in this step and then press Ctrl/Cmd + G to group them. Name this group to “Sorceress”.
Step 4: Create the Butterfly
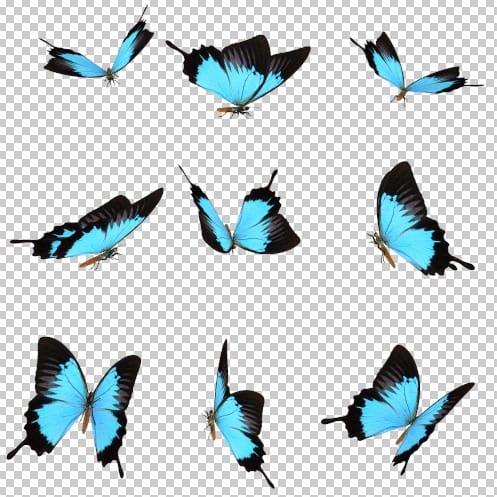
Now in this step, we will be adding the butterfly. To start, open “Butterfly Stock 12” by Shoofly Stock.

Activate the Polygonal Lasso tool (L) and drag a selection area around the butterfly shown on the image below:

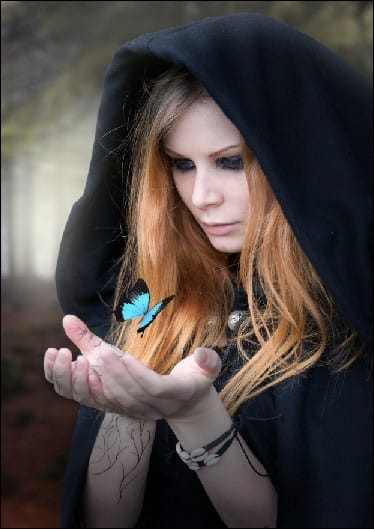
After creating the selection, activate the Move tool (V) and drag that butterfly to our canvas. Once it’s on the canvas, rename this layer to “butterfly”. Position the butterfly as seen on the image below:

Now, let’s resize the butterfly using the Transform tool (Ctrl/Cmd + T). See image below:

After that, let’s reduce the Brightness of the butterfly; to do that, simply click on the “butterfly” layer and then go to Image > Adjustments > Brightness/Contrast. When the box opens, input the following values:
- Brightness: +5
- Contrast: 0
The result should be similar to the following:

Now when you’re done, group this layer and name it “butterfly”.
Step 5: Create the Magical Light
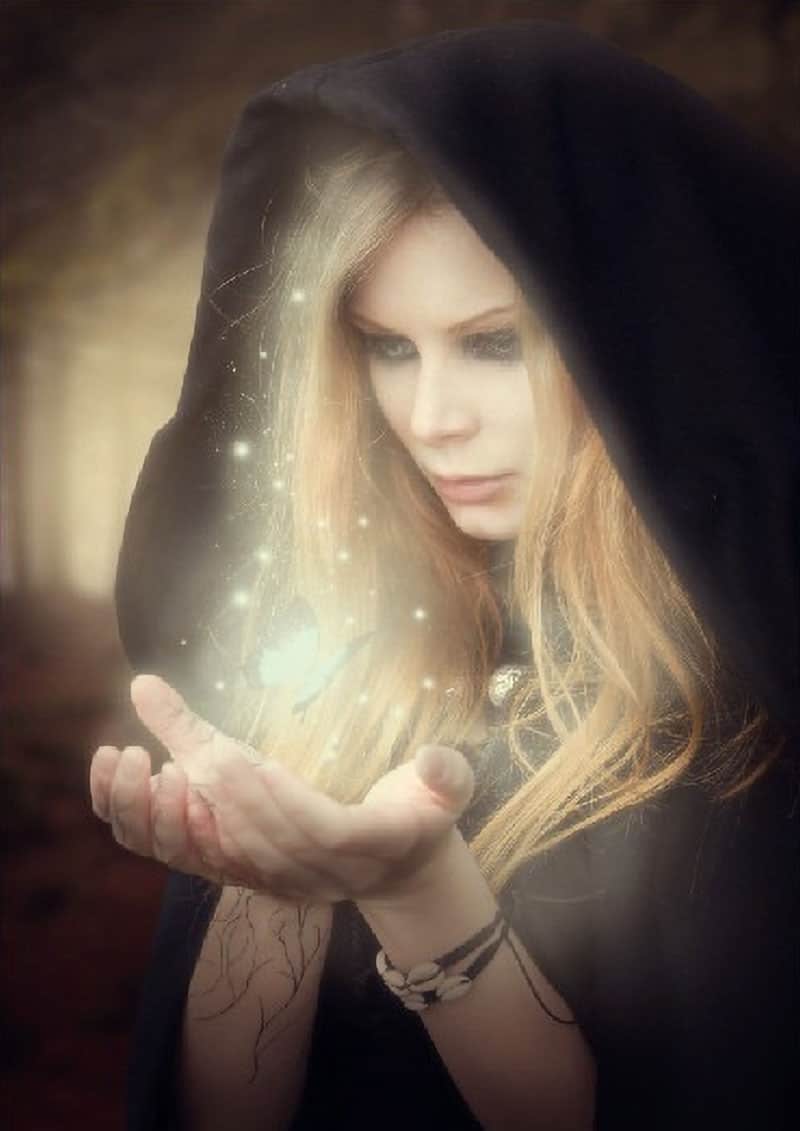
In this step, we will be adding the light coming from the sorceress’ hands. To start, make sure that you have downloaded the Sparkles brush by Tempting-Resources. To open that brush after downloading, simply extract or copy the brush (.abr file) to this destination: Adobe >Adobe Photoshop > Presets > Brushes.
6 responses to “How to Create a Magic-Yielding Sorceress Photo Manipulation”
-
Great tutorial!
Thanks!
-
if anyone needs the butterfly stock with out watermarks
http://www.lakii.com/vb/attachments/a-47/140500d1360355267-a-butterfly_stock_12_by_shoofly_stock.jpg -
Dude! This was so fun! I can’t wait to explore the rest of your website! Thanks!!!
-
There is no link to the brushes or anything else :(
-
Thanks for letting us know! Don’t know how the links went missing but we added them back!
-
-
Hi, Im doing this tutorial but I can’t seem to find the CRASH_SPACE.abr brush. I’ve looked everywhere. Is there any other brush that can replace it? Thanks fot your help. Cool tutorial


Leave a Reply