Turn any photo into a dot grid artwork with these Photoshop actions. You'll get great results with dots that change size. They get larger in brighter areas and smaller in darker areas. Free download available.
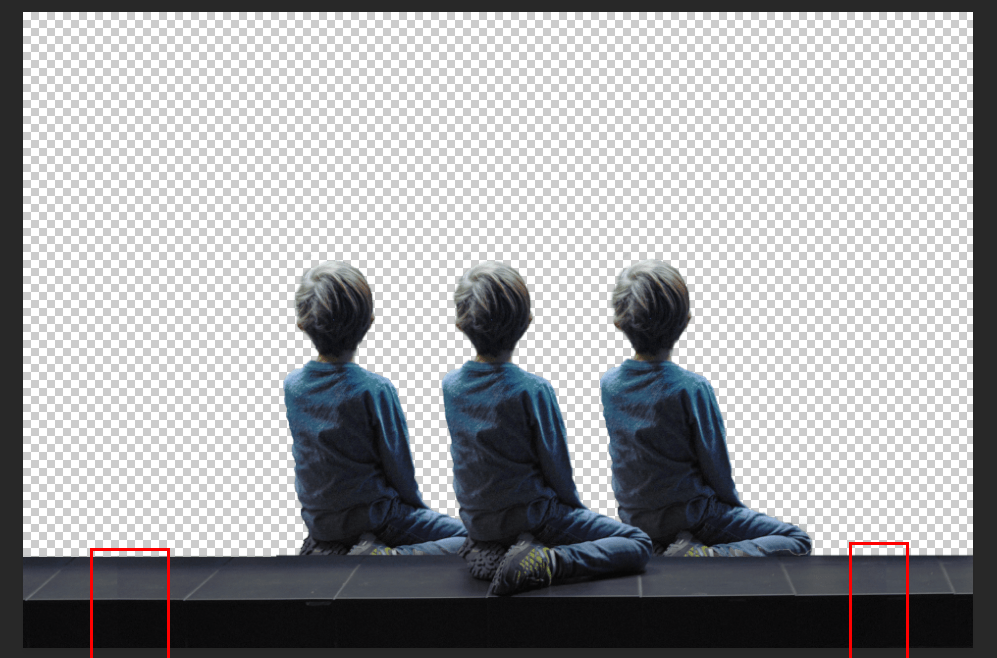
Step 8
Next, create a layer mask on both copies of the group and use Brush Tool(B) Soft Round with foreground color black and start paint the boy.
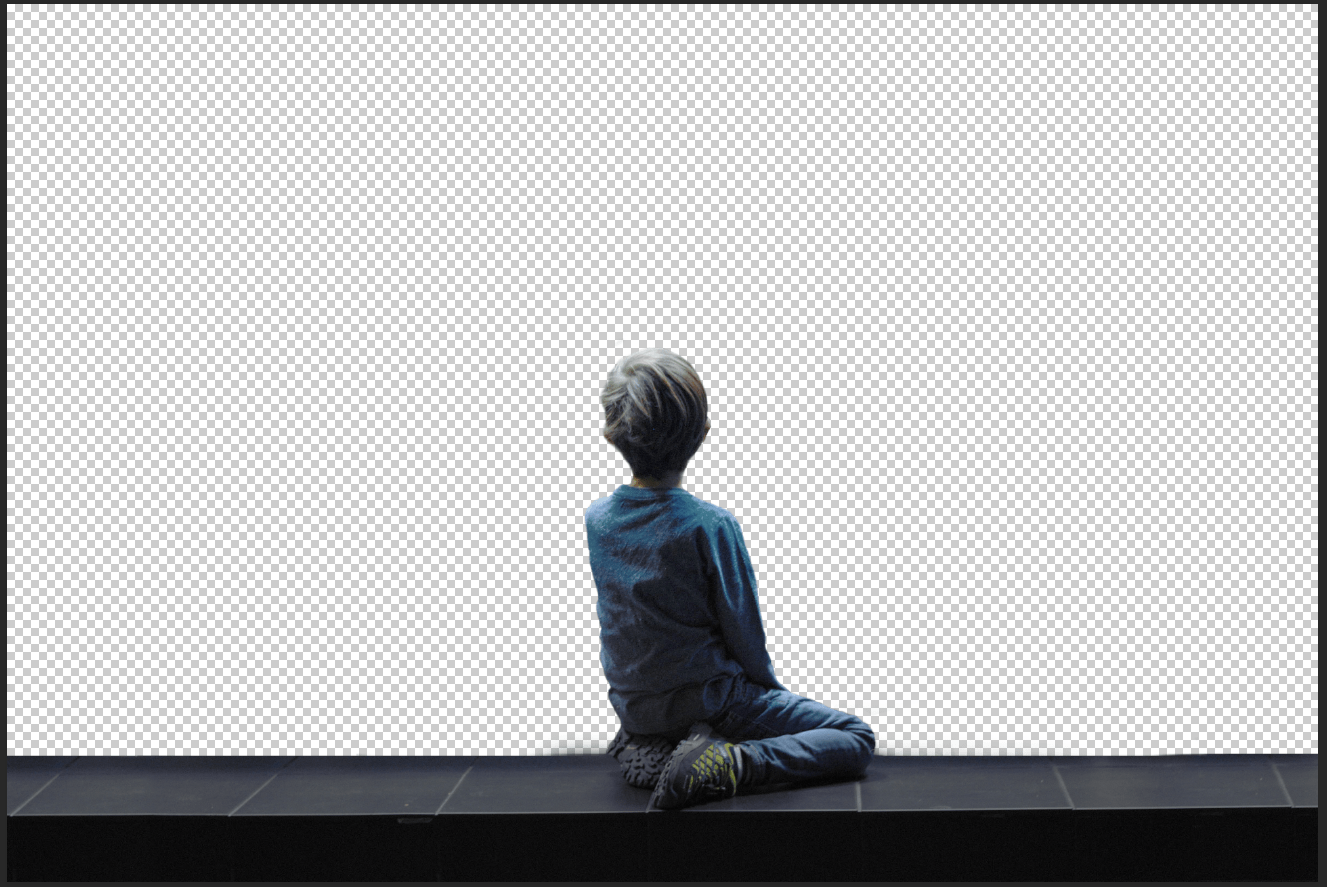
Step 9
Next we will openMountains. After you open the image, use Rectangular Marquee Tool(M).
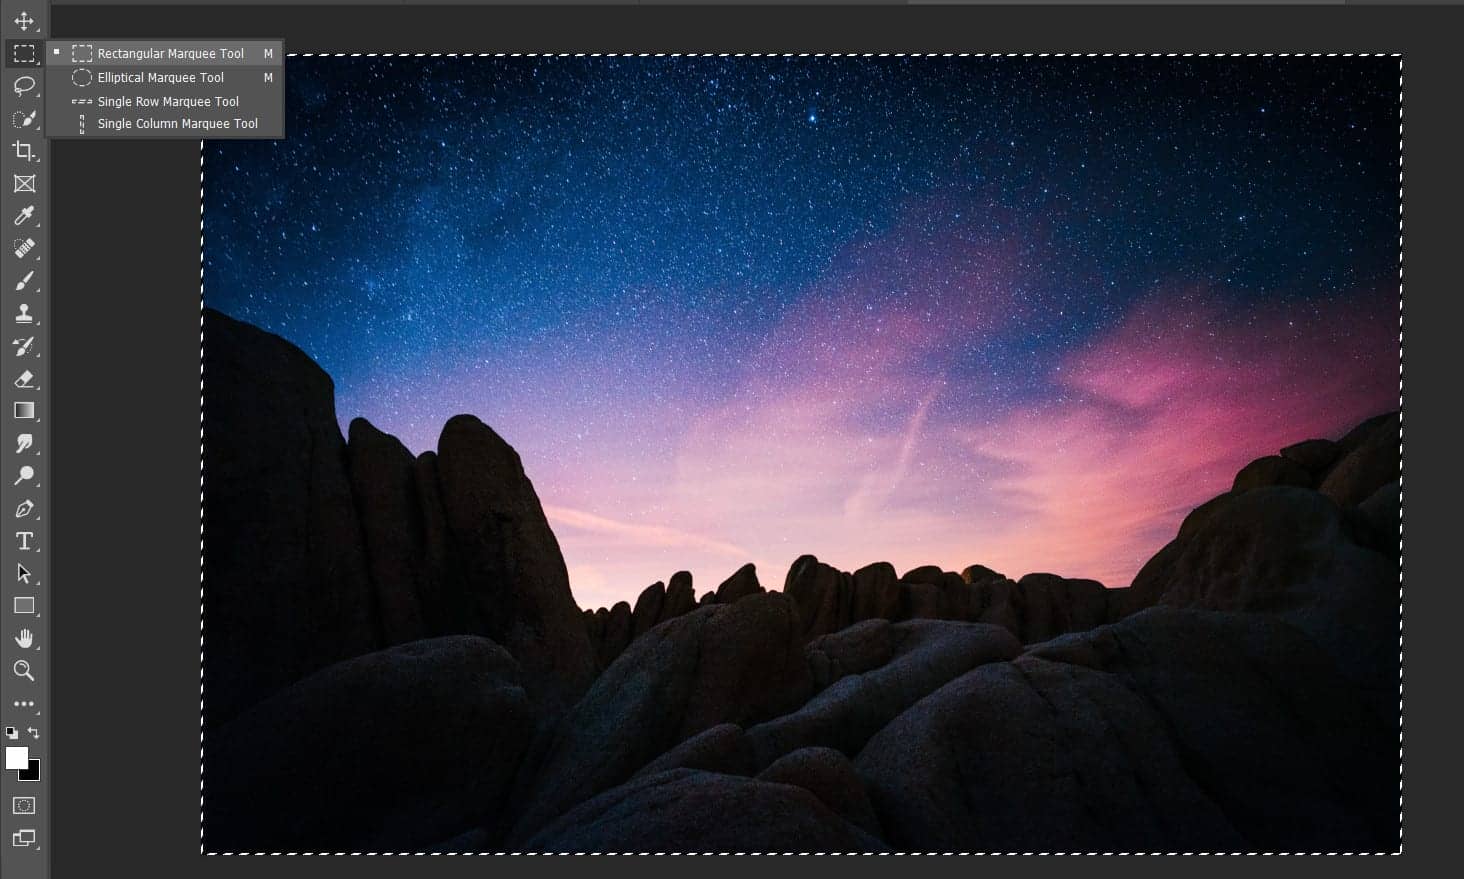
After the selection area has been created, simply copy (Ctrl / Cmd + C) and Paste (Ctrl / Cmd + V) it below the Man and Woman. Then position the image with the transform tool (Ctrl / Cmd + T). Hold Alt + Shift and resterize like image below. In Photoshop CC only hold Alt to resterize al sides together.
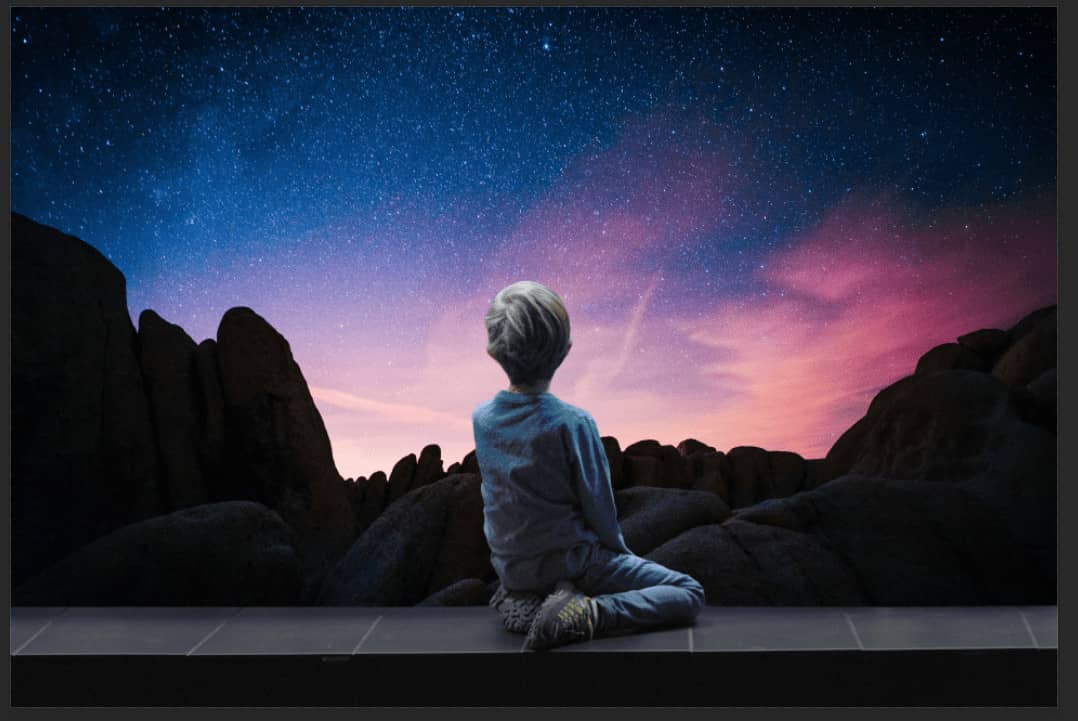
Step 10
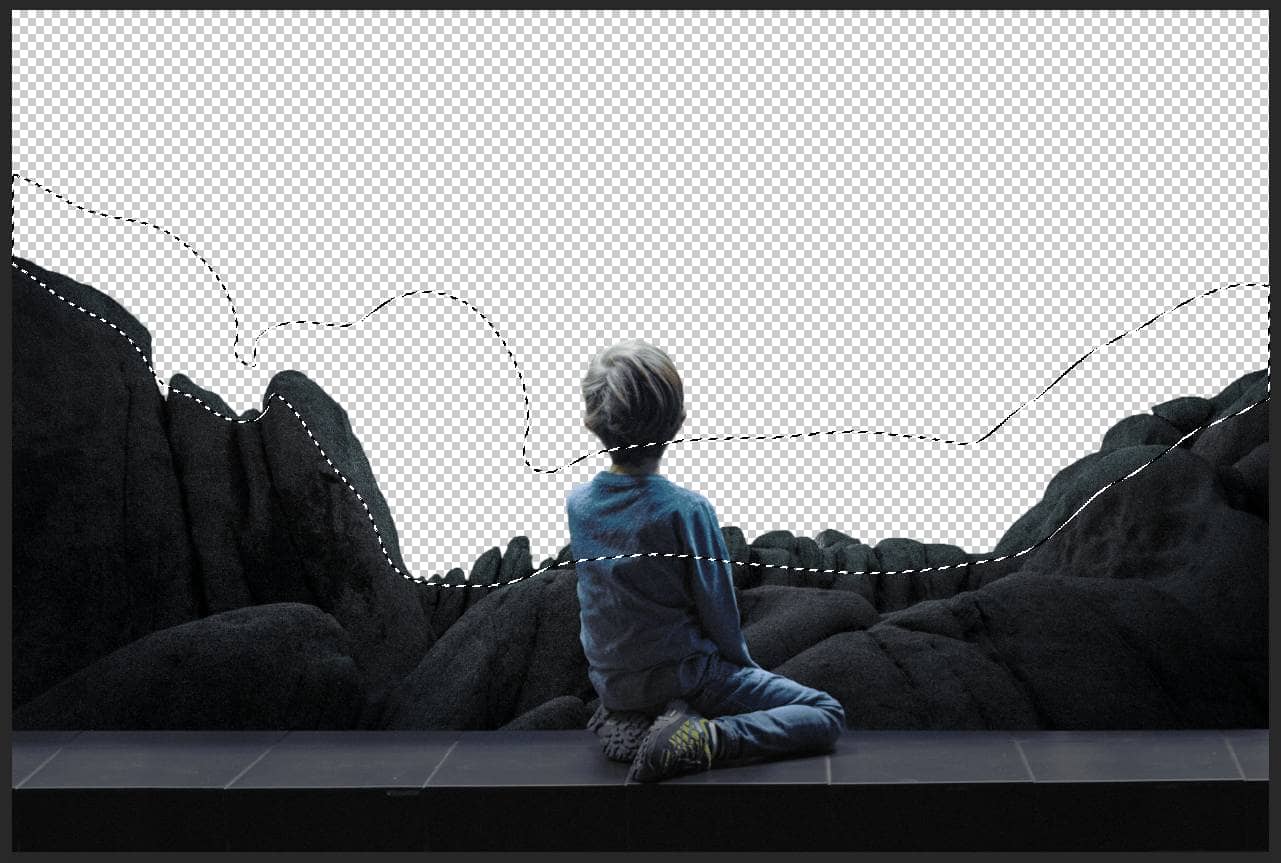
Now use Pen Tool(P) and start selecting the Mountains.
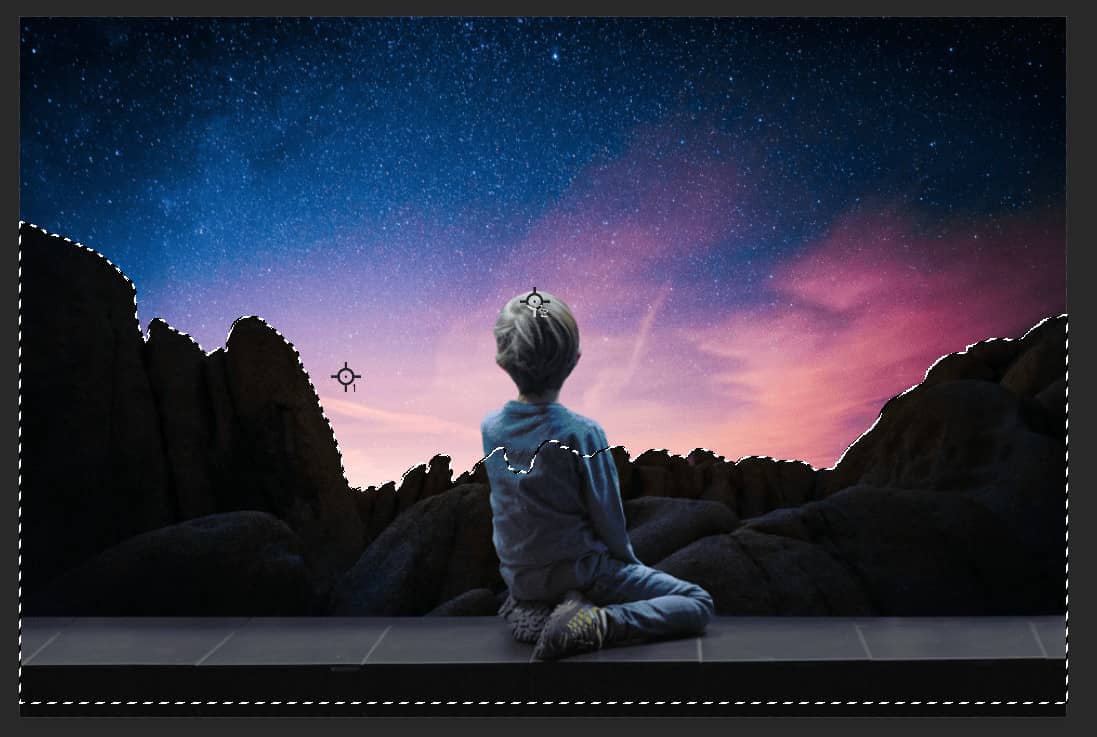
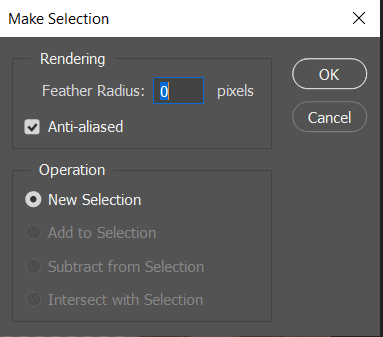
Then press Right click on mouse and select "Make Selection" Feather Radius set to 0px and check Anti-aliased then press OK.
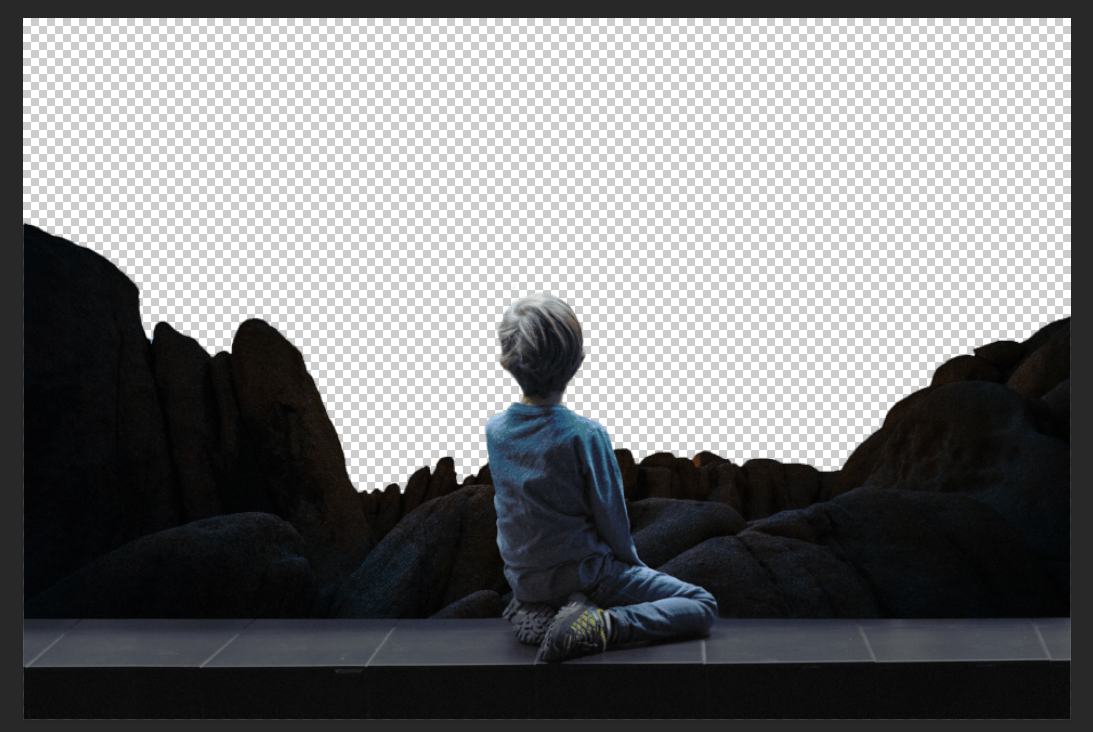
Now press the icon Add Layer Mask and this is the result.

Step 11
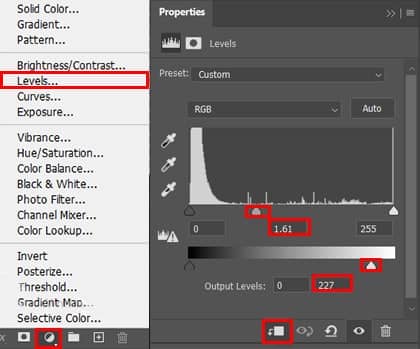
Add Adjustment Layer "Levels"
Step 12
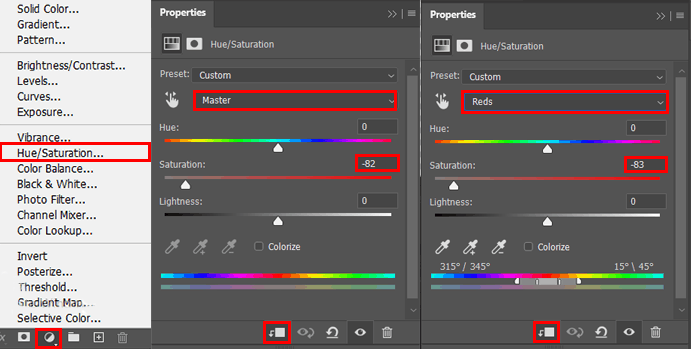
Add Adjustment Layer "Hue/Saturation"
Step 13
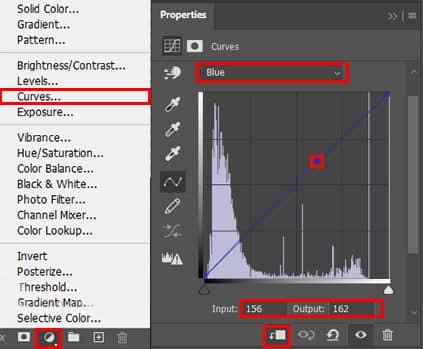
Add Adjustment Layer "Curves"
Step 14
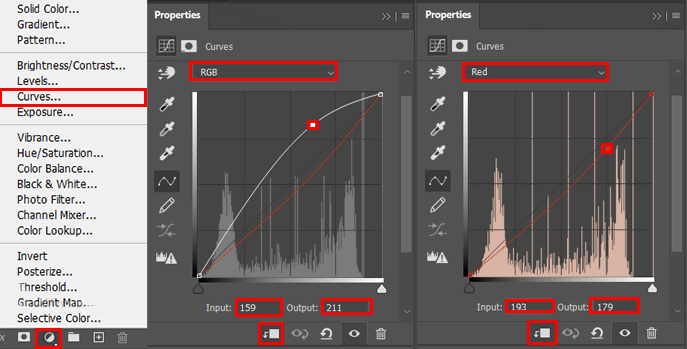
Add Adjustment Layer "Curves" and press Ctrl/Cmd + I to invert. Then use Brush Tool(B) Soft Round with foreground color white and paint the topside of Mountain.
Step 15
Add Adjustment Layer "Curves" and press Ctrl/Cmd + I to invert. Then use Brush Tool(B) Soft Round with foreground color white and paint the bottom of Mountain.
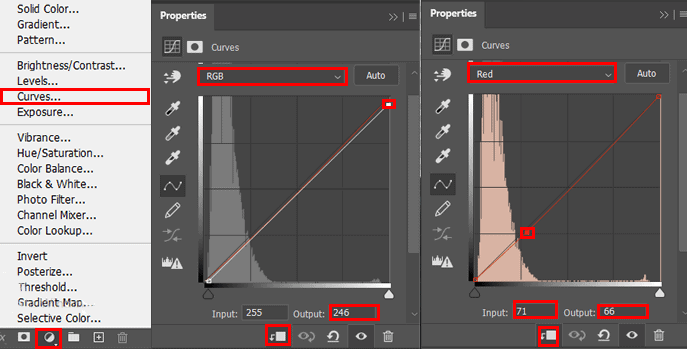
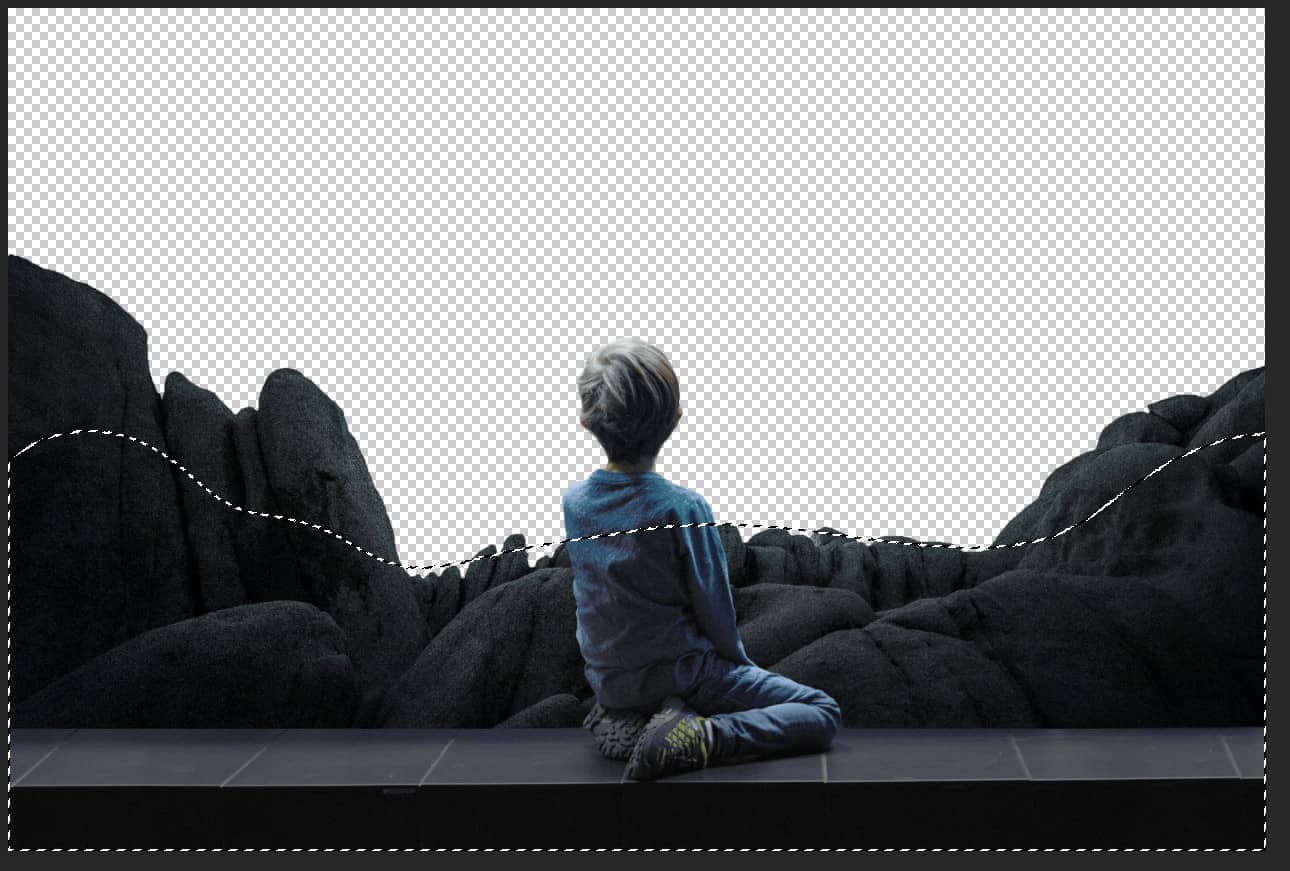
Step 16
Add Adjustment Layer "Brightness/Contrast" and press Ctrl/Cmd + I to invert. Then use Brush Tool(B) Soft Round with foreground color white and paint the right bottom of mountain.
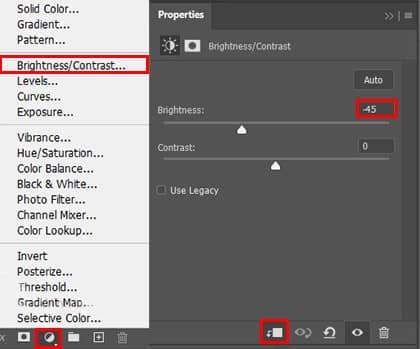
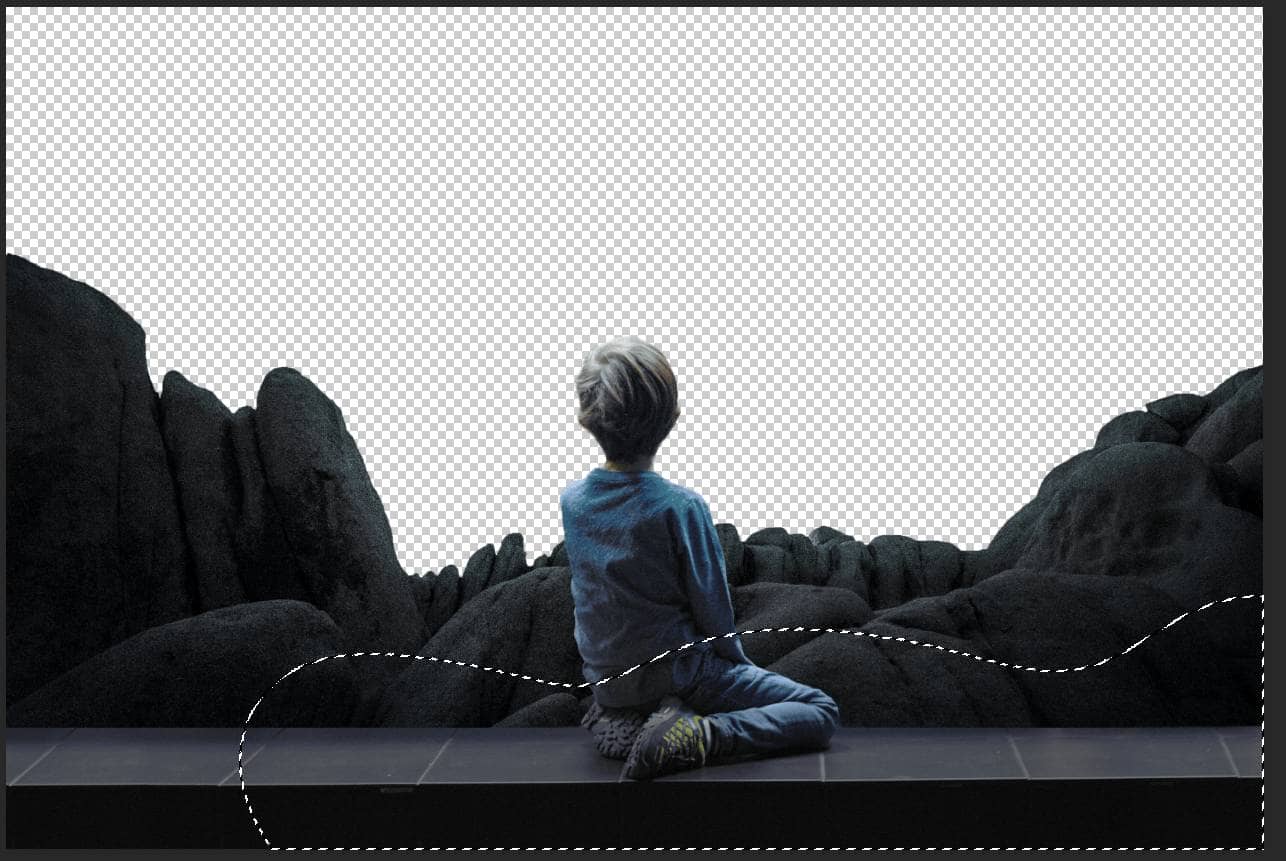
Step 17
Now we will openEarth. After you open the image, use Rectangular Marquee Tool(M).
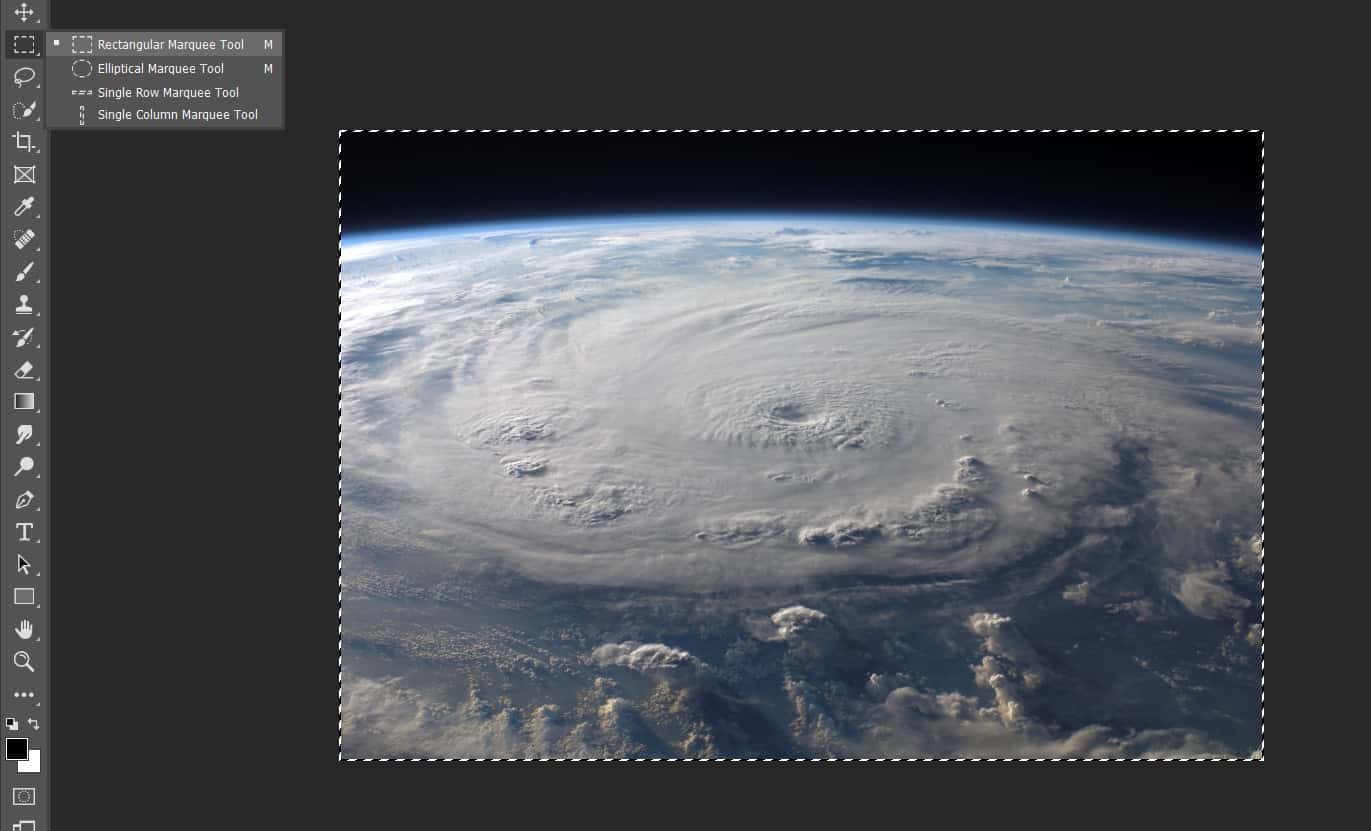
After the selection area has been created, simply copy (Ctrl / Cmd + C) and Paste (Ctrl / Cmd + V) it below the Man and Woman. Then position the image with the transform tool (Ctrl / Cmd + T). Hold Alt + Shift and resterize like image below. In Photoshop CC only hold Alt to resterize al sides together.
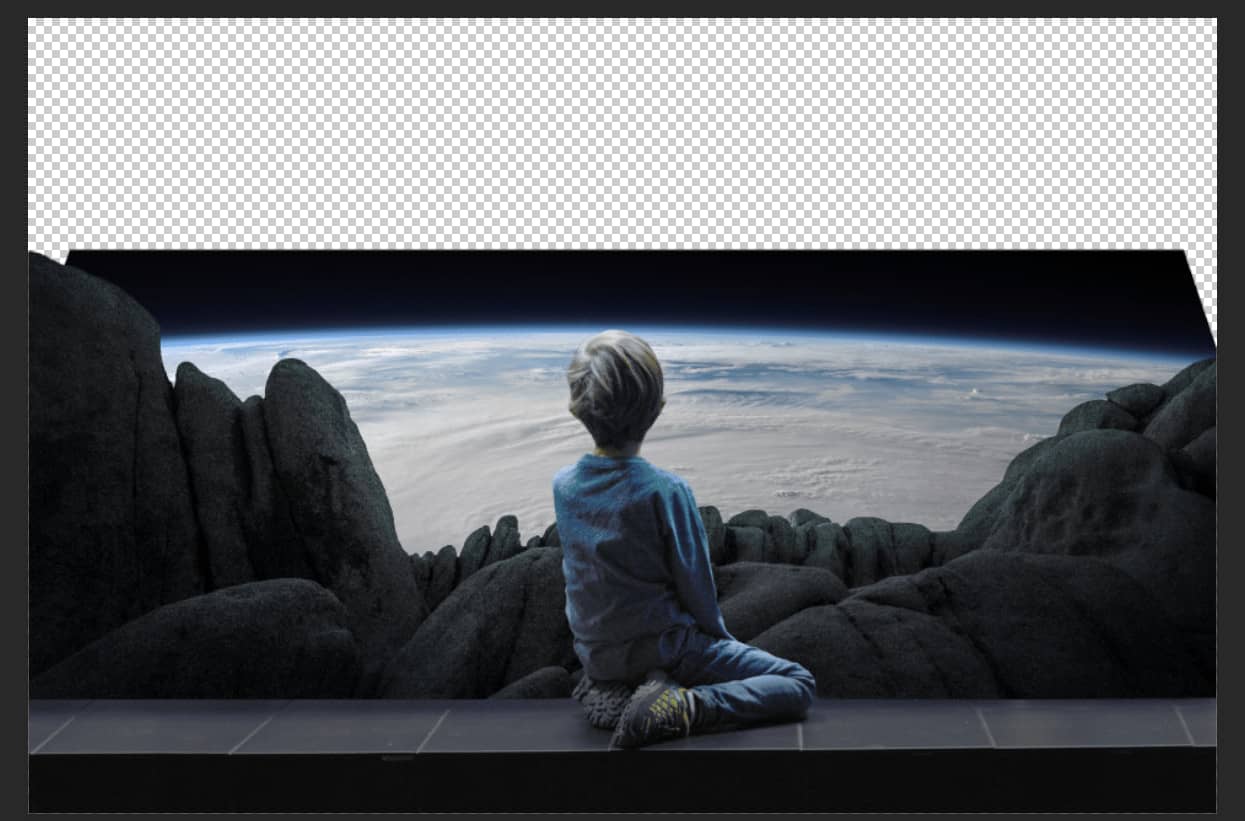
Step 18
Create a layer mask and use Brush Tool(B) Soft Round with foreground color black and paint the black area above the earth .
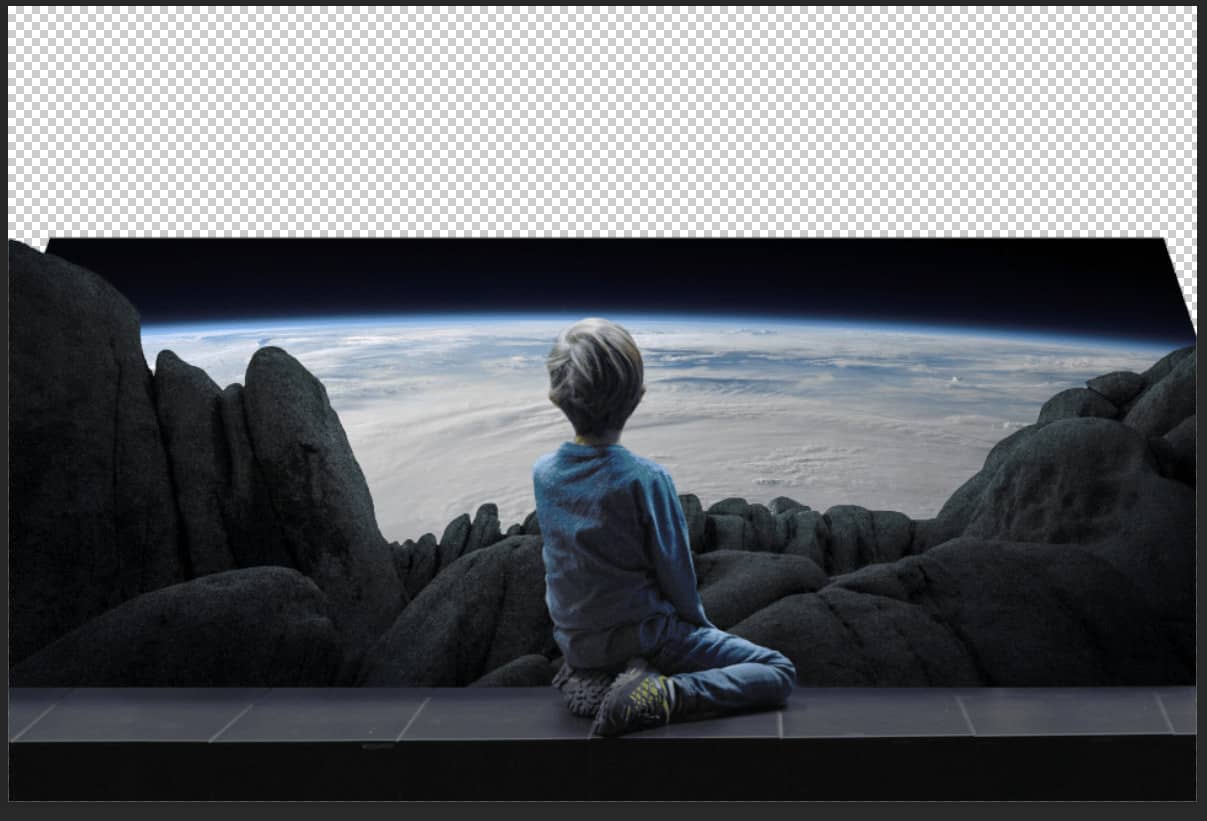
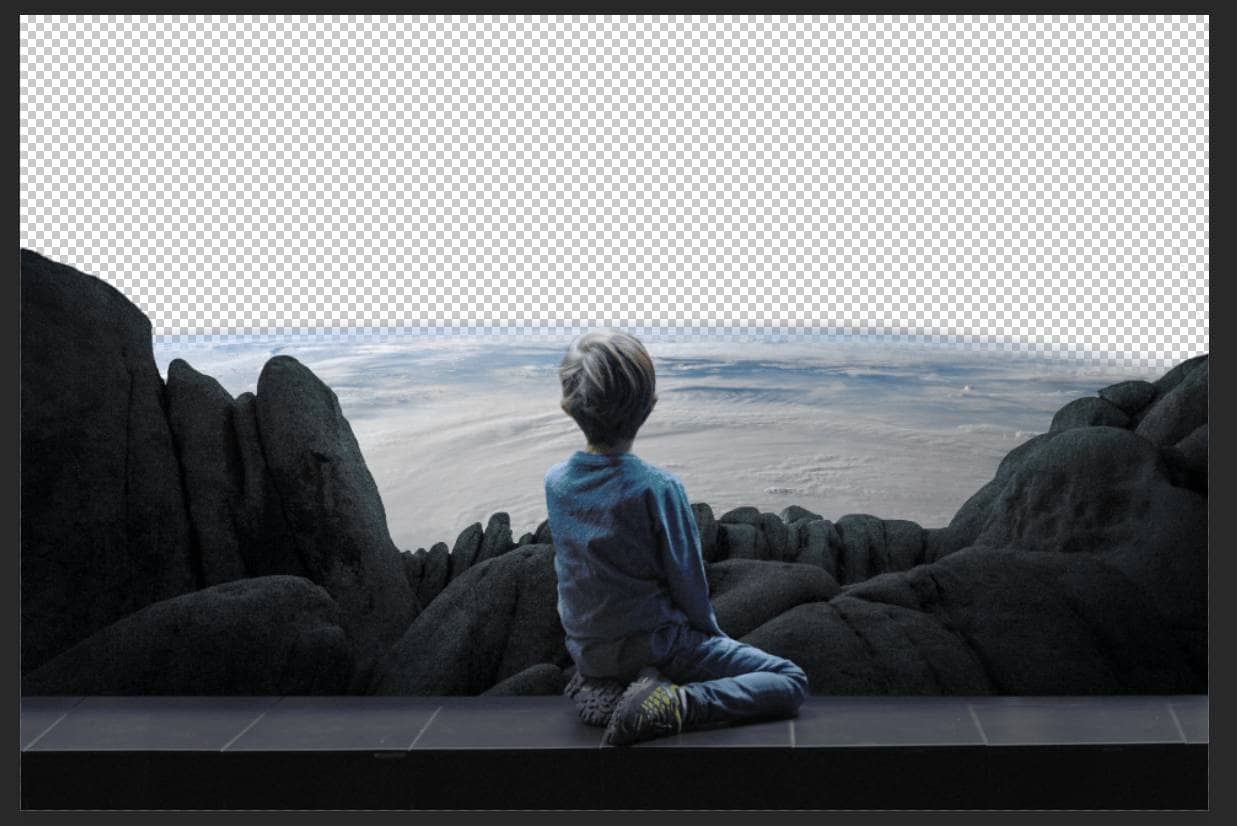
Step 19
Add Adjustment Layer "Curves"

Step 20
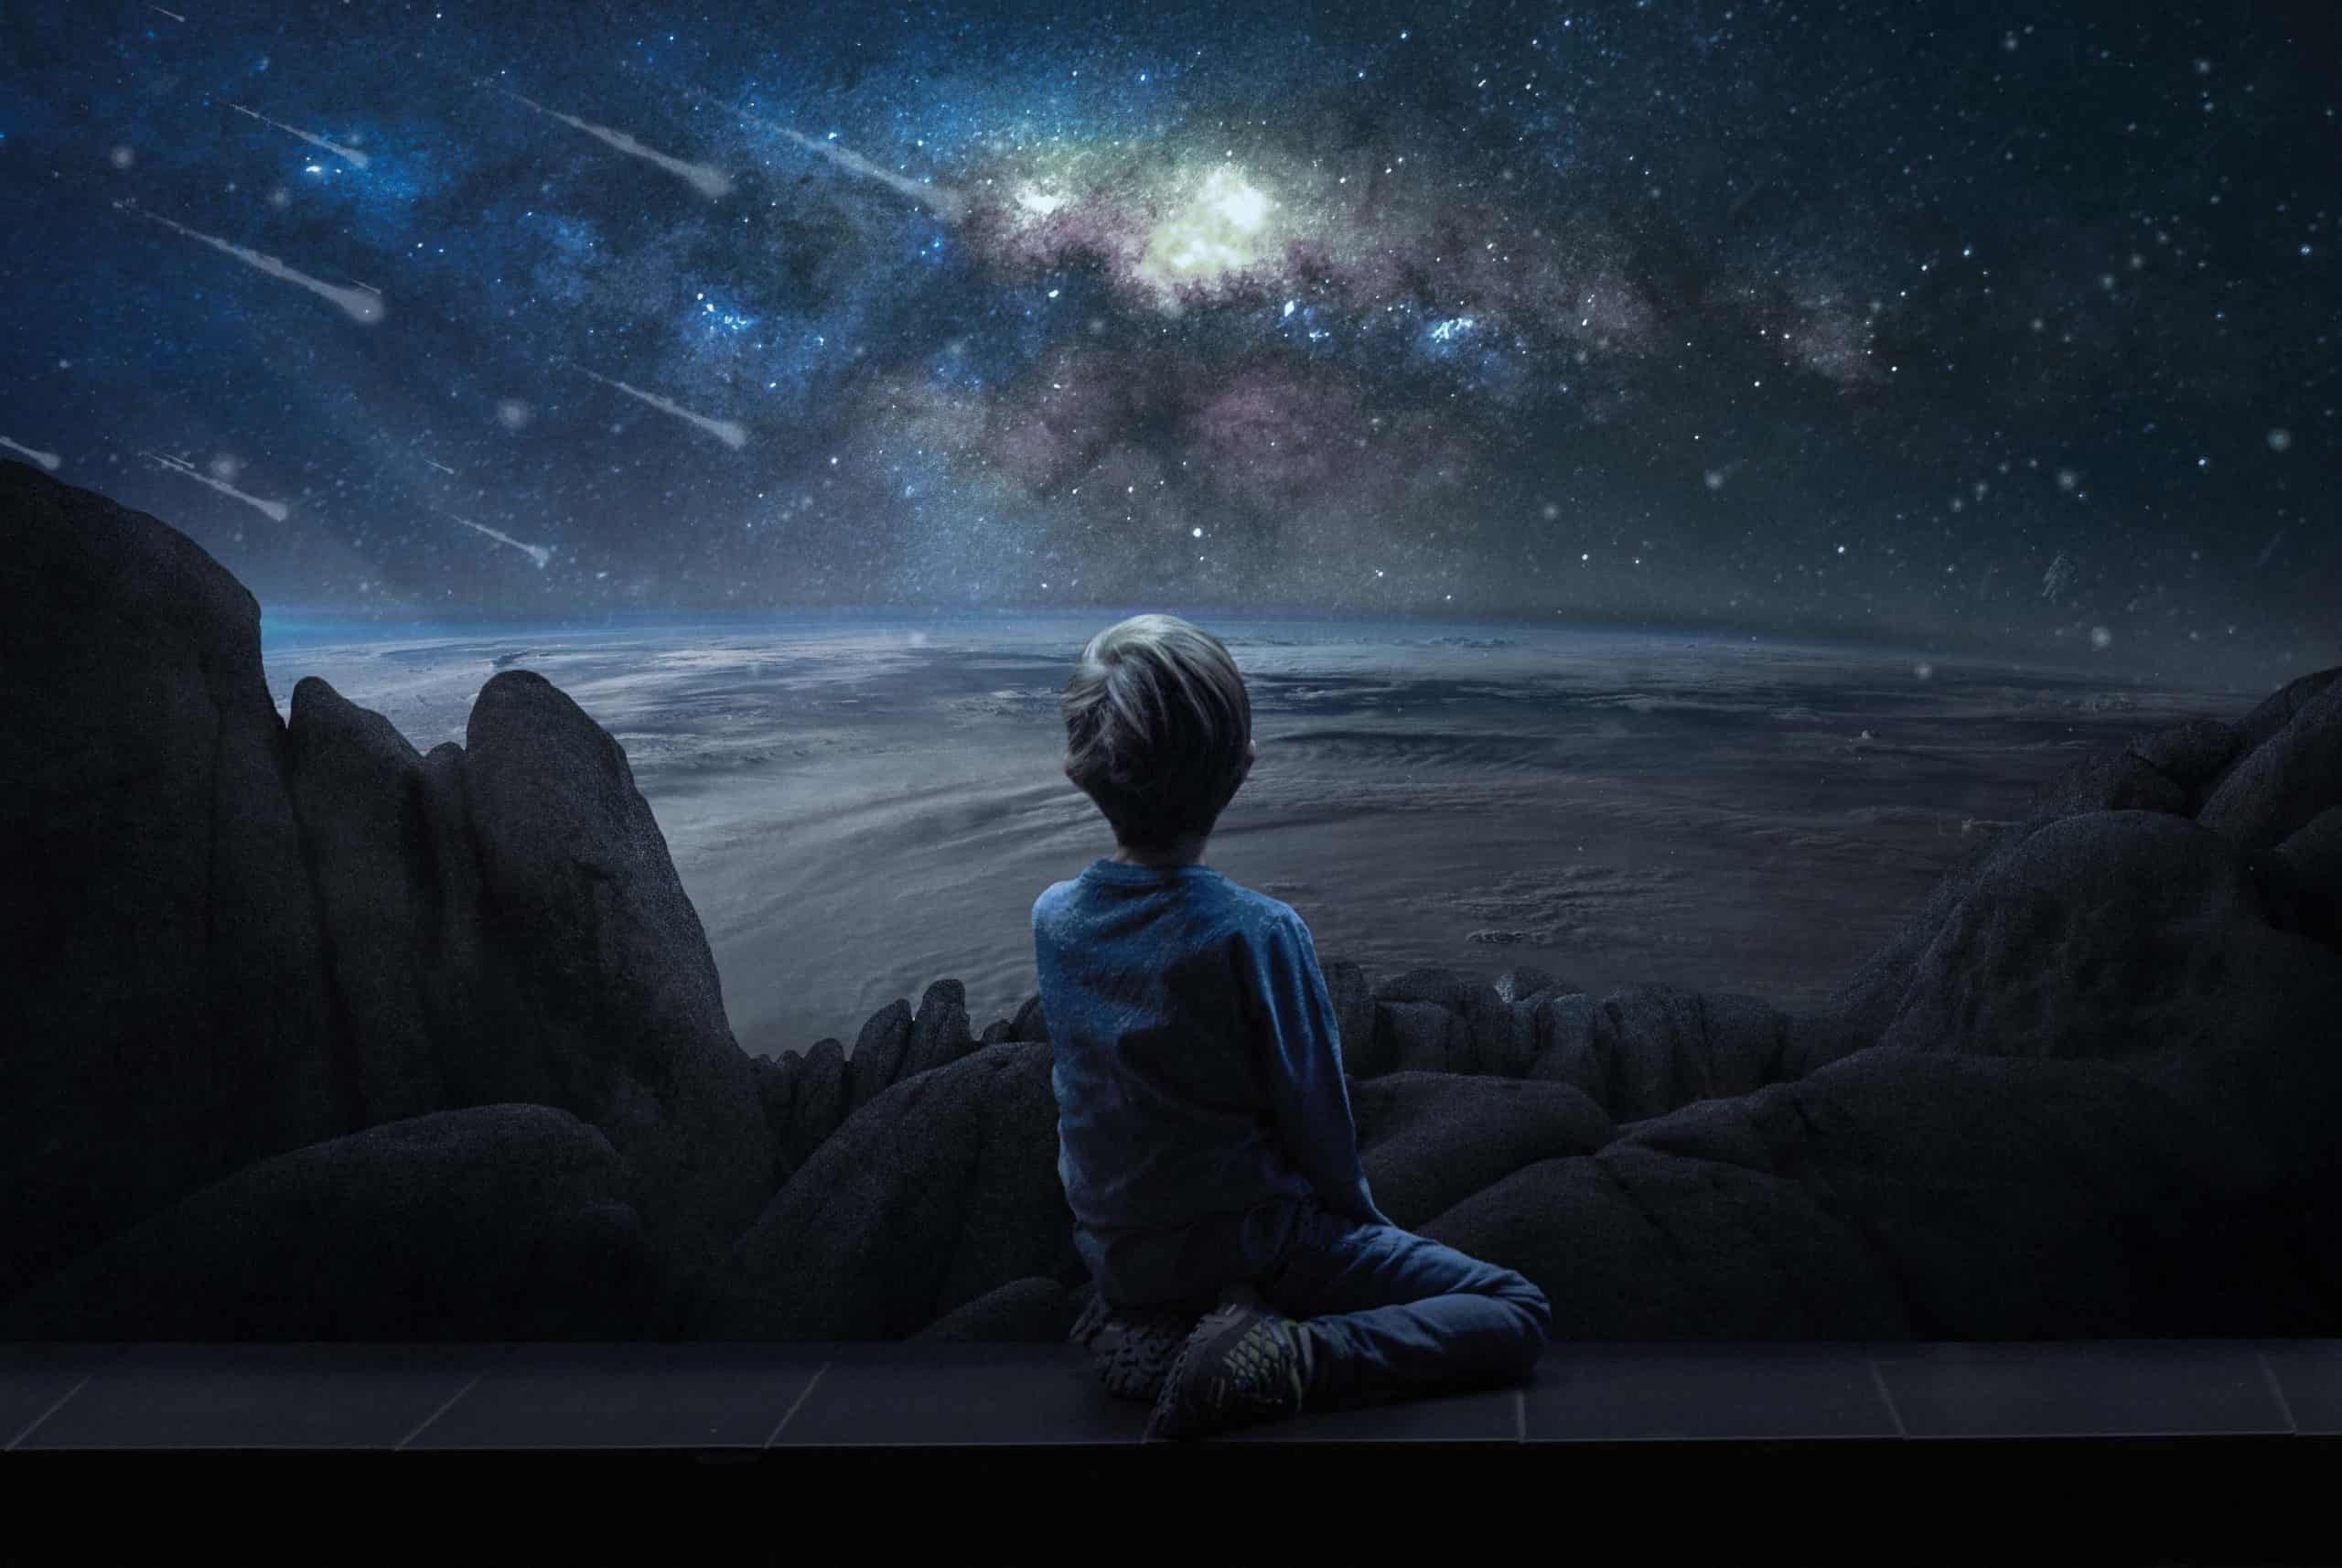
Add Adjustment Layer "Gradinet Map" Default Black/White. Blend mode change from Normal to Soft Light with Opacity 45%.

6 comments on “Look at Earth Surreal Photomanipulation Tutorial”
this is crazy and not teaching. Get real yall terrible
This is a super unclear tutorial. You can't even see step 5... Horrible UX and technical writing.
Tutorial is very claer , well done !!! Thanks for sharing . 👍👍👍😉
This tutorial could have been a good one if the steps were all visible
Thank you very much! This is neat!
Hi a great tutorial, It would have helpful to see all the layers from start to finish, and even see the PSD file which is not available your link is not there, the missing layers would answer a lot of questions, many thanks