Step 27
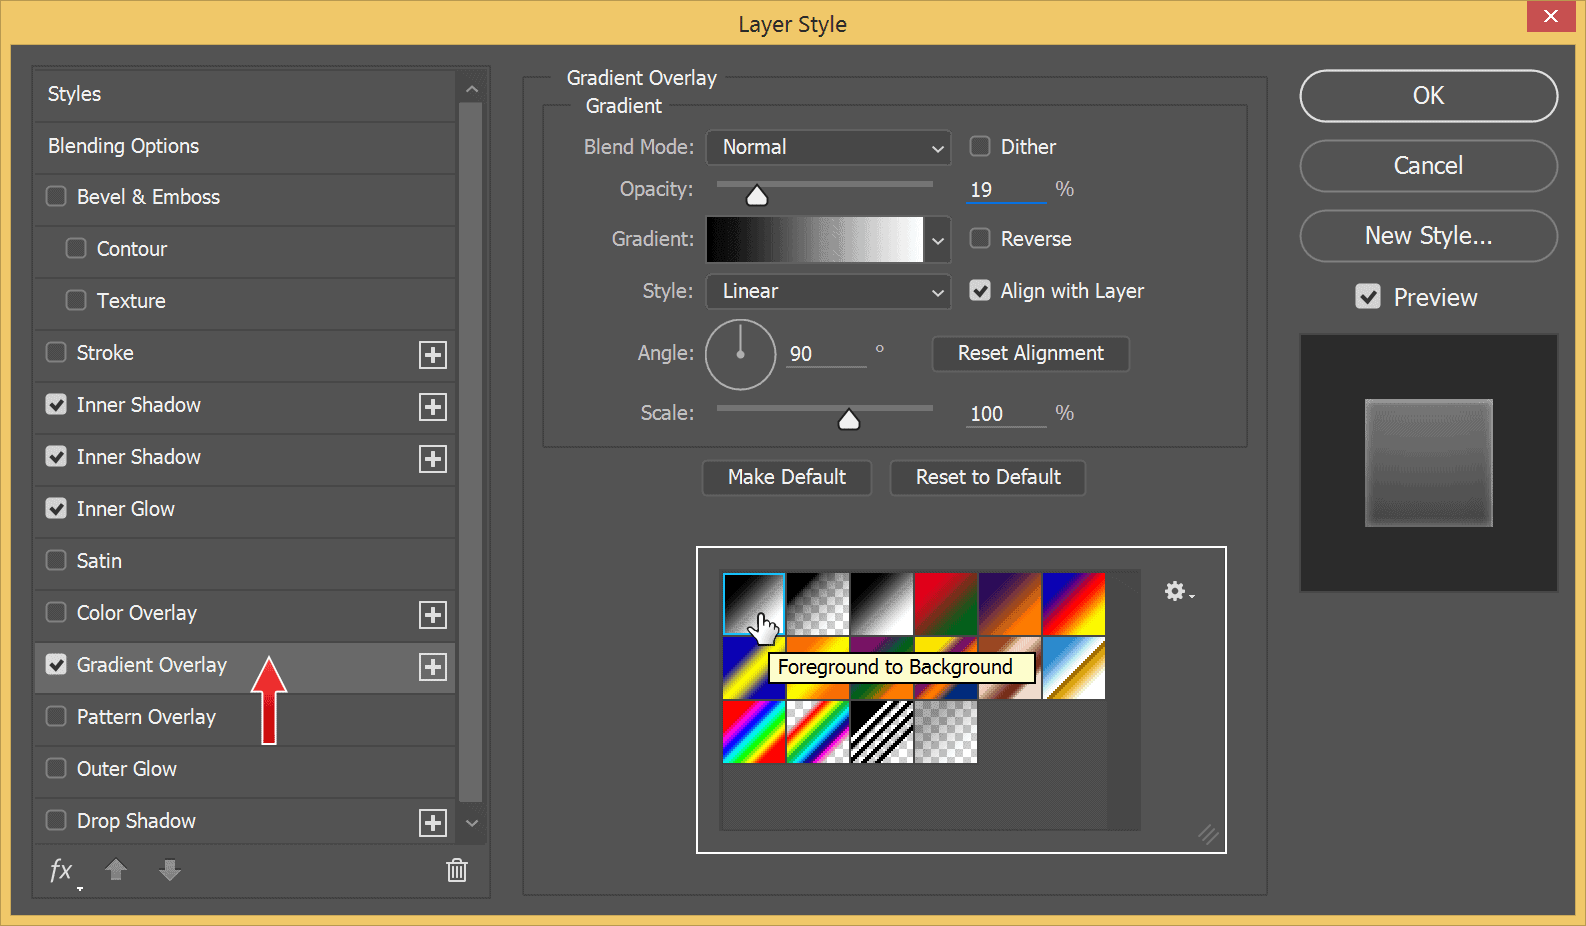
To keep the torn photo from appearing flat as a cartoon character, add Gradient Overlay. Select Black to Whitegradient from the list of available gradients.

Step 28
Finally, Drop Shadowis a must. Use the settings seen below. We’re done with the Layer Style, click OKbutton to apply them.

Step 29
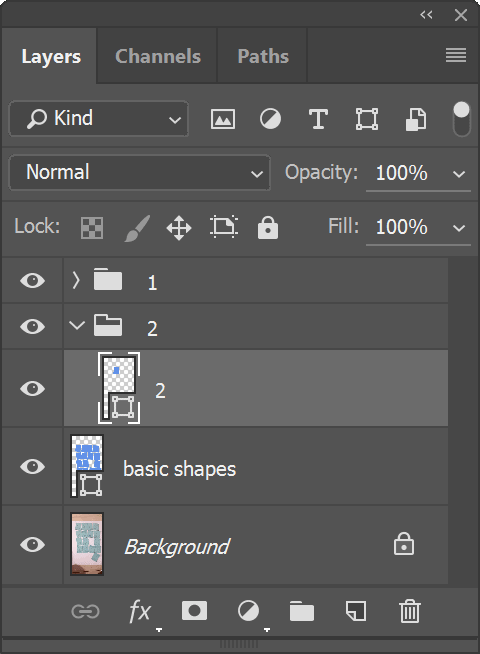
Each piece of the torn photo will be made up of several layers. To keep each piece organized, the best idea is to keep it in a group folder. Hit Ctrl + Gto put the active layer into a group folder. Make sure to give the group layer appropriate name too, as simple as 1for first piece, 2for second piece, and so on.

Step 30
We are going to use the same layer style for all pieces of torn photo. We can simply copy the layer style and paste it onto the designated layer. Right click the layer in Layers Paneland select Copy Layer Style.

Step 31
The next step is making the second piece. Select the second shape, hit Ctrl + J to duplicate it to new layer.

Step 32
Place it in a separated group layer and give appropriate name.

Step 33
Right click the layer and select Paste Layer Styleto apply layer stye setting we put earlier to the first piece.

Step 34
Continue this process until we have all the pieces in individual group layer.

Step 35
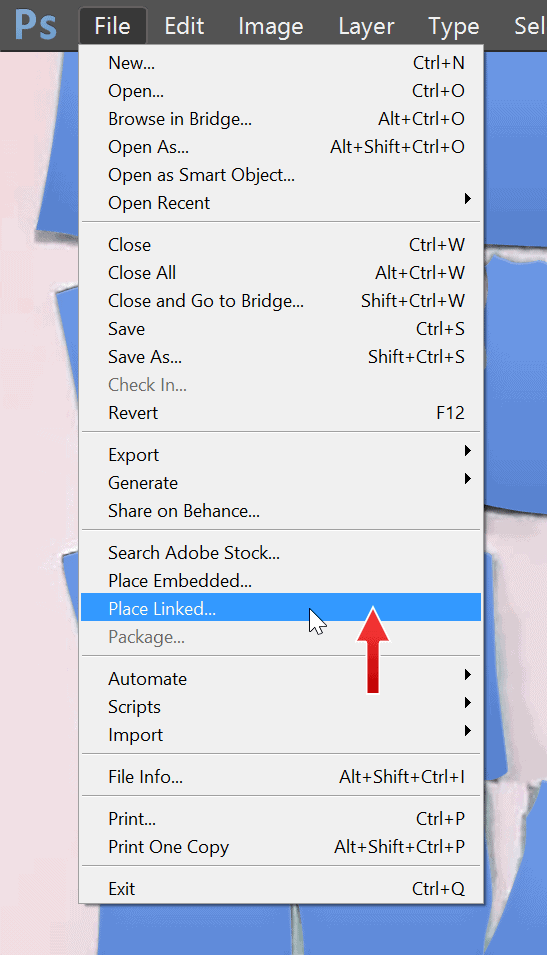
Let’s insert the guide file. Click File >Place Linked.

Step 36
A dialog box will pop up asking us to choose a file. Select the file guide we made earlier. Place it on top of the torn photo. Its size should matched the size of the torn photo.

Step 37
Duplicate the 6R Photo layer into each group layer by Alt+ dragging it.

Step 38
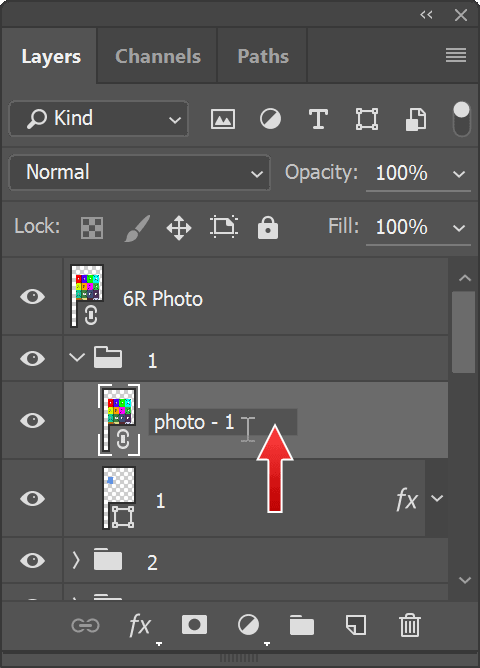
As usual, give the duplicated layer a decent and recognizable name, something like photo – 1. That should allow us to know which is which. This duplicated layer should be placed right above the shape of the photo piece.

Step 39
Turn the photo into Clipping Maskby hitting Ctrl + Alt + G. This way, the guide file will be clipped by the shape of the photo piece underneath it.

Step 40
Again, duplicate the guide file into the second piece. Rename its layer to photo – 2for clearer identification. And as in the first case, convert it into Clipping Maskby clicking the Ctrl + Alt + G.
One response to “Making Photoshop Mockup of A Torn Photo”
-
Nice.


Leave a Reply