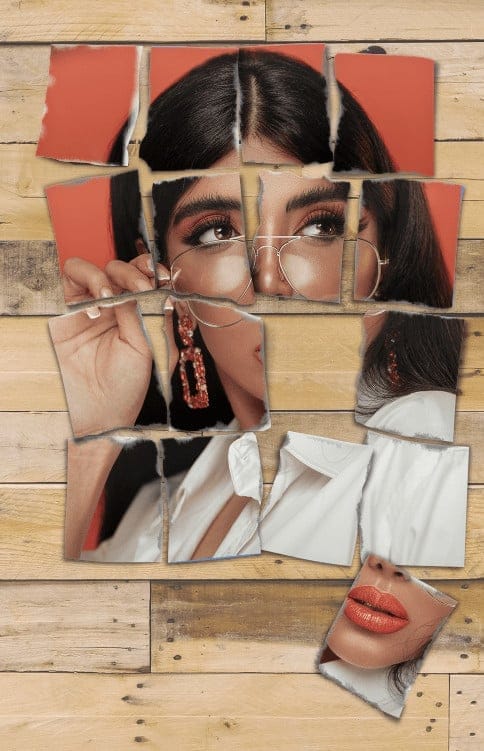
The latest season of TV series Saul Goodman had a series of photos of its cast torn apart. Of course, the most natural way to do this is just really torn them apart and then photograph them. But, for the sake of this tutorial and since not everyone has proficiency in photography –myself included– we’re going to replicate this effect using Photoshop. To follow this tutorial, you can use Photoshop CC 2014 or earlier versions. We are going to use Linked Smart Object, manual painting, and some clever warp transformation to tear apart the photo. Are you ready? Let’s get it on.
Preview of Final Results

Tutorial Resources
You can use your own image. In fact, I encourage you to do so. Using your own resources might add extra motivation to achieve the best result.
- Photo of torn photo on floor– jeprie
- Portrait of Woman– @amiwnrk
- Woman in White and Black– @whitewatermedia
- Wooden Pallet– @wesleyphotography
Preliminary Steps
Cut out an 6R sized paper (6 inches x 8 inches). Divide it into 16 rectangles, draw some lines and number inside each rectangle.

Tear each rectangle by hand. Don’t use ruler or tools, like a scissor or utility knife, to help straighten to result. Try to keep it as realistic as possible.

Place each rectangle on a flat surface and take its photograph. We’re going to use the photograph as a guide in placing the torn photo. You can do a lot more if you want to, for example scattered the position, such as putting the rectangle number 11 out of place. You can also blow the rectangles and took their pictures while they are suspended in mid-air. There is no limit to what you can do. Just be creative. As for this Photoshop tutorial, we are going to use the following photo as a base.

Step 1: Making The Guide File
First part of the tutorial is making the same guide, which is the 6R photo size paper in Photoshop. Click File > Newand then set its Widthand Height to 6 inchesand 8 inches. Click Createbutton to make the file.

Step 2
Activate the Rectangle Tooland set its mode to Shape in the Options Bar. We are going to use this tool to draw the 16 rectangles inside the paper guide. We already know the size of the rectangle, it is 1/4 of the canvas width and length. To make an accurate size rectangle, click the canvas to pop up a dialog box. The width should be 1,5 in. And you know what? You can do simple calculation inside the input box. Set the height to 8/4 inand let Photoshop calculate it for you. Click OKbutton to create the rectangle.
1 response to “Making Photoshop Mockup of A Torn Photo”
-
Nice.


Leave a Reply to AnonymousCancel reply