Step 50
Set foreground color to black and Brush Opacity, which can be found in the Options Bar, to 50%. Paint on the piece’s edge to hide it and reveal the original we had earlier. That original shape is going to be the paper color.

Step 51
Do the same to the next piece.

Step 52
Keep on doing this to the other pieces.

Step 53
Here’s the result to the rest of the pieces.

Step 54: Adding Shadows
We have added shadow to each piece using its own layer style setting in the shape of Drop Shadow. But, it’s not enough. To fix it, we need to paint the shadows manually. Activate the Brush Tooland select brush type with soft edges.

Step 55
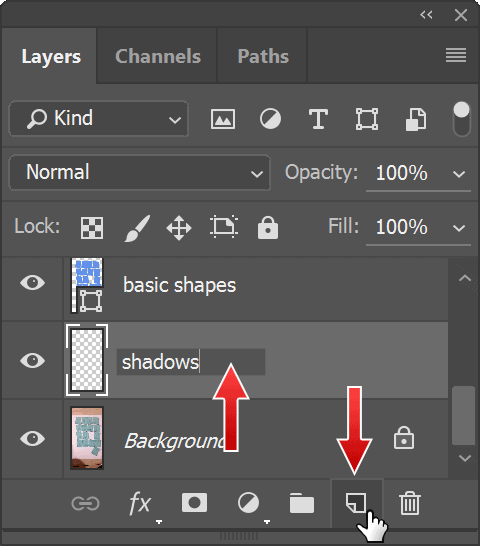
We also want to paint the shadow in its own layer. The shadow layer should be at the bottom of all the layers and one step above the Backgroundlayer. Using the Brush Tool, carefully draw a big shadow at first.


Step 56
And then delete unneeded shadow using the Eraser Tool. Hit 1from the keyboard to decrease the Eraser’s Opacityto 10%to help you erase the shadows gradually. Use greater Opacityfor faster result.

Step 57
Paint smaller and darker shadow right underneath some of the piece’s edge. Use the Brush Toolwith smaller brush tip and higher Opacitysetting.

Step 58
Let’s take a look at the result when an actual photo is added. Double click the Linked Smart Objectthat we put at the top of all layers.

Step 59
The guide file will be opened in Photoshop in a separate window. Anything we do to this file will be reflected back to the mockup file. Let’s take an image from unsplash.comand paste it on top, covering the multi-colored rectangles. When this mockup is finished and functional, we no longer need those rectangles and can get rid of it. But for now, we’ll just leave it be.

Step 60
Save the guide file that we have updated and then close it. Photoshop will automatically update the Linked Smart Object layer. This might take a while depending on your machine and the file size. Be patient. Once everything is clear, you will no longer see pieces of multi-colored rectangles but a torn photo.


Step 61
To change the paper color, double click thumbnail of the basic shapeslayer. A Color Pickerdialog box will pop up. Select new color and click OKbutton to confirm new color.
One response to “Making Photoshop Mockup of A Torn Photo”
-
Nice.


Leave a Reply