Luminar AI lets you turn your ideas into reality with powerful, intelligent AI. Download the photo editor and see how you can completely transform your photos in a few clicks.

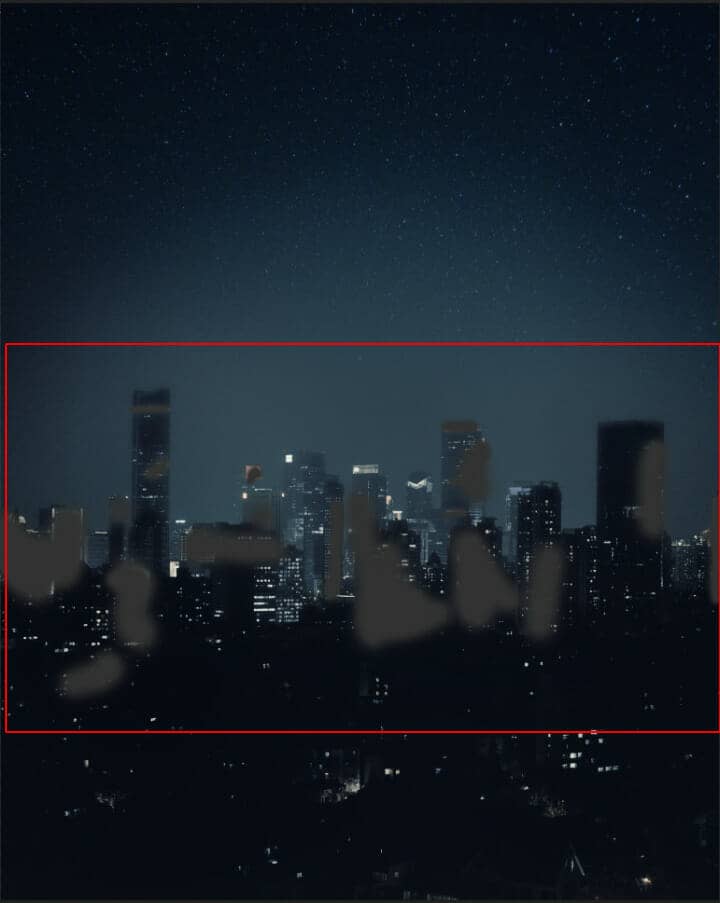
Blend mode change to Color Dodge
Step 8
Next, place Moon Go to File > Place and select Moon. Then place it to our work canvas and position the image with the transform tool (Ctrl / Cmd + T). Hold Alt + Shift and rasterize like the image below. In Photoshop CC only hold Alt to rasterize all sides together.
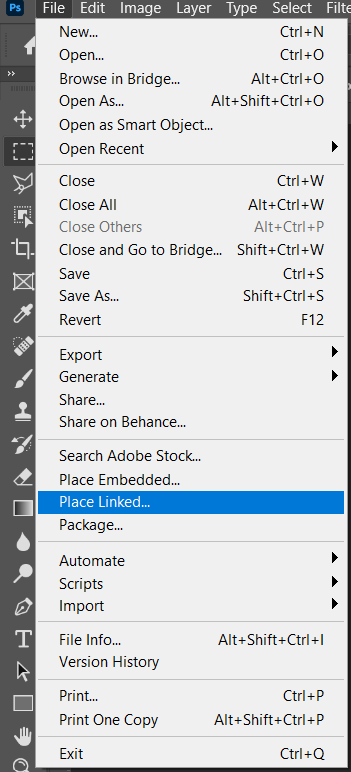
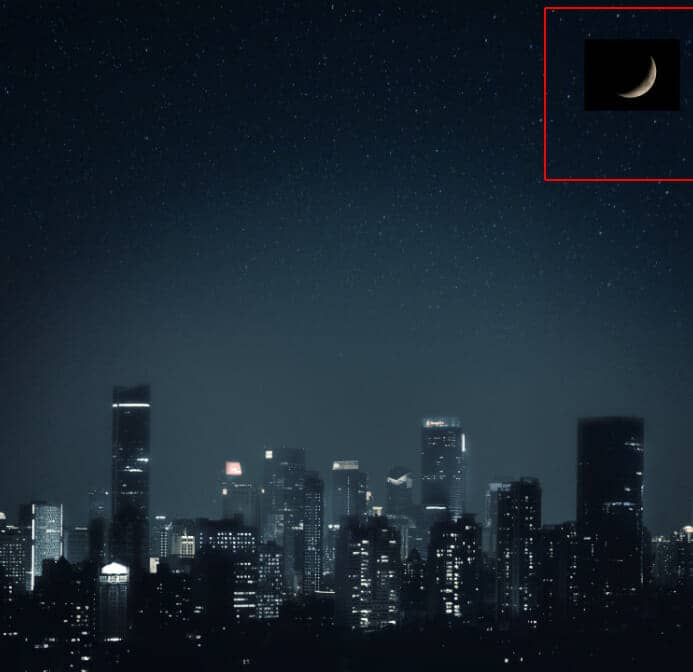
Blend mode change to Screen

Step 9
Add Adjustment Layer "Hue/Saturation"
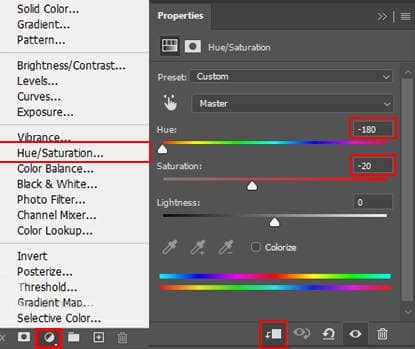
Step 10
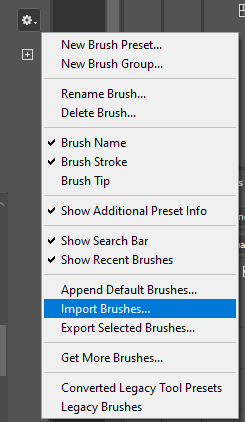
Next, we will add Comets but first, we need to import brushes. Select a Brush Tool(B) and right-click on the background. Now click on the gear icon and Import Brushes (Select a downloaded brush).
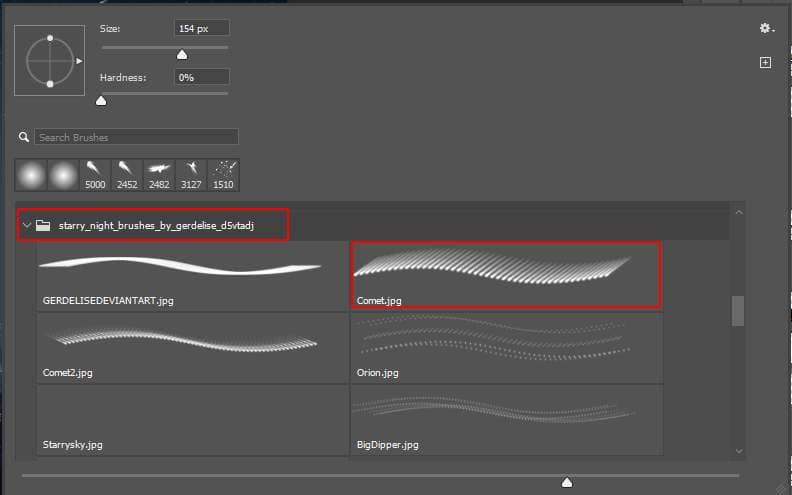
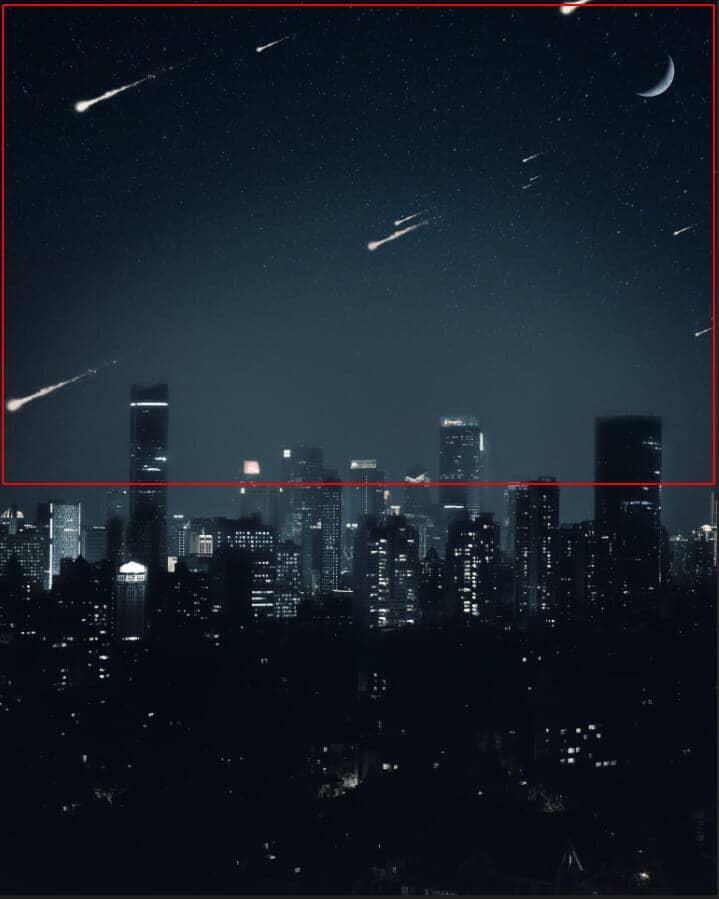
Now we can paint comets. Create a new layer and change the blend mode to Exclusion with the foreground color white.
Step 11
Create a new layer and change blend mode to Overlay, then use a Brush Tool(B) Soft Round with foreground color white. Then paint the center area.


Step 12
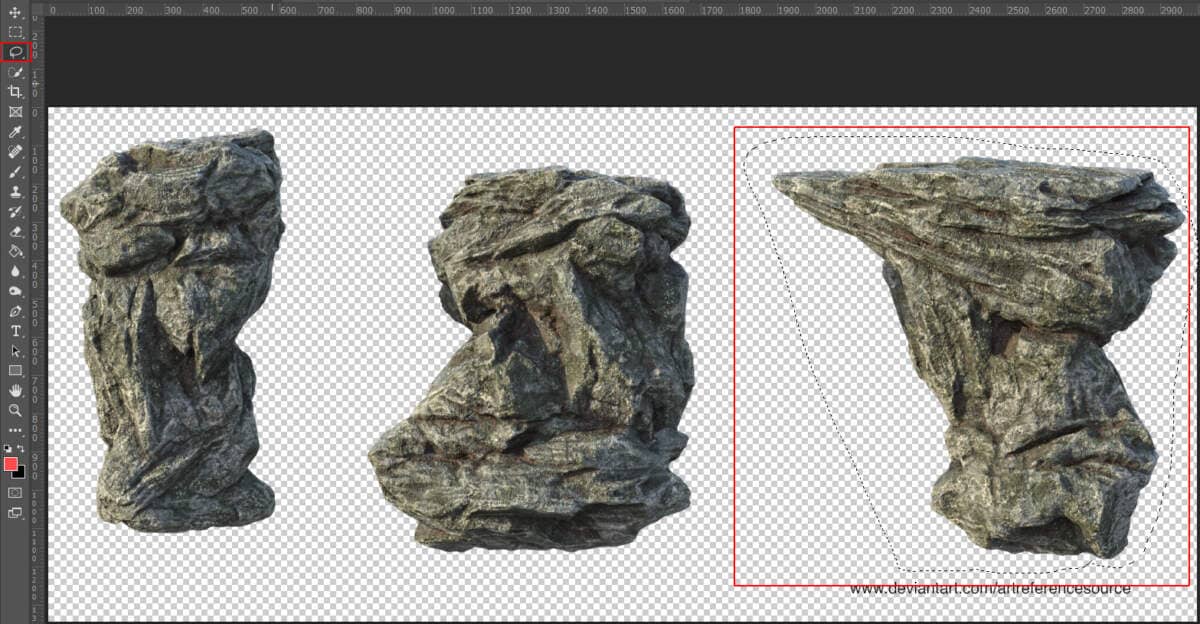
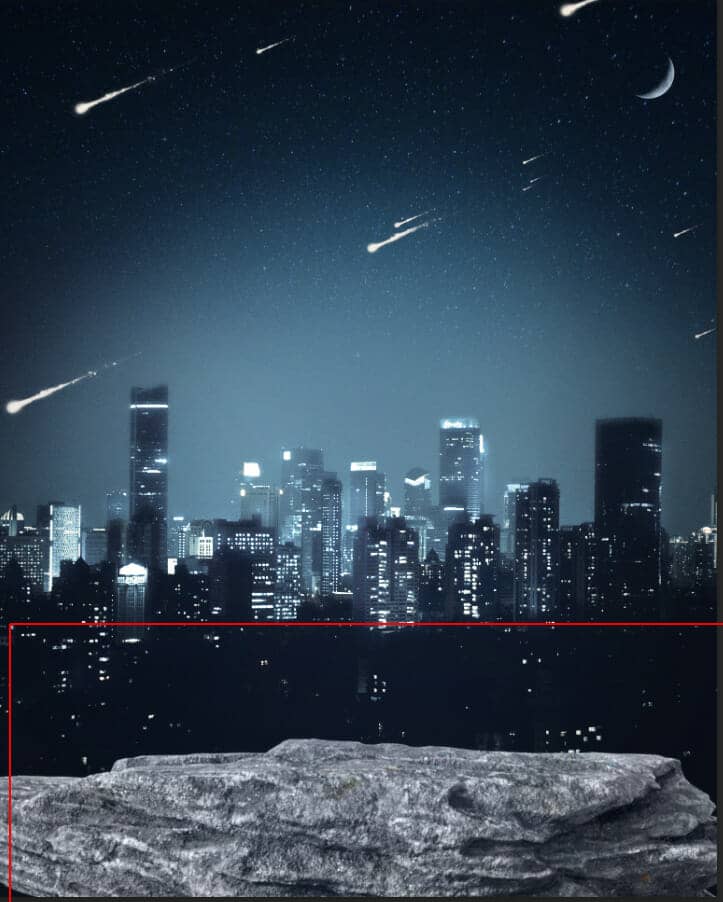
Next, we will open a Stone. After you open the image, use Lasso Tool(L) and select stone. After the selection area has been created, simply copy (Ctrl / Cmd + C) and Paste (Ctrl / Cmd + V) it to our work canvas. Then position the image with the transform tool (Ctrl / Cmd + T). Hold Alt + Shift and resterize like the image below. In Photoshop CC only hold Alt to resterize all sides together. Blend mode change to Luminosity.
Step 13
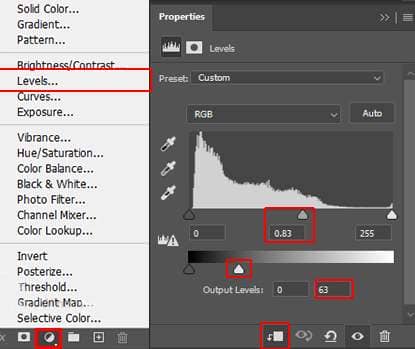
Add Adjustment Layer "Levels"
Step 14
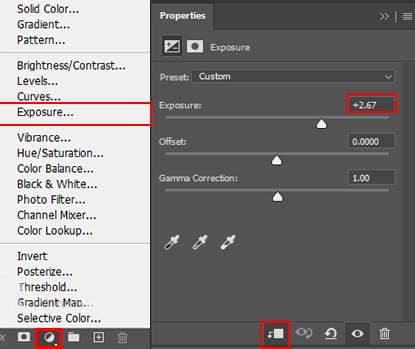
Add Adjustment Layer "Exposure" and press Ctrl/Cmd + I to invert and use Brush Tool(B) Soft Round with foreground color white and paint the highlight parts.

Step 15
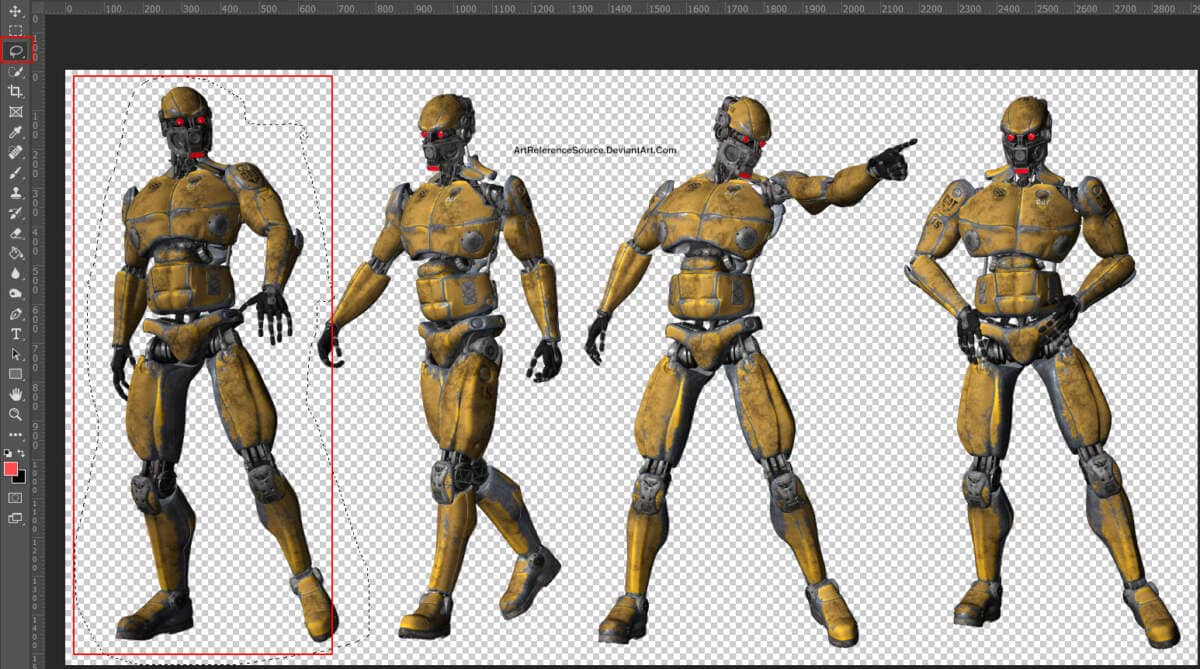
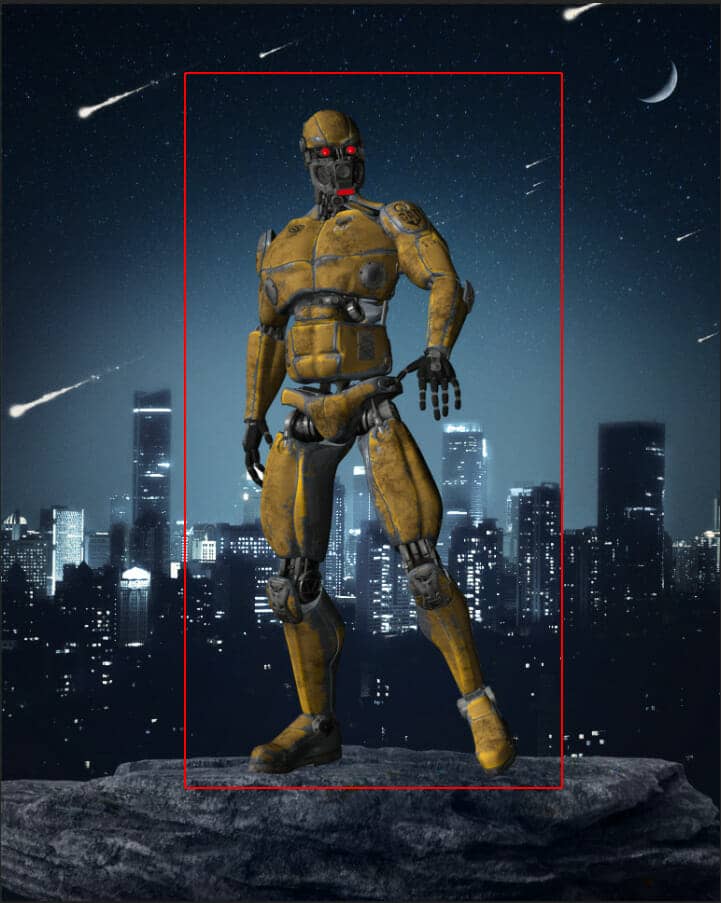
Open a robot image and use Lasso Tool(L) and select the first one. After the selection area has been created, simply copy (Ctrl / Cmd + C) and Paste (Ctrl / Cmd + V) it to our work canvas. Then position the image with the transform tool (Ctrl / Cmd + T). Hold Alt + Shift and resterize like the image below. In Photoshop CC only hold Alt to resterize all sides together.
Step 16
Select the robot layer and create a new layer for shadow. Use Soft Round Brush Tool with the foreground color black and paint the shadow. The flow of the brush set to 10% and blend mode change to Multiply.


2 comments on “A New Age is Coming Photoshop Tutorial”
Interesting, thanks for the details and concept. Learned a few things too.
great tutorial thank you look forward to seeing more