Step 7
Import the Bubble brushes. Create a new layer and use the bubble brush as I did in the image below.

Step 8
Import the Fish brushes. Create a new layer and use one of the fish brushes to create a couple of small black fish in the underwater. Lower the opacity of the fish layer to 50%.

Step 9
Open the psd file “Fish”. Select a fish with the rectangular marquee tool. Copy and paste the fish into our working document. Convert the newly imported layer to a smart object (right click the layer and choose “Convert To Smart Object”). This will allow us to resize the layer without actual loss of pixel data. Place the fish near the left side of the underwater. Press Ctrl + D to duplicate the fish layer and move it next to the other fish.

Step 10
Import the light brushes. Create a new layer and change it�s blending mode to Overlay. Using one of the light brushes create a light as I did in the image below. Change the fill of the layer to 31%.

Step 11
Create a new layer and change the blending mode to Overlay. Use the light brush again to create a new light. Blur this light with a 20px Gaussian Blur (Filter > Blur > Gaussian Blur). Lower the fill to 51%. Create a layer mask and mask the half upper portion of the light.

Step 12
Duplicate the light layer and drag it to the left.

Step 13
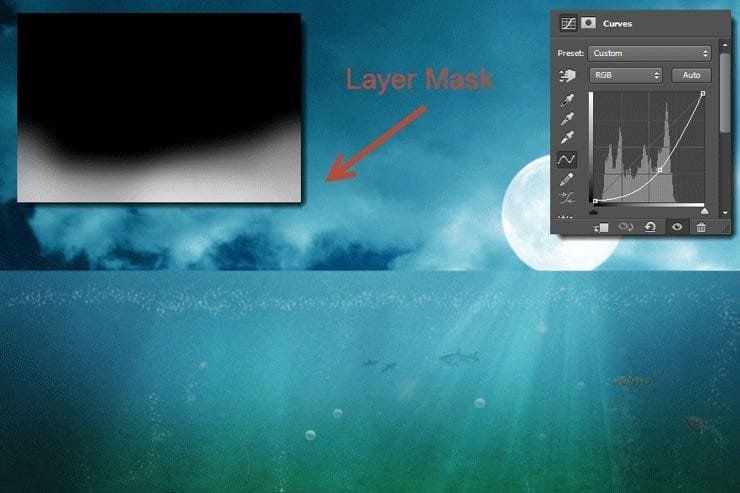
Create a new curves adjustment layer. Drag the curve down in order to darken the scene. Fill the layer mask with black. With a white brush paint on the bottom of the scene in the layer mask to reveal the darkening effect.

Step 14
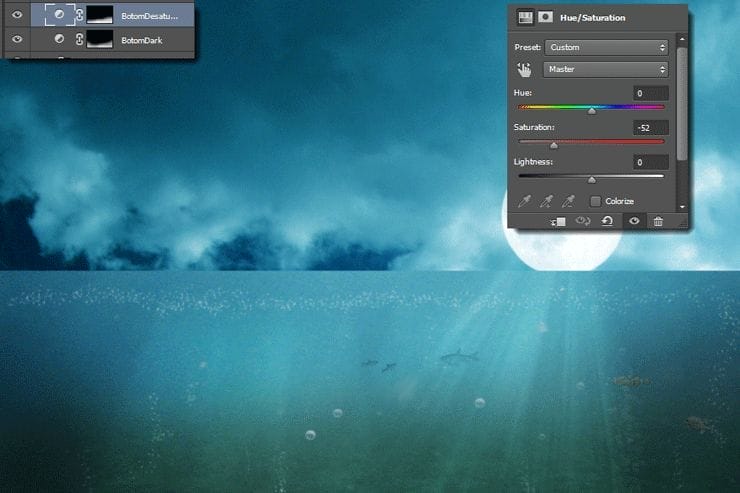
Create a hue/saturation adjustment layer. Below are the settings I used. Fill the layer mask with black and paint with white on the bottom of the scene (like I did on step 13). The reason we do this is because usually underwater should be darker and more desaturated than the rest of the scene.

Step 15
Open the image “Sea”. Copy all and paste into the working document.

Step 16
Create a layer mask for the sea layer. With a black brush paint in the layer mask until you have something resembling my result below.

Step 17
Create a Curves Adjustment layer and clip it to the sea layer. Drag the curve up to lighten the waves.
8 responses to “Amazing Surreal Shark Photoshop Tutorial You Have to Try”
-
wow amazing, thx for tutorial.. :D
-
great
-
Excuse my language, but, this looks bloody terrifying! Thank you for sharing!
-
excuse my language, but this is insane
-
-
thank you for uploading and creating this tutorial man–much appreciated!
-
nice
-
Wow Great work
-
Nice work


Leave a Reply