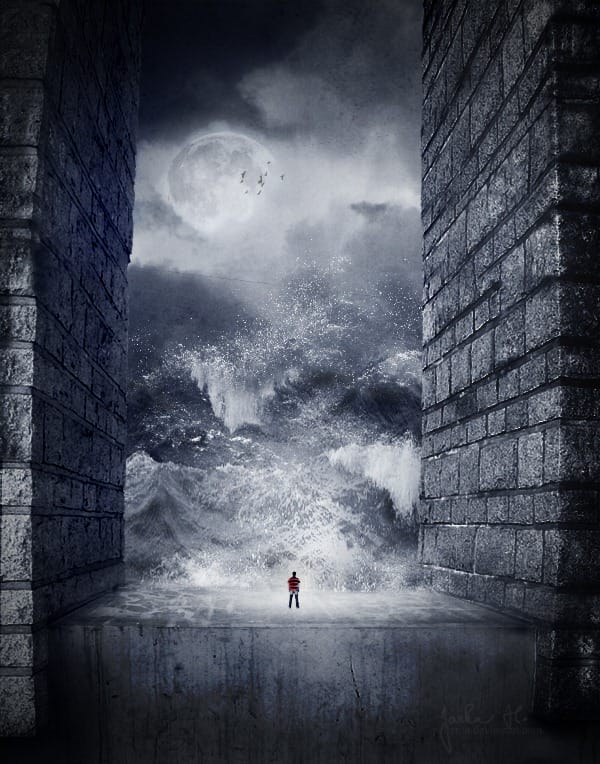
Learn how to create this amazing apocalyptic photo manipulation with Photoshop! You’ll learn how to blend elements such as water and moon, create seamless structures with the Clone Stamp tool, and finish it off with a cold movie photo effect.
Preview of Final Results

Intense Apocalyptic Photo Manipulation Photoshop Tutorial
Resources
- Wall – Pelleron Art
Step 1 – Preparing the Wall
Create a new document in Photoshop. Set the width on 600 pixels, height on 764 pixels, then press OK.

Now download the picture of the wall and drag it into the manipulation. Name the layer e. g. BACKGROUND WALL. As you can see the picture of the wall is too bright. To make it darker add new adjustment layer Levels above the BACKGROUND WALL. The button Create new fill or adjustment layer can be found on the bottom part of the palette Layers. If you don’t see this palette simply press F7 on your keyboard.

I would recommend you to use adjustment layers instead of the direct adjustments (from Image > Adjustment > …). Thanks to adjustment layers you will be able to redo all the steps no matter if you did them on the beginning or at the end. Set the Input Levels as shown below.

Right click on the Levels adjustment layer and select the option Create Clipping Mask. This way the layer affects only one layer below not all of them. Below it’s shown the result of this step. Some parts of the wall are too dark but don’t worry about that. They will be covered with another layer.

Step 2 – Bending of the Wall
In this step you will bend the wall. It gives the picture bit claustrophobic feel which will evoke the mood of the picture better. Click on the layer BACKGROUND LAYER. Grab the Marquee Tool (M) and select the left part of the wall. Press Ctrl + C to copy the selection and Ctrl + V to paste it. Then press Ctrl + D to deselect it.

Place the new layer on the top of the layers and name it e.g. LEFT BENDED. Now go to Filter > Distort > Shear… and set the dialogue as you can see below. Move the line very gently. Otherwise it won’t look much realistic.

Click on the BACKGROUND WALL once again. Grab the Marquee Tool (M) and select the right part of the wall. Copy and paste that selection. Place the new layer on the top of the layers and name it RIGHT BEND. Now bend it the same way as it’s described above. Your image should look similar to the one shown below.
4 responses to “Create an Intense Apocalyptic Photo Manipulation”
-
Great !
this is my version
https://dl-web.dropbox.com/get/My%20Desing/dddddd.png?w=AABKFKWU0NYg1Q9Mqkyr-PaV4kPe3ya5LofvpCm2oBVYbAtahnks alot
-
this is all f up…missing instructions
-
very good but some resources not available … thanx any way for your excellent tutorial
-
GREAT!


Leave a Reply