In this tutorial, you will learn advanced tips to create different shapes made from fire and how to use filters, adjustment layers, and masks to create this stunning effect.
Preview of Final Results

Wings of Fire Photoshop Tutorial
Resources
- Model – rammkitty-stock
- Background – ro-stock
- Fire – resurgere
Step 1
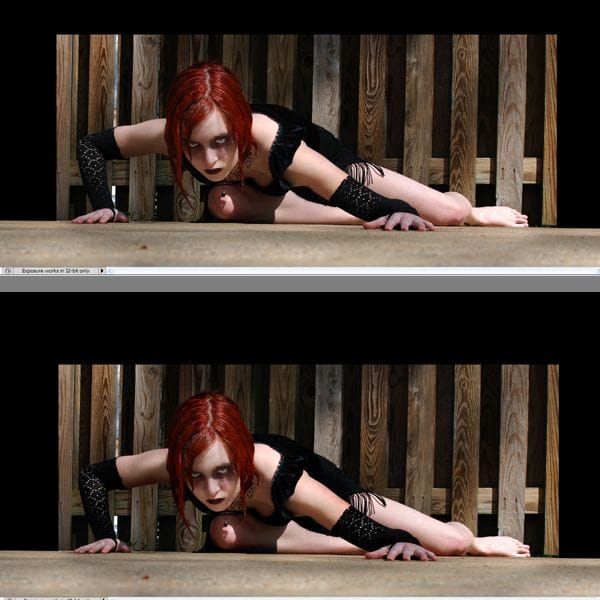
The first step is to open the girl’s image and crop it. We need more space for the fire wings and this is not enough.

Step 2
Now that we have the needed space our initial image is a bit small so cut out the middle part of the floor and place it in both lower corners.Create a mask and, with a brush, remove the edges so it will blend in.


Step 3
With dodge and burn add some highlights and shadow on the model.

Step 4
Cut out the model (use the pen tool ) and delete the background.

Step 5
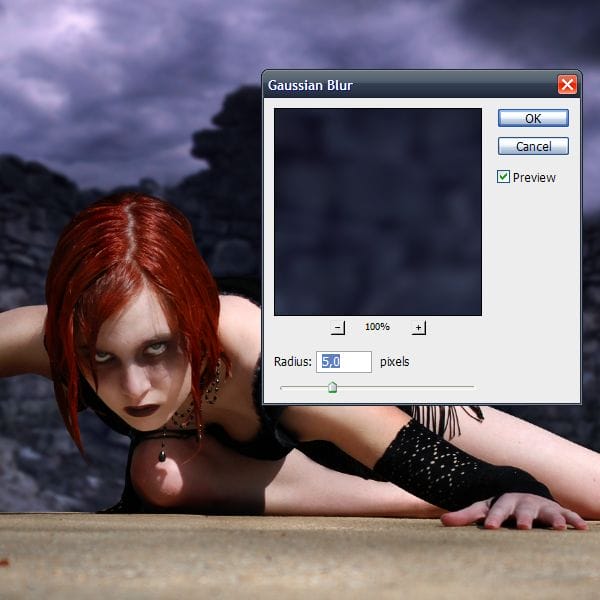
Next we will add the new background. Since it is to small for our large surface we need to enlarge it, so CTRL+J to duplicate the layer. Add a mask and erase the edges.


Go to Filters-Blur-Gaussian Blur (radius 5 px ) to give the background more depth.

Now it looks a bit to symmetrical but this can be resolved easily with the clone stamp brush.

Step 6
The background is dark and our model is too light so to blend her in we need to make her darker. Go to Adjustment Layers – Curves and use the presets like in the image below. Use the Curves on a clipping mask.

Step 7
In this step we need to paint some hair. This is very easy on a graphic table but it can be done with a mouse also. First select (eye dropper) a color from her hair and add some extra strings of hair. Just a few are enough. Look at the image below to see how it should look.

Step 8
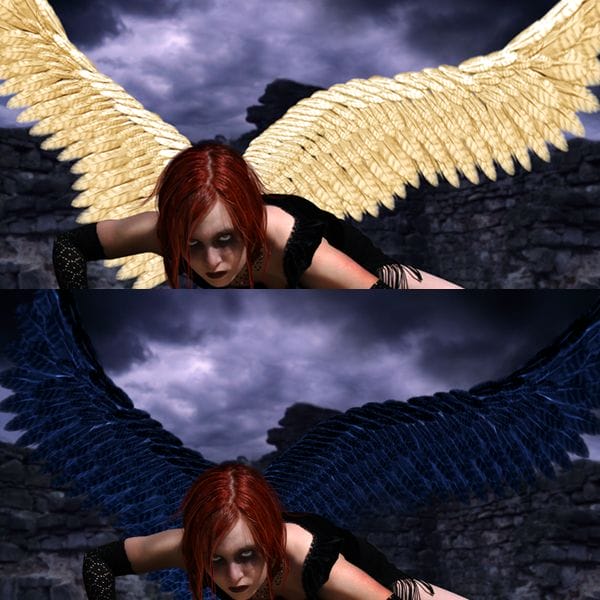
Take your wings stock and arrange them to your liking. After that hit Ctrl+I to invert the colors to create a dark basis for the flames.

Step 9
Take your flame stock and use the settings below in the Blend If panel form the Layer Style on the flame layer. Hold down the ALT key to split the black handle – this will create a smooth transition.


Step 10
Add more flame stock and make sure you clip them to the wing (clipping mask). This will give you a basis to add your flames to.

Step 11
Take some other flame stock and arrange it like in the image below. Again in the Layer Style – Blend If panel move the black handle so it gets rid of all the dark elements in the image below. Remember to hold down ALT while dragging to split the handle and create a smooth transition. Then erase on the mask the parts you don’t want showing and choose the Screen blending mode. You can experiment with other blending modes since you got rid of all the dark elements in the stock image from the Layer Style
9 responses to “Create an Intense “Wings of Fire” Photo Manipulation”
-
Great tutorial. thanks
-
Hi my is Ebrahim zarghoon i wont which you show me how can macked like you photos in photoshop thangs
-
thanks sir, for your tutorials really its wonderful. with hope that you will give us more tutorial.
thank you once again -
Really a nice work hope you will uplode more in the future.
-
Hello Loredana Papp,
You are simple Awsome. I don’t have words to praise you. I become a huge fan of yours now. Thanks again for sharing your wonderful and creative art :)
-
Very interesting, I Love this tutorial!
-
Awesome!!! Wings of Fire” Photo Manipulation
Thanks -
u rock its reallly nice concept ( flaming wings )…really nice work
-
Model – rammkitty-stockBackground – ro-stock
dosnt exist :(

Leave a Reply