


Luminar AI lets you turn your ideas into reality with powerful, intelligent AI. Download the photo editor and see how you can completely transform your photos in a few clicks.
In this tutorial that explains in detail how to create a cool and dynamic wallpapers! Over following pages, you will discover all of the tricks and techniques, that I have used in this artwork. Also, I will tell you how to create a realism and weather events. Grab your mouse and a big cup of coffee, because today we are going to a very secret mission. Check it out, and you might learn some neat tricks!
What you'll be creating
Okay, let's start with the tutorial: create a new document and add the image of port, containers and city, change the sky. All this mixed together and add a few more main details. Then go to soldiers and military equipment. The next stage of work on realistic lighting and color mood of the picture. Completing the special effects photo manipulation and sharpening. Whatever version of Photoshop you are using, you will be able to follow this tutorial along.

Tutorial Resources
- Container Vessel - Freeimages
- Containers (2446x3654) - Pixabay
- Sky (6257x4144) - Pixabay
- New York City (2984x1967) - Pixabay
- Helicopter (1988x1491) - Pixabay
- Boxes - AreteStock
- Soldier 1 - PhelanDavion
- Soldier 2 - PhelanDavion
- Optical Flares - daWIIZ
Step 1
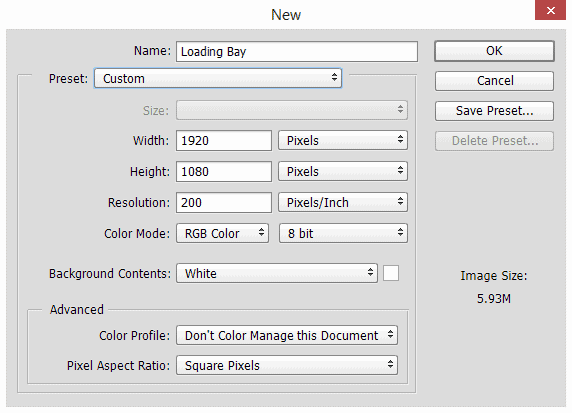
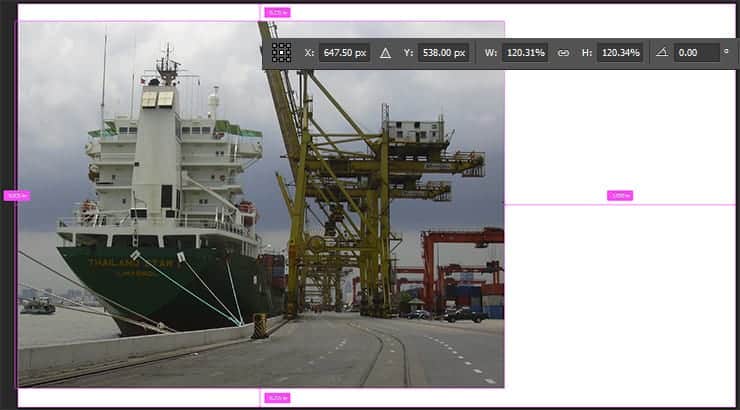
First I opened up a new document named "Loading Bay". Size was 1920x1080, Resolution 200 Pixels/Inch. Go to File > Place Embedded, and open "Container Vessel" image.
Resize it (Cmd/Ctrl + T or go to Edit > Free Transform) as shown in image below, and then tap the Return key to accept the changes.
Step 2
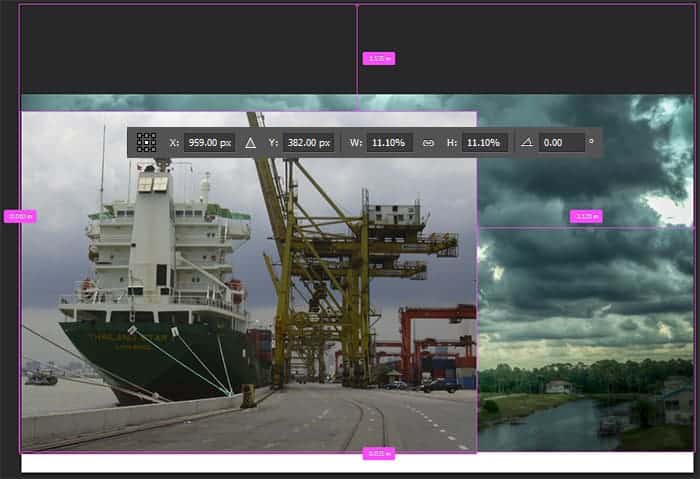
Placed image of the sky under the layer with the ship and transformed it to fit my picture properly.
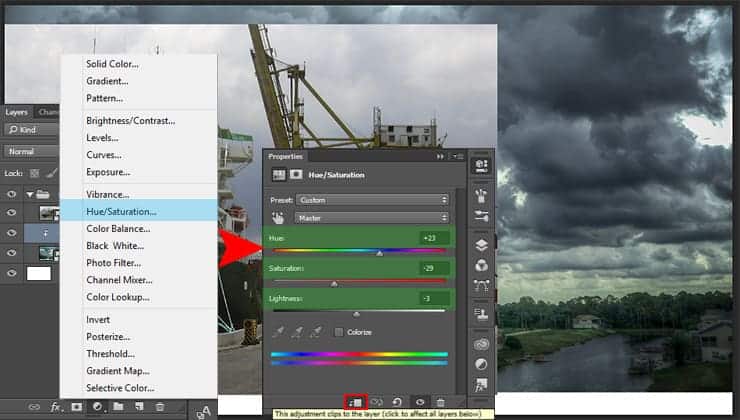
I changed the color of the sky, so that the image more suited to the picture. Create a new Hue/Saturation adjustment layer (Layer > New Adjustment Layer > Hue/Saturation or use "Create new fill or adjustment layer" icon at the bottom of the Layers panel). Change the Hue: +23, Saturation to -29, Lightness: -3. Click the "Clip adjustment to layer" icon at the bottom of the Properties panel.
Step 3
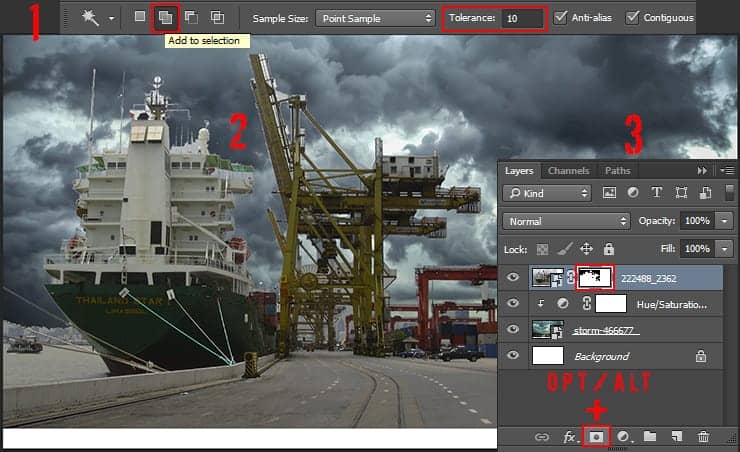
Go back to ship's layer. Now I used Magic Wand Tool (W) with Tolerance: 10 and "Add to selection" option. Start to select a sky. Try to capture every possible fragment of the sky, but do not pay attention to the remaining small pieces, then we will remove it. Also, try to not got into the selection a ship fragments. Hold Opt/Alt (to inverse a layer mask) and click on "Add Layer Mask" icon to remove a sky.
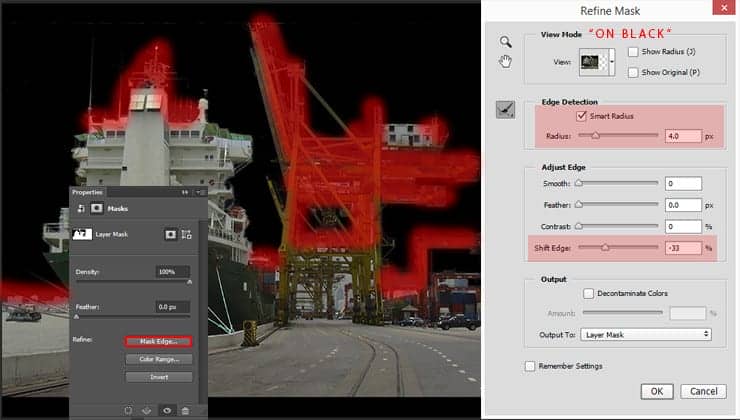
Double click on a layer mask and you go to Mask Properties. Click on "Mask Edge" button. In window "Refine Mask" set view "On Black", checkbox on "Smart Radius", Radius: 4.0px, Shift Edge: -33. Use brush in this window to remove the remaining pieces of the sky throughout the image. Voila, now all unwanted pieces gone and the open horizon of opportunities.
Step 4
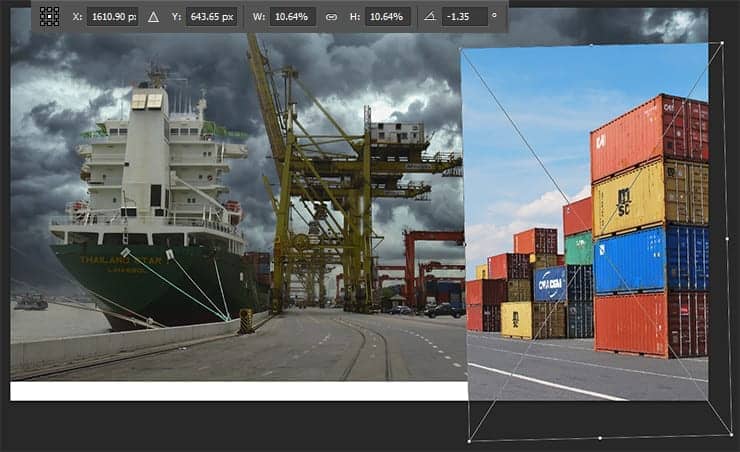
Place "Containers" image (File > Place Embedded). Resize the image is not necessary, only Rotate it on -1.35 degrees, tap the Return key to accept the changes. Position the image to part of the containers with the first plan was hidden beyond the boundaries of the work area and containers conform to distance of whole image. In such a way, with Magic Wand Tool (W) select a sky and holding Opt/Alt, click on "Add Layer Mask" icon to remove a sky. Do not touch the asphalt in this image, it is still useful to us.
Create a new layer (Cmd/Ctrl + Shift + N or use "Create New Layer" icon) set default colors (D), switch them (X) and use Cmd/Ctrl + Del to fill layer. On Layer panel set Fill around 20% and clip this layer to containers (hold Opt/Alt + click between layers). This removes excess brightness from containers.
7 comments on “Create a Surreal Secret Mission Scene in Photoshop”
This is a GREAT tutorial! I’ve already started working with your tutorial and learning new things , thanks a lot
Great ! Thank you, Maria !
A very big "thank you" for your tutorials. I wrote you on DA to give you credit as well. I changed the military men to zombies just for fun. Learned an incredible amount from this. You do such mind-blowing work!!!
Very well done. I've been using Photoshop for many years but I learned a few new tricks from this Tutorial. Thanks for posting, and the great instructions.
perfect
Thank you for this tutorial. I really enjoyed and makes me improve my use of photoshop.
Thank you for this tutorial. I really enjoyed and makes me improve my use of photoshop.