Make skin look perfect in one-click with these AI-powered Photoshop actions.
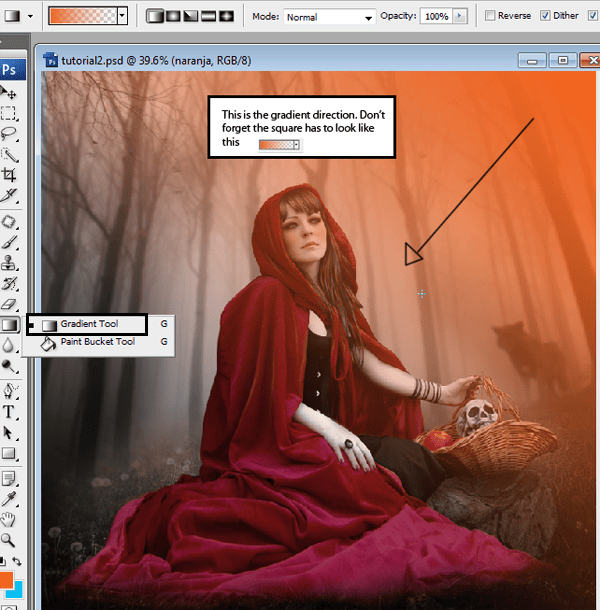
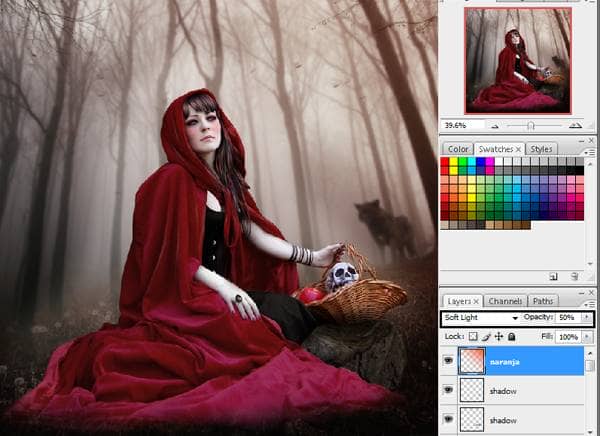
Use the layer with soft light 50% of opacity.
Step 47
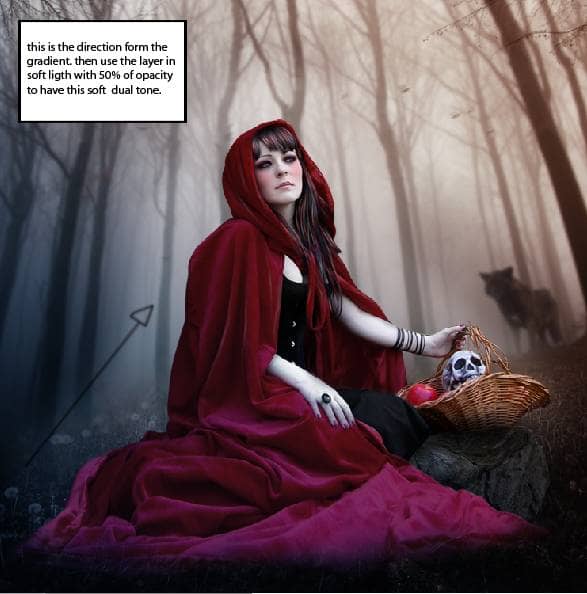
Repeat the process with a blue tone.
Step 48
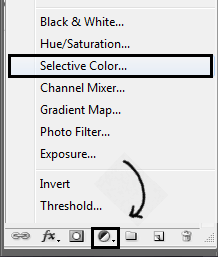
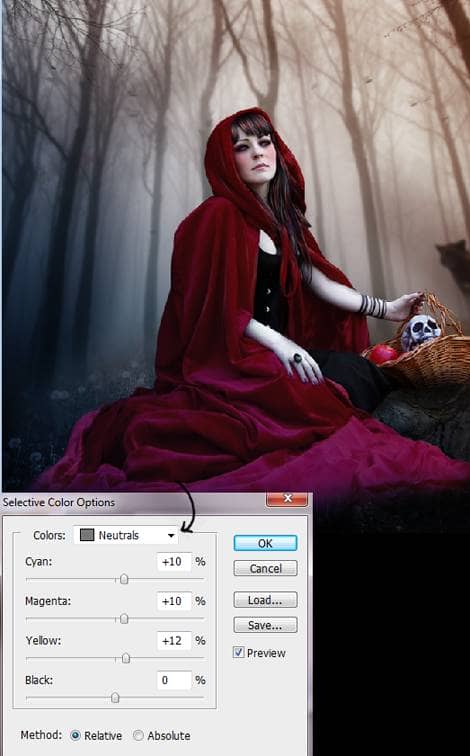
Go to the option "create a new fill or adjustment layer". Press the option selective color.
Go to the option neutral and change the numbers like this:
Step 49
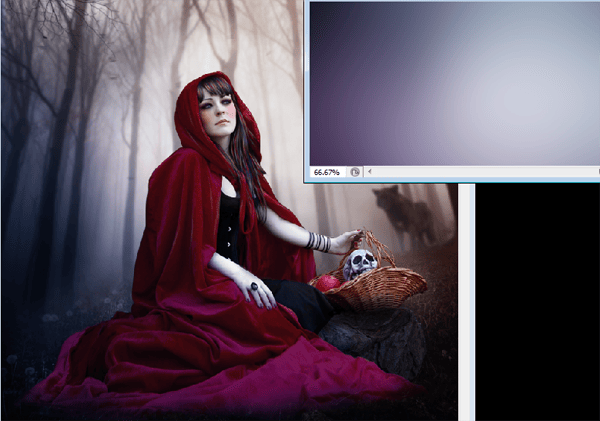
I create another gradient with some colors to create a nice light effect.
Step 50
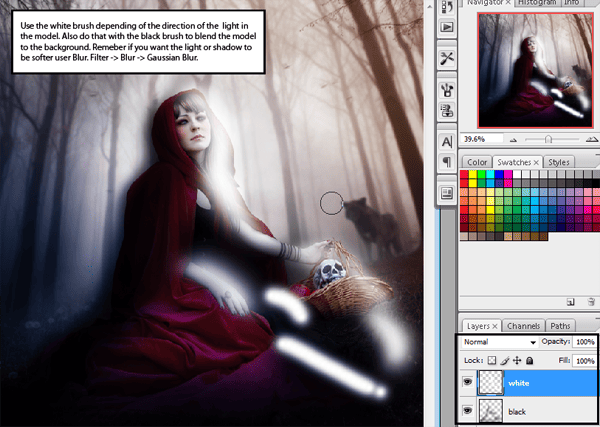
In a new layer used a black soft brush and in another layer a white brush to create shadows and lights.
Step 51
Paint with blue and yellow over the model.
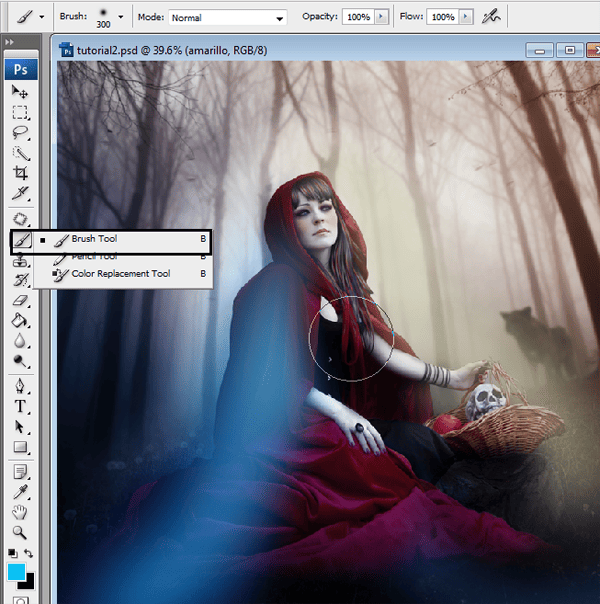
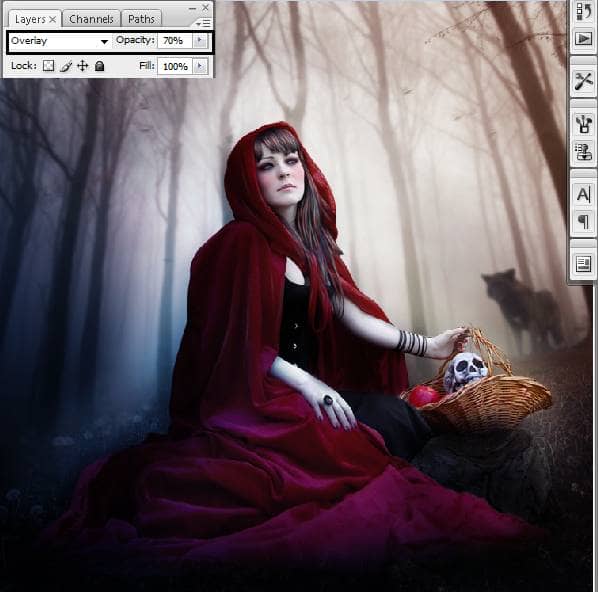
Change the layer to overlay with 70% of opacity.
Step 52
In a new layer use the elliptical tool to make a circle.
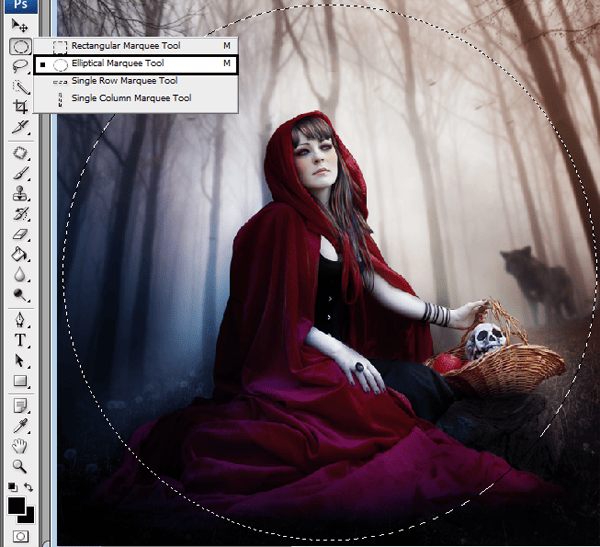
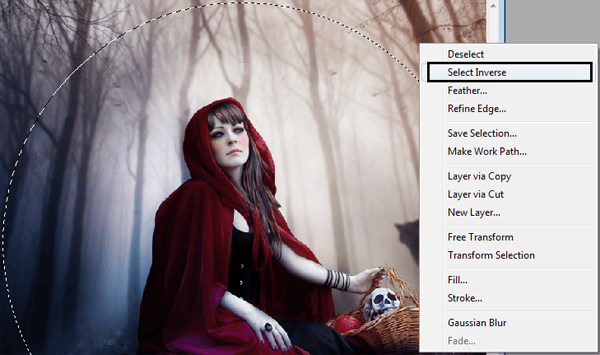
Press right click and the click in the option "select inverse".
Use the paint bucket like this:
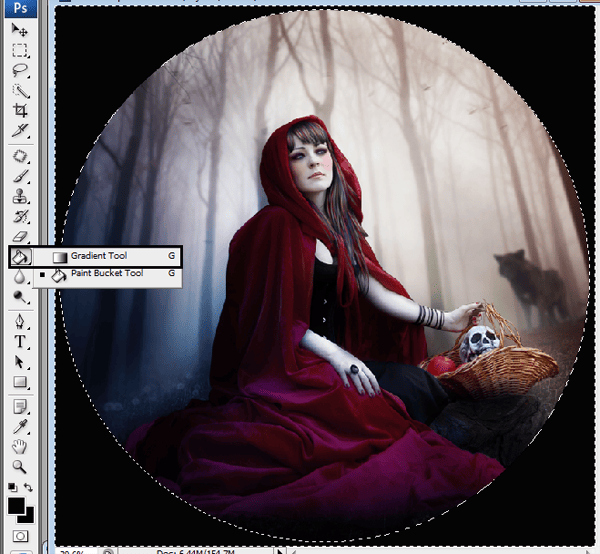
Then go to Filter - blur - Gaussian blur. Add 150 to radius.
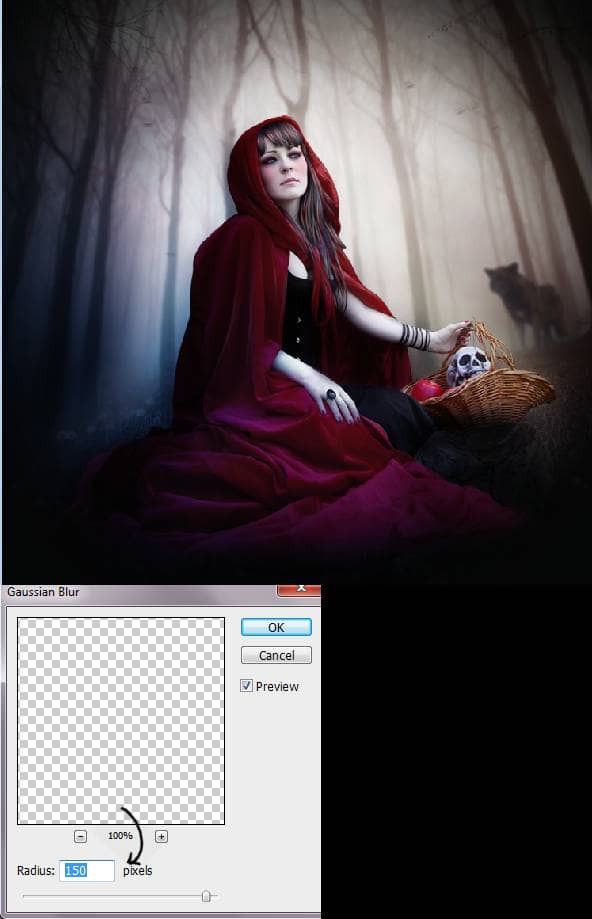
Step 53
The Final touch is change the side of the circle, so the image can be clearly. Press CTRL+T. and made the layer bigger I used 125% bigger.
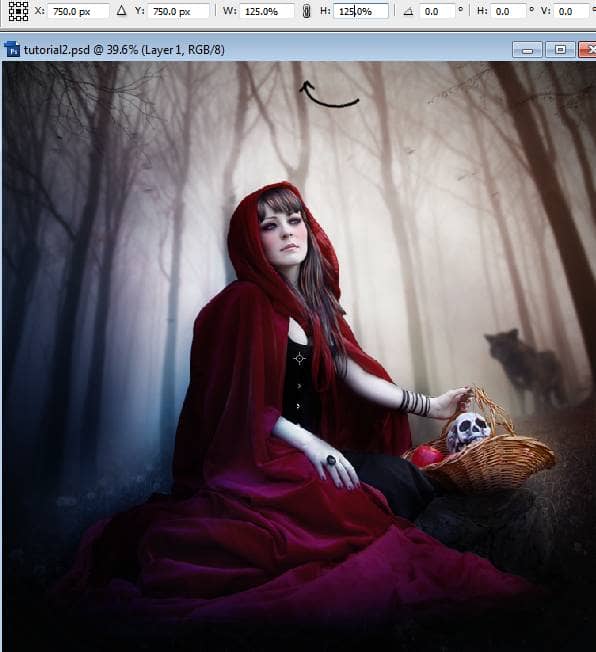
Final Results
![final-results[1] final-results[1]](https://cdn.photoshoptutorials.ws/images/stories/7b116e83e9e8_C193/final-results1.png?strip=all&lossy=1&quality=70&webp=70&avif=70&w=1920&ssl=1)


 I hope you get good results with this tutorial. You can check more of my art at:
33 comments on “How to Create a Red Riding Hood Artwork in Photoshop”
nice tutorial :)
loved it
Was forced to do this but still good work on the tutorial
Elegant, modern, very different..
Awesome...!!!
nice
As a beginner ,i appreciate it.thank you
i lkie artes!
Thank you. Here is my result http://cartercho.deviantart.com/art/The-lost-apples-345213469?ga_submit_new=10%253A1356706307&ga_type=edit&ga_changes=1&ga_recent=1
try hard...
Love the tutorial thank you, heres a link to my final product http://1artpro.deviantart.com/art/Red-Ridinghood-350746058?ga_submit_new=10%253A1359240729
boas , mais um excelente tutorial e uma belo ensinamento... muito obrigado
@jorgemiranda de nada Jorge, fico feliz que achasse interessante :)
Thanks for making Photoshop easy to learn...
Just sharing:
@Julia Garner thank you Julia I'm glad you found it useful
This is an awesome picture.
I like the color and the blur circle in the last part. make it more mysterious.
@Ayaron thank you :)
thank you... great tutorial... hope there more excited tutor that I could try...
@macarip thanks, I hope to see your result!
Great tutorial, congratulations, best regards
Awesome Tutorial.. Love it..
reywen, rock under the skull basket.
my teacher forced us to do this. I hate it!!
where is rock picture?
Did you find it? I cant find it as well.
superb
thanks for tutorial its useful for me as beginner
nice use of photoshop ..
to create a red ridding hood artwork n photoshop..
thanks for sharing..
really nice post and it will be useful ..thanks to share.
nice tutorial...!!!
Hola andrea hermoso tutorial gracias por compartir tus conocimientos
graciela
Thanks for this tutorial. I really enjoyed it. :)
shut up george