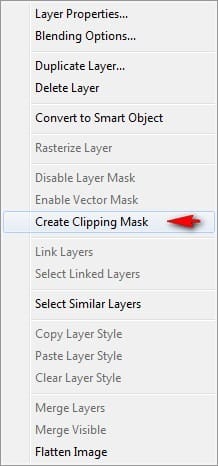
The Clipping Mask allows all the actions to be done only on the layer it is clipped on to.
Step 21
Now, activate the Brush tool (B) and input the following:
- Brush size: 150px
- Hardness: 0%
- Opacity: 15%
- Flow: 100%
- #: 000000

Now, let’s start painting:
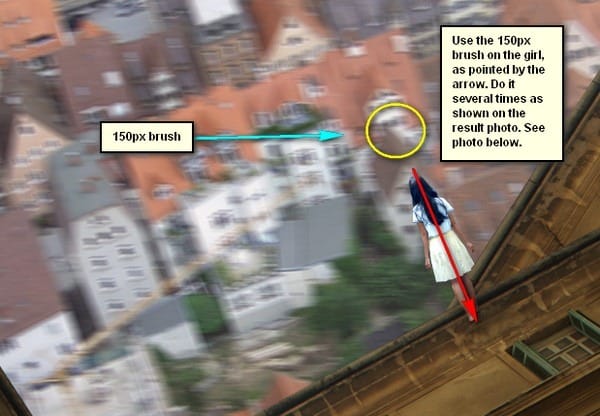
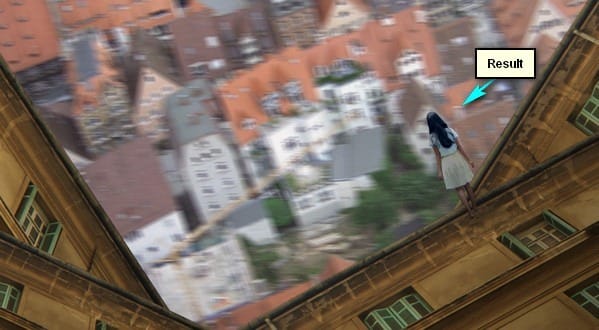
Now, we’re done, so group (Ctrl/Cmd + G) the layers we’ve created on this step and name the group as “girl”.
Step 22: Create the Vignette
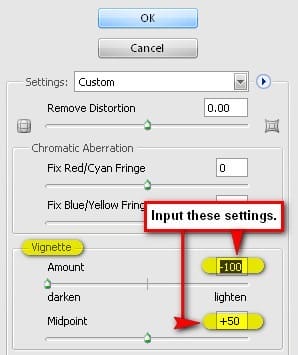
In this step, we will learn how to create a vignette which will help enhance the focus on our subject. To start, go to the Menu bar and click on File > New and use the same settings we used to create our canvas. (Refer to Step 1). Take note, the background contents should be white. Once it has been created, go to Filter > Distort > Lens Correction. Find the tab Vignette and use these settings:
- Vignette amount: -100
- Midpoint: +50
Step 23
Now that that’s done drag the vignette to our canvas using the Move tool (V) and put it on top of all the layers that we’ve created, and then set the following:
- Blending mode: Multiply
- Opacity to 40%
To set the blending mode, simply click on the drop-down menu beside the word “Normal” on the top part of the Layer window. The Opacity is located just beside that drop-down menu as well. See image below:


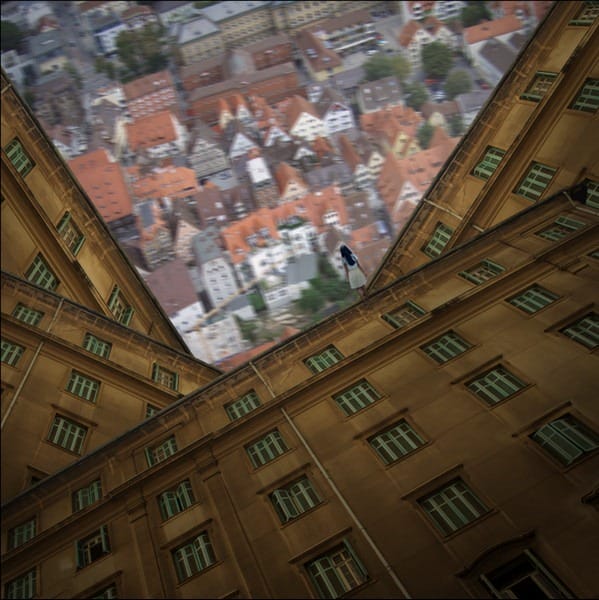
The unblended Vignette will look like this:

Once the blending mode is set to “Multiply” it would look like this:
Step 24: Add the Grungy Textures
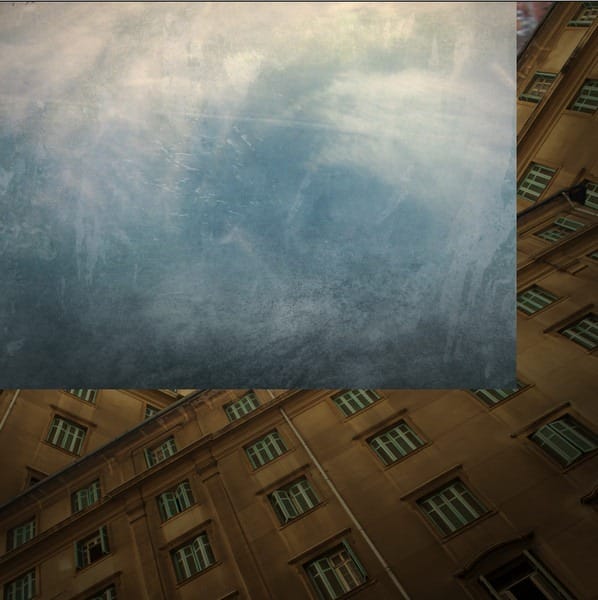
In this step, we will be adding the textures to give the image a grungy feel. To start, open “texture 11” by Sirius sdz. Once open, activate the Move tool (V) and drag this texture to our canvas and rename it to “texture 1”. Be sure to put this texture above the Vignette. Now, position this texture as shown below:
Step 25
Activate the Transform tool (Ctrl/Cmd + T) and resize it as shown below:


Step 26
Now, let’s adjust the Blending Modes of this texture to make it blend with the images. Set Blending mode and Opacity to the following:
- Blending mode: Soft Light
- Opacity: 100%

The result:

Step 27
Next, open the stock image – “light metallic texture” by night fate stock. Once open, activate the Move tool (V) and drag the image to our canvas. Rename it as “texture 2” while on the canvas. Position it as shown below:

Next, activate the Transform tool (Ctrl/Cmd + T) and resize “texture 2” as shown below:
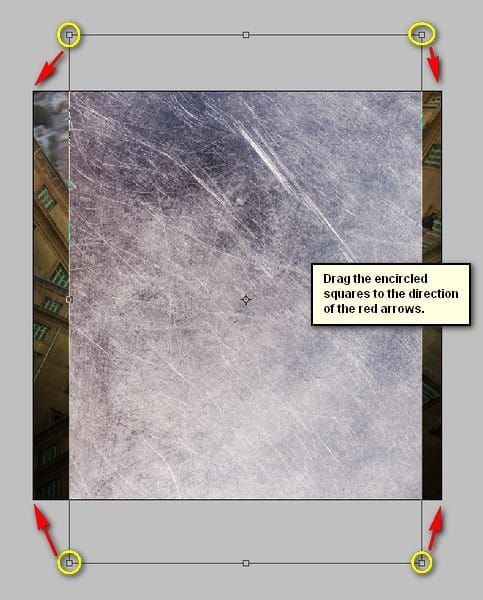
The result:
3 responses to “How to Create an Odd Looking Cityscape in Photoshop”
-
Excellent post. Thanks for sharing……….
-
Very helpful.
-
thanks, great work, grear art


Leave a Reply