Luminar AI lets you turn your ideas into reality with powerful, intelligent AI. Download the photo editor and see how you can completely transform your photos in a few clicks.
This Photoshop tutorial will show you how to create a surreal image of a girl on top of oddly stacked buildings. You'll learn how to create an illusion of depth with the Blur tool and apply ambient lighting effects using adjustment layers.
Download the PSD
How to Create an Odd Looking Cityscape in Photoshop PSD.zip | 242.32 MB
Download from Website
Preview of Final Results
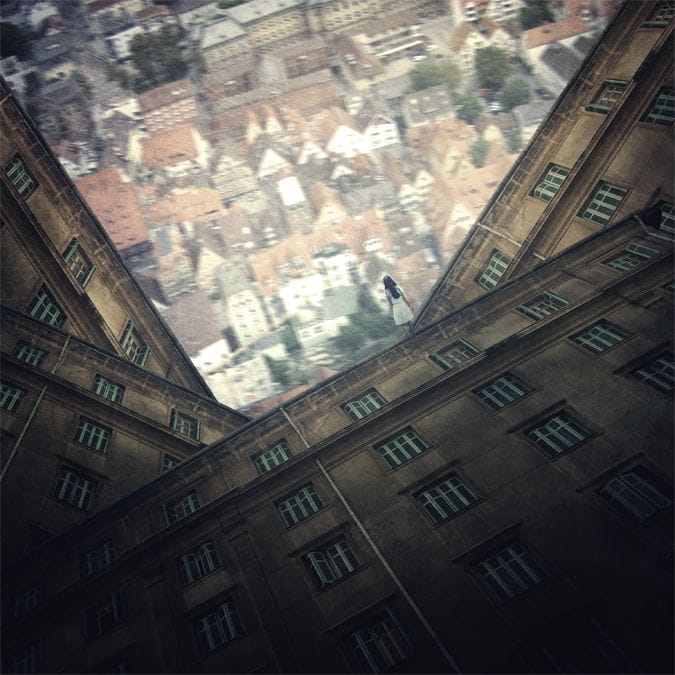
Odd Looking Cityscape Photoshop Tutorial
Tutorial Resources
- Looking down on Ulm - Zhonk
- Old buildings with green windows - lucianont
- Walking - sweetcaffeine-stocks
- texture 119 - Sirius sdz
- light metallic texture - night fate stock
Step 1: Create a New Photoshop Image File
Now, let's start by creating a new image file, go to the Menu bar and click File > New, and then input the following values on their respective fields:
- Preset: Custom
- Width: 3000 pixels
- Height: 3000 pixels
- Resolution: 300 pixels/inch
- Color Mode: RGB Color; 8 bit
- Background Contents: Transparent

Step 2: Create a city as seen from above
We will start off by creating a city from aerial view. To start, let's open "Looking down on Ulm" by Zhonk. Once the stock image is open, activate the Move tool by pressing V on your keyboard and left-click on the image and drag it to our 3000x3000px canvas.
Once on the canvas, position it as shown below:

Step 3
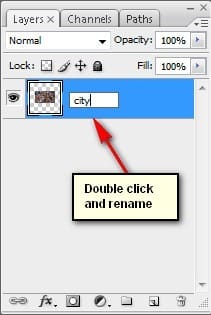
Next, rename this layer to "city". To rename a layer, simply double-click on the words: "layer 1" (you can find that on the layer window) to prompt a text box to appear.
Step 4
Next, we will resize the city. To do that, activate the Transform tool by pressing Ctrl/Cmd + T and then resize the city layer as shown below:
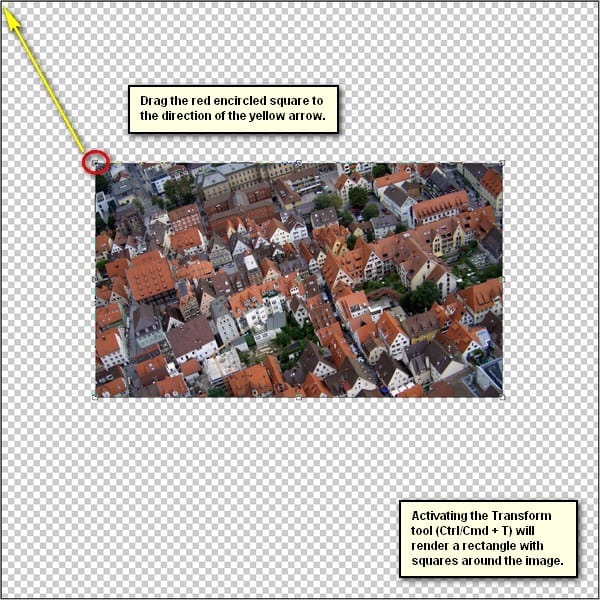
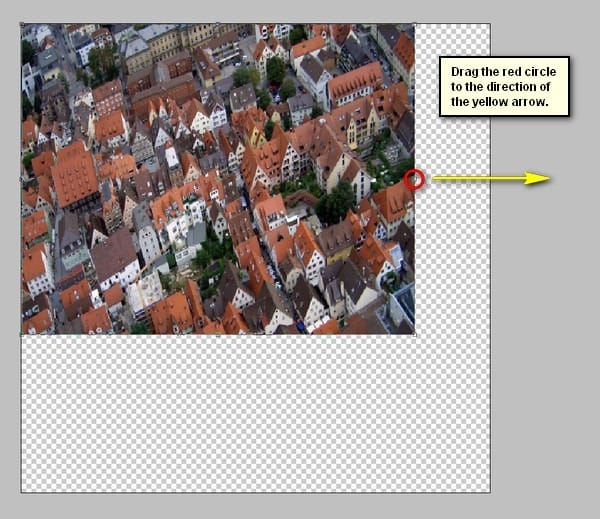

Step 5
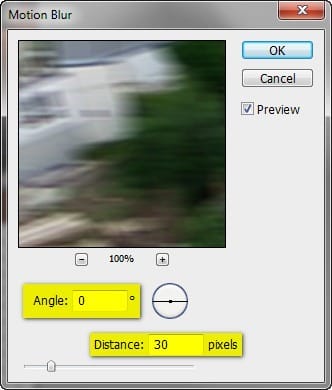
Now that we had resized the city layer, it is now time to give it motion blur effect, to give the viewer the illusion that this city is actually moving. To do that, left-click on the "city" layer and then go to Filter > Blur > Motion Blur.
Once activated, input the following:
- Angle: 0'
- Distance: 30pixels

The result should be similar to the following:
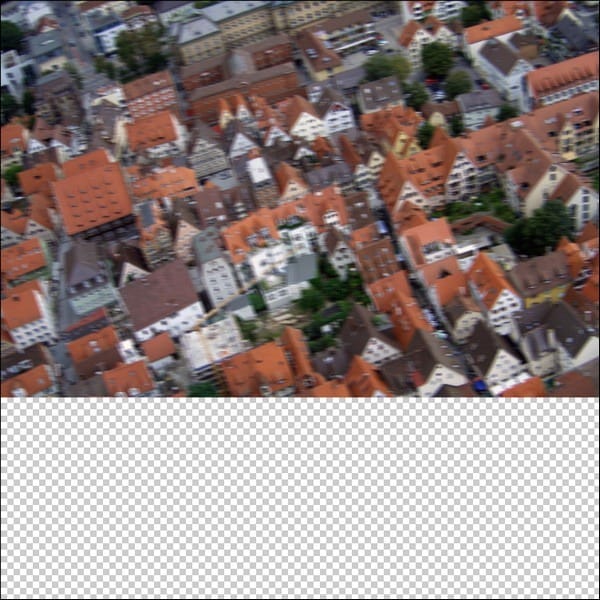
Step 6
Next, we will create a glary haze over the city layer to produce the illusion that it is far away.
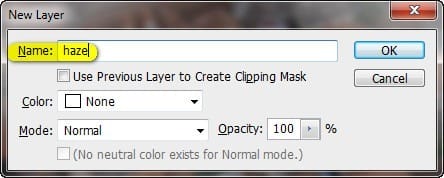
To start, let's create a new layer over the "city" layer, by left-clicking on the "city" layer and pressing Ctrl/Cmd + Shift + N. Doing this will automatically create a new layer over our "city" layer and a box will appear asking several details, but the only important thing is to give it a name.
Input "haze" on the name field.

Step 7
Now, that that's done, we will now activate the Brush tool (B) but then let's make sure that the active Brushes are the default brushes. The default Photoshop brushes are shown on the image below, if that's not what you see, then follow the instructions below:

Right click the canvas while a layer is selected and while the Brush tool (B) is activated and then click on the button highlighted below:

Then click on "Reset Brushes" from the contextual menu.

Now, that that is done input the following settings for our Brush tool (B):
- Brush size: 2200px
- Hardness: 0%
- Opacity: 15%
- Flow: 100%
- #: ffffff

Note: The #: ffffff is the color of the brush. To change it to that, simply do the following:

Once the Color Picker box opens, input the following on the # box:

Now, we're all set to paint, use the brush as shown on the image below:

The result should be similar to this:

Step 8
Now that we're done, group all the layers that we've created by selecting all the layers and pressing Ctrl/Cmd + G. Once grouped, rename it to "City from above".

Step 9: Create the Weird Buildings
Now, we will be adding the oddly positioned buildings. To start let's open the stock image - "Old buildings with green windows" by lucianont. Once opened, activate the Polygonal Lasso tool by pressing L on your keyboard.

Use the Polygonal Lasso tool (L) to select the outline of the building.

Now, that you've created a selection area around the building. Activate the Move tool (V) and drag the selected building to our canvas. Once on the canvas, rename this layer to "building". Now, position it as shown on the image below:

Next, activate the Transform tool (Ctrl/Cmd + T) and then resize it as shown below:

The result:

Step 10
Now, activate the Transform tool (Ctrl/Cmd + T) once again and right click on the canvas to bring up the Transform tool's contextual menu. Once up, click on the following:

Then, rotate the image as shown below:

The result:

Step 11
Activate the Move tool (V) and move the image as shown on the image below:

Step 12
Now, duplicate (Ctrl/Cmd + J) the moved "building" and rename the duplicated layer to "building 2". Once duplicated, activate the Transform tool (Ctrl/Cmd + T) and right click on the canvas again to bring up the contextual menu and then activate Rotate. Now, rotate the image as shown below:

The result:

Step 13
Activate the Move tool (V) once again and move this building as shown on the image below:

Activate the Transform tool (Ctrl/Cmd + T) once again and resize it as shown below:

The result:

Step 14
Next, duplicate (Ctrl/Cmd + J) "building 2" and rename it to "building 3". Move the "building 3" layer down below the layer "building" so it would appear at the back of the buildings we've created.
Now, activate the Transform tool (Ctrl/Cmd + T) and right click again on the canvas to open the contextual menu to activate the Rotate option. Now, rotate "building 3" as shown on the image below:

It should appear like this:

Step 15
Next, duplicate (Ctrl/Cmd + J) "building 3" and rename it to "building 4". Once duplicated, activate the Transform tool (Ctrl/Cmd + T) once again and activate the contextual menu, and once active, click on Flip Horizontal.

Once Flipped Horizontally, activate the Move tool (V) and drag the image as shown on the image below:

The result:

Step 16
Now that we're done with these buildings, select all of the layers we created in this step and then press Ctrl/Cmd + G to group all of them. Name the group to "Buildings".
Step 17: Create the Lost Girl
Now, we will add the lost girl walking on the building. To start, let's open the stock image: "Walking" by sweetcaffeine-stocks. Take note that this is a PSD file so when you open it, you can just drag the layer with the girl to our canvas.
Put the girl layer on top of all the layers in our canvas and rename this layer to "girl". Drag the layer and position the "girl" layer as shown on the image below:

Now, activate the Transform tool (Ctrl/Cmd + T) and resize it as shown below:

The result:

{en d}
Step 18
Next, activate the Transform tool (Ctrl/Cmd + T) once again and right click once again on the canvas and then click on Rotate from the contextual menu. Now, rotate the "girl" as shown on the image below:

The result:

Step 19
Now, activate the Move tool (V) and drag the "girl" as shown on the image below:

The result:

Step 20
Now, let's fix the shadows on the girl to make her blend well with the rest of the images. To start, create a new layer (Ctrl/Cmd + Shift + N) on top of the "girl" layer and name it "darken. Once done, right click on the newly created layer to open the contextual menu. Once open, click on Create Clipping Mask.

The Clipping Mask allows all the actions to be done only on the layer it is clipped on to.
Step 21
Now, activate the Brush tool (B) and input the following:
- Brush size: 150px
- Hardness: 0%
- Opacity: 15%
- Flow: 100%
- #: 000000

Now, let's start painting:


Now, we're done, so group (Ctrl/Cmd + G) the layers we've created on this step and name the group as "girl".
Step 22: Create the Vignette
In this step, we will learn how to create a vignette which will help enhance the focus on our subject. To start, go to the Menu bar and click on File > New and use the same settings we used to create our canvas. (Refer to Step 1). Take note, the background contents should be white. Once it has been created, go to Filter > Distort > Lens Correction. Find the tab Vignette and use these settings:
- Vignette amount: -100
- Midpoint: +50

Step 23
Now that that's done drag the vignette to our canvas using the Move tool (V) and put it on top of all the layers that we've created, and then set the following:
- Blending mode: Multiply
- Opacity to 40%
To set the blending mode, simply click on the drop-down menu beside the word "Normal" on the top part of the Layer window. The Opacity is located just beside that drop-down menu as well. See image below:


The unblended Vignette will look like this:

Once the blending mode is set to "Multiply" it would look like this:

Step 24: Add the Grungy Textures
In this step, we will be adding the textures to give the image a grungy feel. To start, open "texture 11" by Sirius sdz. Once open, activate the Move tool (V) and drag this texture to our canvas and rename it to "texture 1". Be sure to put this texture above the Vignette. Now, position this texture as shown below:

Step 25
Activate the Transform tool (Ctrl/Cmd + T) and resize it as shown below:


Step 26
Now, let's adjust the Blending Modes of this texture to make it blend with the images. Set Blending mode and Opacity to the following:
- Blending mode: Soft Light
- Opacity: 100%

The result:

Step 27
Next, open the stock image - "light metallic texture" by night fate stock. Once open, activate the Move tool (V) and drag the image to our canvas. Rename it as "texture 2" while on the canvas. Position it as shown below:

Next, activate the Transform tool (Ctrl/Cmd + T) and resize "texture 2" as shown below:

The result:

{en d}
Step 28
Now, input the following:
- Blending mode: Soft Light
- Opacity: 40%
The result:

Select the layers we've created for this step and group them (Ctrl/Cmd + G). Name the group as "textures".
Step 29: Create Ambient Light
In this step, we will create ambient light which will come from the sunny city below which will illuminate the lost girl and some parts of the weird buildings. To start, create a new layer (Ctrl/Cmd + Shift + N) above the "textures" group and name this layer as "light".
Activate the Brush tool (B) and input the following:
- Brush size: 2500px
- Hardness: 0%
- Opacity: 25%
- Flow: 100%
- #: ffffff
Now, we're all set to paint!

The result:

Step 30: Enhance the Image
Now, we will enhance the colors and exposure of the image. Let's start by creating a Solid Color adjustment layer adjustment layer from the Create New Fill/Adjustment layer button on the Layer window. Take note that the adjustment layers we will be using in this step will all come from pressing the Create New Fill/Adjustment layer button.

Once the contextual menu opens, click on Solid Color:

Now, clicking on the Solid Color option will open the Color Picker box. Now, input the following on the #: space.
- #: 00041e

Step 31
Change the Blending mode to the following:
- Blending mode: Exclusion
- Opacity: 60%

Step 32
Next, let's create a Brightness/Contrast adjustment layer.

Input the following when it opens:
- Brightness: 25
- Contrast: 25
- Use Legacy: Uncheck

Step 33
Next, let's create an Exposure adjustment layer.

Once it opens, input the following:
- Exposure: 0.18
- Offset: 0.0200
- Gamma Correction: 0.80

Step 34
Next, let's create another Solid Color adjustment layer. This time, when the Solid Color box opens, input the following:
- #: 073b00

Change the Blending mode to the following:

So far, the image should be like this now:

Step 35
Next, let's create a Hue/Saturation adjustment layer.

Once open, input the following:

Step 36
Now, let's create a Color Balance adjustment layer.

Once open, input the following:

Step 37
Now, let's create a Photo Filter adjustment layer.

Once open, choose the following filter:

Final Results

Download the PSD
How to Create an Odd Looking Cityscape in Photoshop PSD.zip | 242.32 MB
Download from Website
3 comments on “How to Create an Odd Looking Cityscape in Photoshop”
Excellent post. Thanks for sharing……….
Very helpful.
thanks, great work, grear art