Turn any photo into a dot grid artwork with these Photoshop actions. You'll get great results with dots that change size. They get larger in brighter areas and smaller in darker areas. Free download available.
On the picture below you can get inspiration how to paint it.
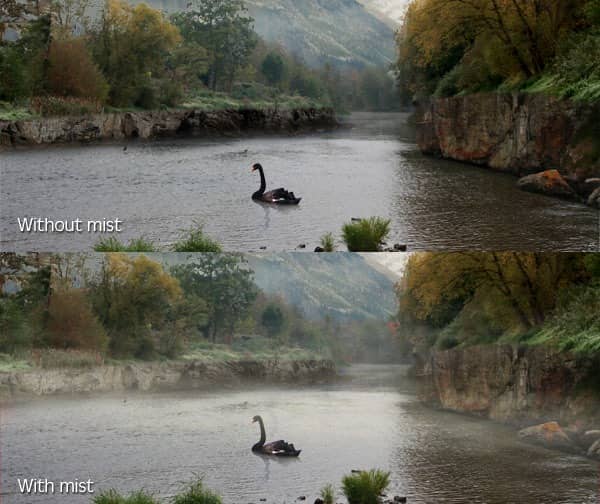
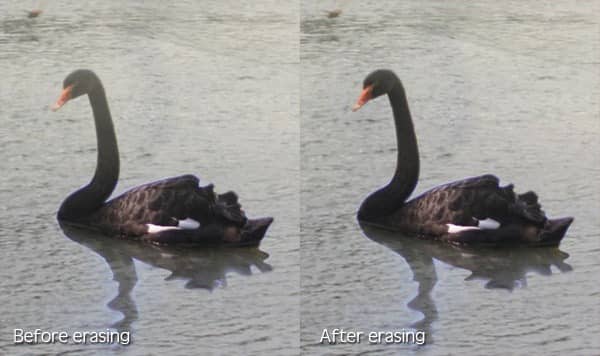
The swan should be in front of the mist. To fix it grab the Eraser Tool (E), lower the opacity on 30% and erase some mist on the swan.
Step 14 - First Color Adjustment
The basic elements are already placed in the manipulation. Let's focus on first color adjustment to set up the basic mood of the picture. The aim was to create peaceful, calm scenery. Because of that I decided to use warmer tones and lower saturation because more saturated colors feel more energic or dynamic.
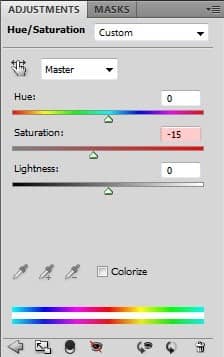
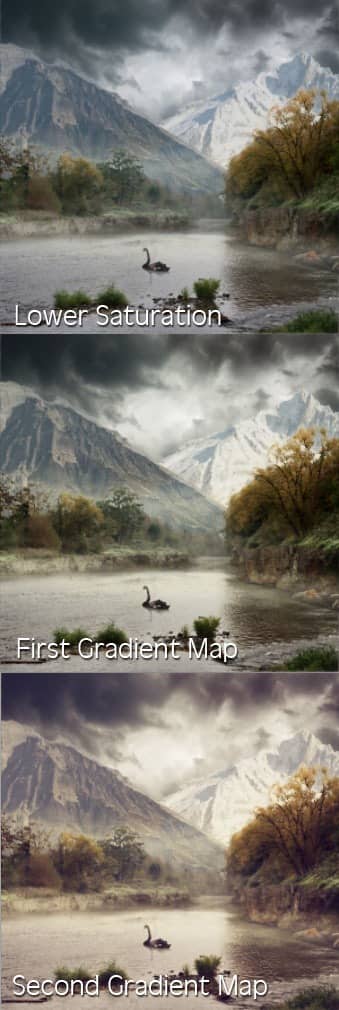
First of all lower the saturation of the picture a little. To do that add new adjustment layer Hue/Saturation on the top of all layers and set the value Saturation on -15.
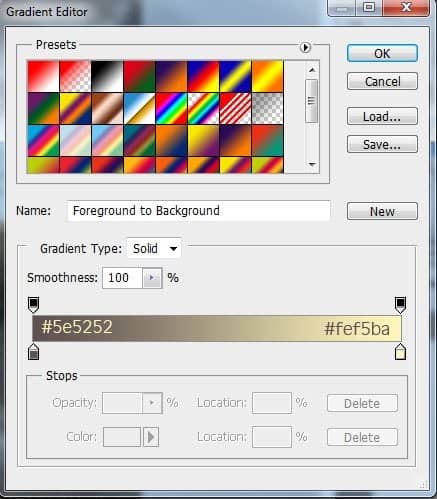
Let's make the image lighter, with more contrast and more light yellow tones. All this you can do with only one adjustment layer - Gradient Map.
Set the gradient as shown on the picture below and change the Blending Mode of this layer on Soft Light.
To add even moe yellow tones to lights and violet tones to darks add one more adjustment layer Gradient Map and select one of the basic gradients named Violet, Orange. Change Blending Mode of this layer on Screen and lower the Opacity on 35%.
Below you can see how the adjustments affect the picture.
Step 15 - Adding Light Rays
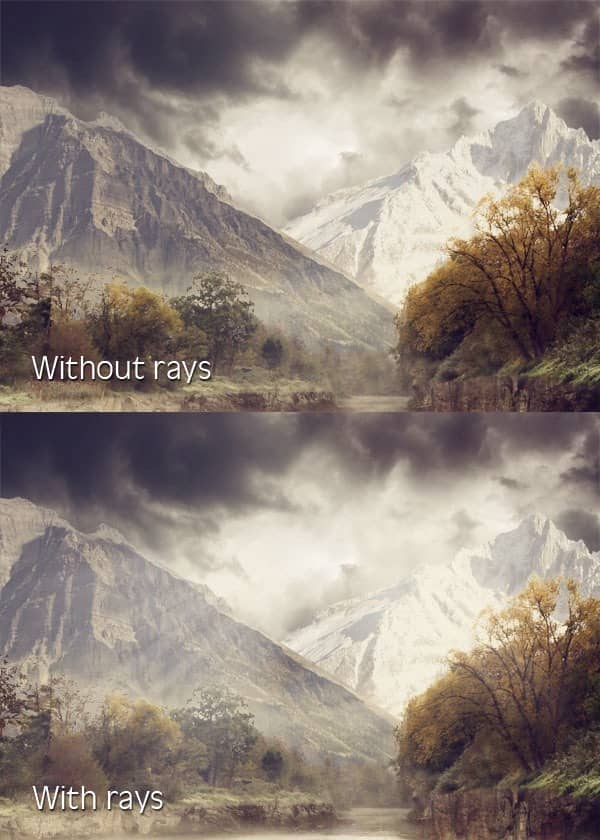
In this step you'll create light rays to make bit more fantasy feeling.
Create a new layer on the top of all layers and name it SUN RAYS. Download the light rays brushes listed in the beginning of the tutorial and install them into the Photoshop.
Select one of the brushes you've just installed and paint rays on the left on the same place as you can see on the final picture. Then paint less visible rays on the right.
To get the most realistic effect be very gentl with the brush. Use lower opacity of the brush and try to avoid using white color. Use light yellow instead. It looks more natural than pure white.
To make the lights even bit more dramatic let's add lens flare above.
Create a new layer on the top of all layers and name it LENS FLARE. Grab the Gradient Tool (G) and fill this new layer with solid black color.

9 comments on “Serene Fantasy Photo Manipulation”
👏
I enjoyed this and my pic turned out great. Thank you!!!
I enjoyed this and my pic turned out great thank you!!
thanks a lot..................
Sorry guys figured it out. I pressed the mask button while i was still in the channels tab. Clicking layers and clicking on the image followed by pressing masks fixed it ;)
When removing the sky the sky turns darker, it doesn't disappear. I tried using a white brush to see if it changes but it doesn't. I am using CS6, can someone help. Thanks
Wow, I can't thank you enough for making this tutorial of which I just completed. I made a couple of mistakes but I still love the final result. I have been using Photoshop and following many tutorials for over a year and did not learn as much as I did today with your one tutorial. Thank you, thank you, thank you : )
Very Nice!
very very good