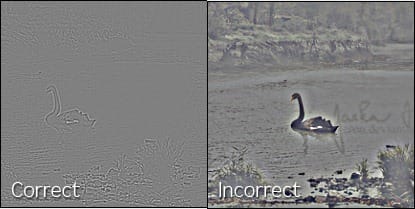
Step 23 – Sharpening
One last thing has to be done – sharpening. Press Ctrl + A on your keyboard to select the whole image and then Ctrl + Shift + C to copy it merged. Paste it on the top of all layers and name the layer SHARPENING.
Go to Filter > Other > High Pass and set the value Radius to be able to see decent edges of the picture.

Change Blending Mode of this layer on Overlay.
Final Results
![preview[1] preview[1]](https://cdn.photoshoptutorials.ws/images/stories/preview1.jpg?strip=all&lossy=1&webp=82&avif=82&w=1920&ssl=1)
Download the PSD
Black Swan.zip | 13 MB
Authors Comment
9 responses to “Serene Fantasy Photo Manipulation”
-
👏
-
I enjoyed this and my pic turned out great. Thank you!!!
-
I enjoyed this and my pic turned out great thank you!!
-
thanks a lot………………
-
Sorry guys figured it out. I pressed the mask button while i was still in the channels tab. Clicking layers and clicking on the image followed by pressing masks fixed it ;)
-
When removing the sky the sky turns darker, it doesn’t disappear. I tried using a white brush to see if it changes but it doesn’t. I am using CS6, can someone help. Thanks
-
Wow, I can’t thank you enough for making this tutorial of which I just completed. I made a couple of mistakes but I still love the final result. I have been using Photoshop and following many tutorials for over a year and did not learn as much as I did today with your one tutorial. Thank you, thank you, thank you : )
-
Very Nice!
-
very very good


 Thank you very much for reading the tutorial. I really hope that you’ve learnt something new or found inspiration for your next work. I’d love to see your results in comments under the article. If you want to read more Photoshop tips written by me you can visit my blog at
Leave a Reply