This tutorial shows you how to combine different stock photos to create calm landscape manipulation. You will learn different techniques of blending, changing lights and shadows and color adjustments. Let’s get started!
Preview of Final Results

Serene Fantasy Photo Manipulation Photoshop Tutorial
Resources
- Background, sky and swan – Pelleron-Art
- Left Mountain – Salsola Stock
- Right Mountain – creativewa on sxc.hu
- Right Rock – irenegirl on sxc.hu
- Left Rock – mdnt on sxc.hu
- Mist Brushes – Pelleron
- Light Rays Brushes – Pelleron
Step 1 – Removing the Sky from the Background
Open the background picture in Photoshop. Right click on the layer and select the option Layer from background.
First thing you need to do with the picture is to remove the uninteresting sky to be able to add the more dramatic one. You can easily do that with Channels.
If you don’t have the palette Channels visible go to Window > Channels and it will appear. On this palette you can see four different layers – RGB, Red, Green and Blue.
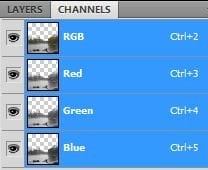
Right click on the Blue channel and select the option Duplicate Channel… Make visible only this duplicated Channel.
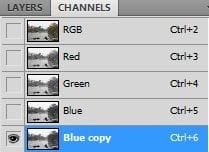
Go to Image > Adjustments > Levels or press Ctrl + L on your keyboard. Set the Input Levels on 128; 1,00; 232 and press OK. You should get something like on the following picture.
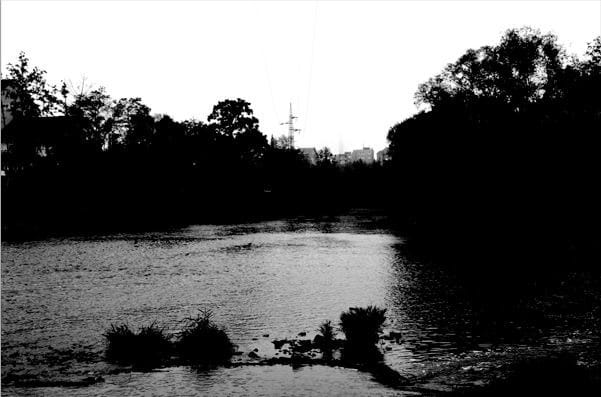
You want to make the picture only black and white without any shade of grey. Things you’ve done before leads to creating the mask for the sky. White color shows part of the picture which will be selected and black part stays unselected. If you let some grey colors in the picture they will be selected e.g. with 50% opacity.
To make the whole ground black grab the Brush Tool (B), pick black color and simply paint over the grey areas of the water.
On the horizon there are some buildings which shouldn’t be in the final picture. Carefully paint over them with white brush. You should get something like on the picture below. On the following picture you can see how the channel should looks like.
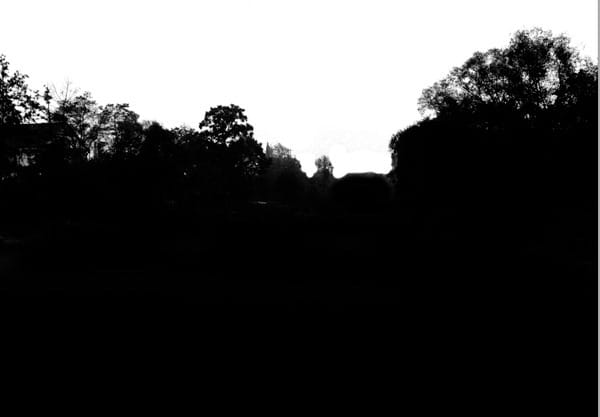
Once you’re finished make visible all channels except the one named “Blue Copy”. Go to Select > Load Selection and set the window which appear as on the picture below. Press OK.
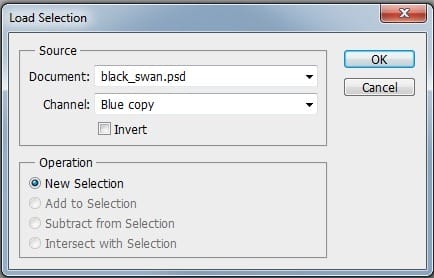
It activates the mask based on the Blue copy Channel.
The sky is selected and you want to hide it. First you need to invert the selection. Do that by pressing Ctrl + Shift + I on your keyboard or go to Select > Invert. Then click on the button Add layer mask which can be found in the bottom part of Layers palette.
9 responses to “Serene Fantasy Photo Manipulation”
-
👏
-
I enjoyed this and my pic turned out great. Thank you!!!
-
I enjoyed this and my pic turned out great thank you!!
-
thanks a lot………………
-
Sorry guys figured it out. I pressed the mask button while i was still in the channels tab. Clicking layers and clicking on the image followed by pressing masks fixed it ;)
-
When removing the sky the sky turns darker, it doesn’t disappear. I tried using a white brush to see if it changes but it doesn’t. I am using CS6, can someone help. Thanks
-
Wow, I can’t thank you enough for making this tutorial of which I just completed. I made a couple of mistakes but I still love the final result. I have been using Photoshop and following many tutorials for over a year and did not learn as much as I did today with your one tutorial. Thank you, thank you, thank you : )
-
Very Nice!
-
very very good


Leave a Reply