Luminar AI lets you turn your ideas into reality with powerful, intelligent AI. Download the photo editor and see how you can completely transform your photos in a few clicks.
Also light comes from different direction. Position of shadows shows that the sun stood behind the mountain not on the left as in your manipulation. You'll fix both problems in this step.
Let's start with two shadows which are circled in the picture below.
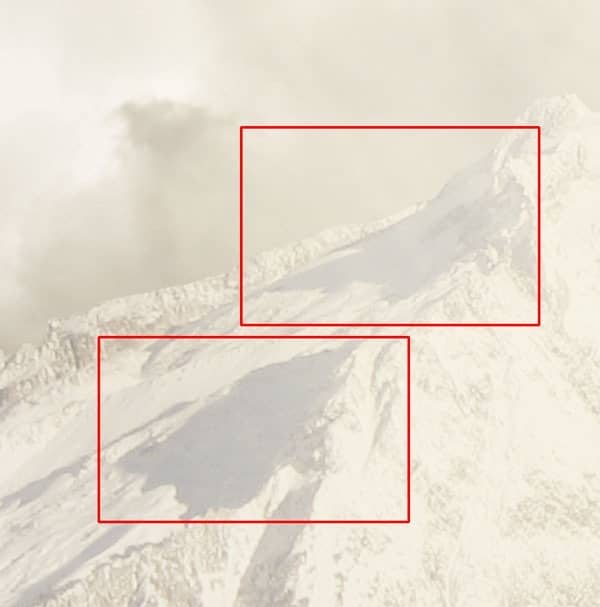
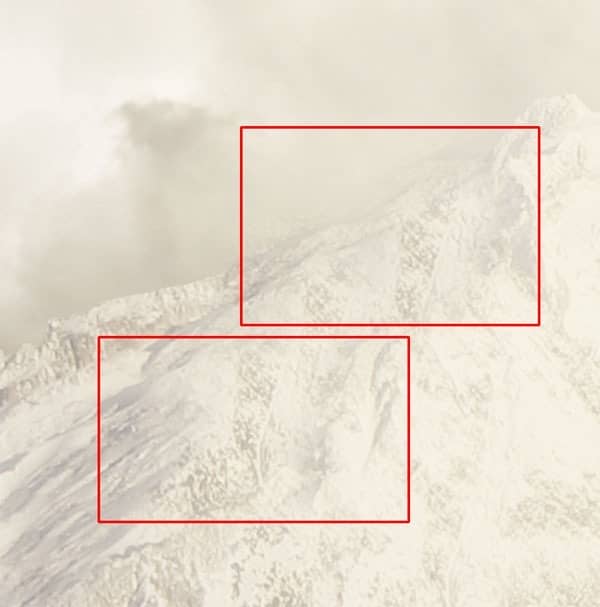
Add new layer on the top of all layers and name it e.g. SHADOWS REMOVING. Grab the Stamp Tool (S) and cover those shadows with pattern from the area of mountain where is light. To get better idea of what I mean you can take a look at the following picture.
If you look at some photos of mountain you may notice that there is sharp transition between the part of the mountaion on which the sun is shining and the one which is in shadows. But there is nothing like that in your manipulation. You'll fix it now.
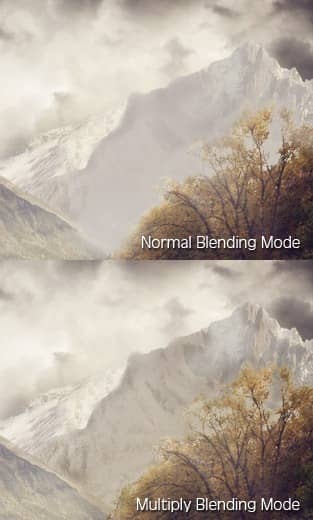
Add new layer on the top of all layers and change its Blending Mode on Multiply. Grab the Brush Tool (B) and lower the Opacity on about 20%. Press Alt and pick one of the shadow color from the mountain, e,g, #b9b2ae. Paint over the part of the mountain which should be in shadow. Don't forget to create the sharp transition I mentioned above.
On the following picture you can see how this layer looks with normal and Multiply Blending Modes.
Step 18 - Left Shadow on the River
In this and following step you'll fix the shadows on the river. Let's start with the shadow on the left side. Grab the Lasso Tool (L) and select the shadow on the right side. Press Ctrl +Shift + C to copy it merged and Ctrl + V to paste it. Place this new layer on the top of all layers and name it e.G. LEFT SHADOW.
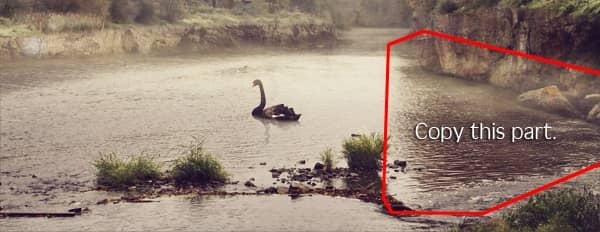
Go to Edit > Transform > Flip Horizontal to flip LEFT SHADOW. You need to adjust the shape of the layer to fit the shape of the left bank. To do that go to Edit > Transform > Warp and adjust the grid as shown on the picture below.
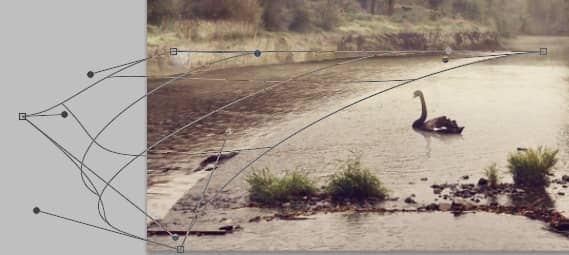
After you're done press Enter on your keyboard.
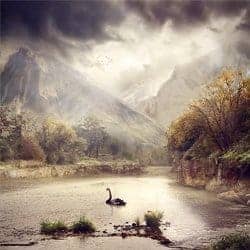
To blend the shadow properly lower the opacity of the layer on 50 %. Then add layer mask and erase all the unwanted parts - erase shadow which is on the bank and make smooth thransition between shadow and water. You should finish with shadow similar to the one on the picture below.

9 comments on “Serene Fantasy Photo Manipulation”
👏
I enjoyed this and my pic turned out great. Thank you!!!
I enjoyed this and my pic turned out great thank you!!
thanks a lot..................
Sorry guys figured it out. I pressed the mask button while i was still in the channels tab. Clicking layers and clicking on the image followed by pressing masks fixed it ;)
When removing the sky the sky turns darker, it doesn't disappear. I tried using a white brush to see if it changes but it doesn't. I am using CS6, can someone help. Thanks
Wow, I can't thank you enough for making this tutorial of which I just completed. I made a couple of mistakes but I still love the final result. I have been using Photoshop and following many tutorials for over a year and did not learn as much as I did today with your one tutorial. Thank you, thank you, thank you : )
Very Nice!
very very good