In this tutorial we will be learning how to take a few different stock images and put them together with some text to make a movie poster/DVD cover design. If you followed the first part of this tutorial on destroying a plane then you can use that image as well.
For the purpose of this tutorial we’ll be making a scaled down version but if you were planning to use this for a poster then you would want to increase the document size and resolution. Let’s get started then!

How to Create a Movie Quality DVD Cover Photoshop Tutorial
Step 1
Create a new document with dimensions; 1000x1415px then go here and copy this image then paste it into your document and scale it to fit the full page.

Step 2
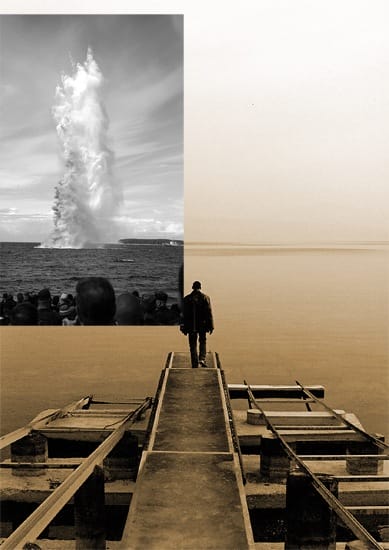
We’re going to add a bit of disruption in the water so copy this image then paste it into your document then go Image>Adjustments>Desaturate then just scale an move the image until you have something that resembles the image shown below.

Step 3
Change the blend mode of this layer to overlay.

Step 4
Obviously we don’t want the peoples heads showing at the front and we want the sky and water to blend in. First add a layer mask to the layer with the explosion on it by clicking the layer mask button at the bottom of the layers panel. Select the brush tool and choose a 125px soft round brush then set the brush opacity to 20% in the main toolbar. Make sure the foreground color is set as black and the layer mask is selected. Now just brush around the parts that you want to hide so brush over the edges of the image first to soften them then over the people and brush over the water a bit to get it to blend. Keep brushing until you get something similar to the image below, if you feel you’ve brushed to much then just change the foreground color to white then that should unhide the parts that you now brush over.

Step 5
Now if you’ve already gone through part one of the tutorial then copy the layers from that tutorial straight into this document; if you have both documents open then you can just select all the layers from the plane document (except the background) and drag them into this document. If you haven’t completed the previous tutorial then you can just use the undestroyed version of the plane which you can find here. Either way just scale and position it until you get something that you like.
6 responses to “Retouching a Studio Portrait”
-
Nice but very simple. could be more appealing.
-
Hi,
I am Arnob. I am willing to work with you and seeking a long term contract with a reputed company like you. I am basically experienced with photo editing manly in masking, clipping path, retouch, and color balance. So it would be a great job if you have any job for me on these areas.I am willing to discuss with you and do a short term trial project so you know if I am perfect or not.
Warmest Regards,
Arnob -
Very handy to know! Great tutorial!
-
Nice but very simple. could be more appealing.
-
Really great tutorial! I love the dodge and burn on the soft light layer…just what I wanted to know..and the shine is very cool!
thanks So much! -
Nice one….. but not so attractive.


Leave a Reply