


Blend mode change to Color Dodge

Step 15
Next, create a new layer and change the blend mode to Overlay. Pick a color to red (#f38977) Then use a Brush Tool(B) Soft Round and start painting around the fire.


Step 16
Next, add some glow to the statue. Create a new layer and use Brush Tool(B) Soft round with foreground color orange #ce9e87 and paint, then change the blend mode to Color Dodge.


Step 17
Open Birds and hold Ctrl/Cmd and click on the layer and after the selection area has been created, simply copy (Ctrl / Cmd + C) and Paste (Ctrl / Cmd + V) it to our work canvas. Then position the image with the transform tool (Ctrl / Cmd + T). Hold Alt + Shift and resterize like image below. In Photoshop CC only hold Alt to resterize al sides together.


Step 18
Add Adjustment Layer “Exposure” and press Ctrl/Cmd + I to invert. Then use Brush Tool(B) Soft Round with foreground color white and paint highlight parts.

Step 19
Next, go to open Seagulls. File > Open and select Birds. After you open the image, use Lasso Tool(L) and start selecting seagulls. After the selection area has been created, simply copy (Ctrl / Cmd + C) and Paste (Ctrl / Cmd + V) it to our work canvas. Then position the image with the transform tool (Ctrl / Cmd + T). Hold Alt + Shift and resterize like image below. In Photoshop CC only hold Alt to resterize al sides together.


Step 20
Add Adjustment Layer “Exposure” and press Ctrl/Cmd + I to invert. Then use Brush Tool(B) Soft Round with foreground color white and paint highlight parts.

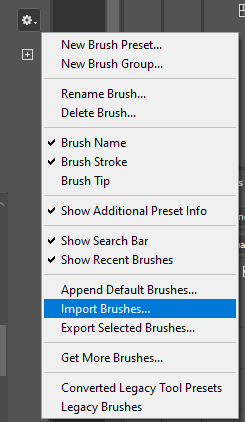
Step 21
Next, we will add Clouds but first, we need to import brushes. Select a Brush Tool(B) and right-click on the background. Now click on the gear icon and Import Brushes (Select a downloaded brush).

Now we can paint ray. Create a new layer and Foreground color use white.

Step 22
Import another brushes Ray Highlights. Select a Brush Tool(B) and right-click on the background. Now click on the gear icon and Import Brushes (Select a downloaded brush).

Now create a new layer and use a soft round brush tool with foreground color white and paint to the right corner.
6 responses to “Create a Symbolic Statue of Liberty Photo Manipulation in Photoshop”
-

Where’s the crack texture image link? you never put it in.
-
Thanks for letting us know! The links are fixed.
-
-
The ray brush link takes you to lava texture. it ddoesnt take you to a ray brush
-
This was a great tutorial! I love the intro you gave about what america is. I love the tutorial. Symbolic, fun, and great final result!
-
It’s a nice tutorial.
-
Really nice tut! Thank you!
Leave a Reply