
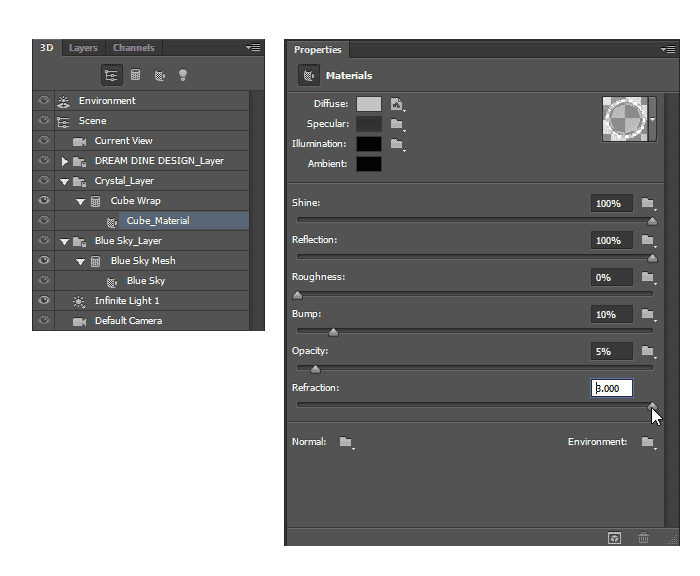

A high refraction setting combined with near-zero opacity turns the shape into a crystal
Step 15
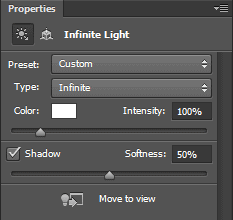
Finally, we’re going to work on the light. Select Infinite Light 1 from the 3D panel. In the Properties panel, set the intensity to 100%, and enable Shadows with a softness of 50%. The softness setting blurs the shadows so that they don’t look so sharp. Click the “Move to view” button to move the light so that it’s positioned where your camera is (right in front of the crystal). Now that we’re done with the 3D objects, press Alt+Shift+Ctrl+R (Option+Shift+Cmd+R on Macs and let it render the scene until it’s complete. This may take awhile to render so take a break and come back in a couple minutes. If you stopped the rendering by accident, you can resume it by go to 3D > Resume Render. When it’s done rendering, you can switch your workspace back to the default Essentials (Window > Workspace > Essentials).

Step 16
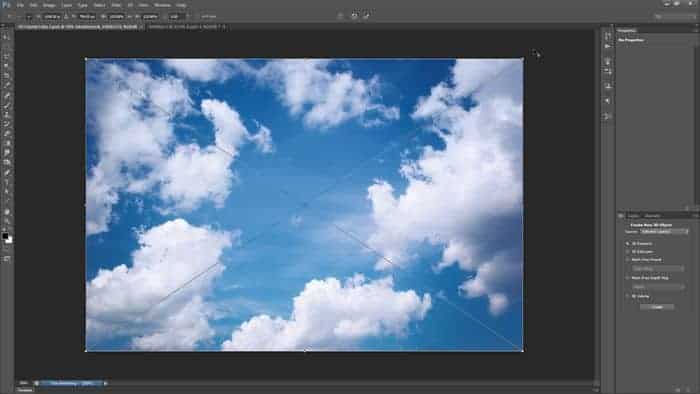
To finish up the image, we’re going to add some clouds so that they appear in front of the crystal and apply some color effects. First, import the same clouds picture by dragging and dropping the file into your Photoshop document. Scale it so that it fits your image then press Enter to apply the transformation.
Step 17
In the Layers panel, hold the Alt or Option key and press the Add Layer Mask button to create an inverse layer mask.

Make sure your foreground color is white; you can do this quickly by pressing D on your keyboard. Then select the brush tool and paint with a soft round brush over the clouds that you want to appear in front of the crystal. You don’t need to be too precise with this – just a rough paint to reveal the clouds will do.

Step 18
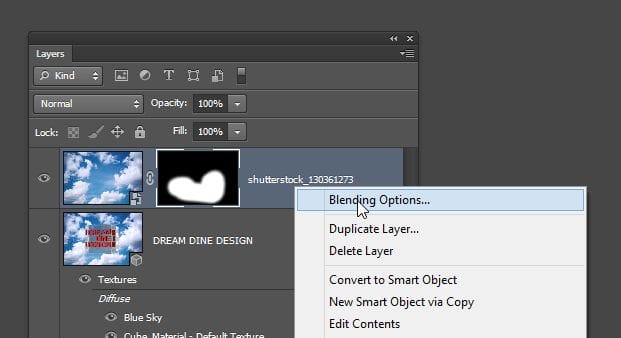
Right-click on the current layer and choose Blending Options. In the Blend If options, drag the black input slider towards the right until the blue sky disappears. To make the clouds blend in smoother, hold the Alt/Option key then drag the right-half of the input slider towards the right until the clouds blend seamlessly with your crystal.
{YOUTUBEBLENDIF}
7 responses to “How to Create a Crystal Cube with 3D Text in Photoshop Extended”
-

I like the idea of this tutorial, it’s very creative and the result looks great.
-
Impressive! Really impressed at this tutorial.. quality is great
-
nice tutorial
-
In the video, you keep clicking and dragging to change the text leading. If you highlight the text first, you will see the changes in realtime. Other than that great video and keep these coming!
-
Nice and easy
-
unique n amazing tutorial . .. .
-
COOL VIDEO!! Who cares about the crystal… teach me how to make the intro!!
Leave a Reply