Learn how to create a ‘Chocolatey Goodness’ text effect in Illustrator and Photoshop. You’ll learn the benefits of the burn and dodge tool while experimenting with Layer Styles.
Preview of Final Results

Download the PSD
Chocolatey Goodness.zip | 1 MB
Download from Website
Chocolatey Goodness Photoshop Tutorial
Resources
- Old Sans Black – DaFont
- Water Pattern – deviantArt (bad-girl)
Step 1 – Create a New Document
Choose File > New or press Ctrl/Command + N. The size of my canvas is 1600px (width) x 916px (height) but choose any size you wish.

Step 2 – Background
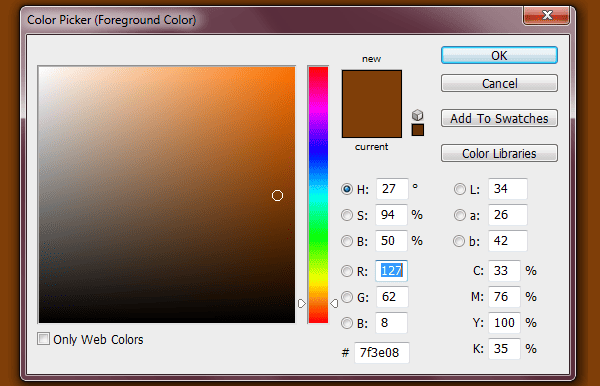
Grab the Paint Bucket Tool, pick #7f3e08 brown color and fill the background.

Step 3 – Stripes
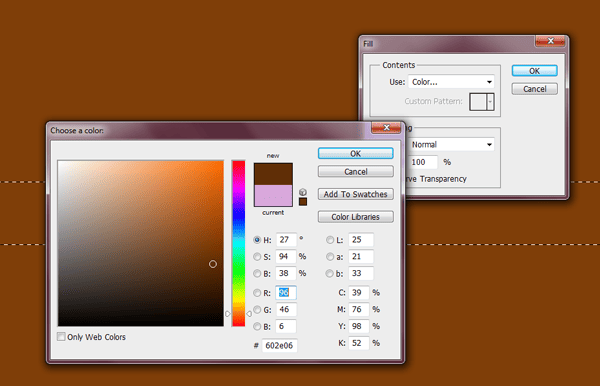
Create a new layer name it ‘Stripes’. Grab your Rectangular Marquee Tool, draw out a long rectangular shape. After that fill it with #602e06 (Edit > Fill > Color).

Step 4 – Duplicate
Once you’ve filled the rectangle, duplicate the ‘Stripes’ layer (right click ‘Stripes’ layer and click ‘Duplicate Layer’, click ‘ok’). Repeat this step as need be, so that it looks like mine. Once it looks like my image merge all of the stripe layers.

Step 5 – Rotate
Rotate your ‘Stripes’ Layer (Edit > Free Transform or ‘ctrl T’) I rotated mines to 39 degrees. Duplicate this ‘Stripe’ layer again and place it next to your first ‘Stripe’ layer. Merge both layers. Grab your Rectangular Marquee Tool and make another rectangular shape that covers a little bit less than half of the canvas and press ‘delete’.

Step 6 – Illustrator
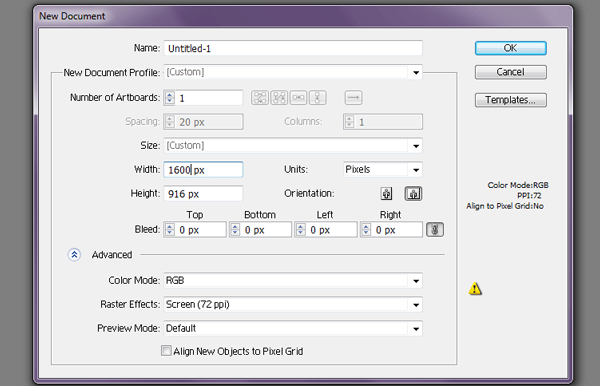
Fire up Adobe Illustrator. Create the same size canvas as the one you made in Photoshop (File > New) 1600px X 916px.

Step 7 – Chocolate Drips
Next, we will be creating the drips in Illustrator. Of course you can do this in Photoshop but for me it’s easier to do it in Illustrator. Grab your Pen Tool (P) and mimic the curves and drips that I have made in Illustrator. At this time it doesn’t matter what color you make the drip because when we transfer it over to Photoshop we will change the color.

Step 8 – Transfer drips to Photoshop
Transfer these drips over to photoshop by ‘drag and drop’ or save it and open it up in Photoshop. Once you have placed the drips in Photoshop, ‘rasterize’ the layer (right click on the layer > rasterize) and name it ‘Drips’. Soften the areas of the drips with a soft round brush. In the image below I have circled the areas in red that have some areas that need to be softened.
6 responses to “How to Create a Chocolate Text Effect in Photoshop”
-
aaaaaaaaaaaaahhhhhhhhhhhhhhhhhhhhhhh
-
no me sale la parte del color donde quedan los reflejos blancos
-
This is actually excellent ! unique tutorial. I never seen such.
Thank you thank you ! Really thank you for this tutorial !
Wish you all the best for your work in graphic designs . . .
best luck. Thnkies once again. -
Thank you. Very delicious!!!
-
Thank you! Great job
-
this is brilliant! thankyou sooooo much!


Leave a Reply to mariaCancel reply