
Step 8
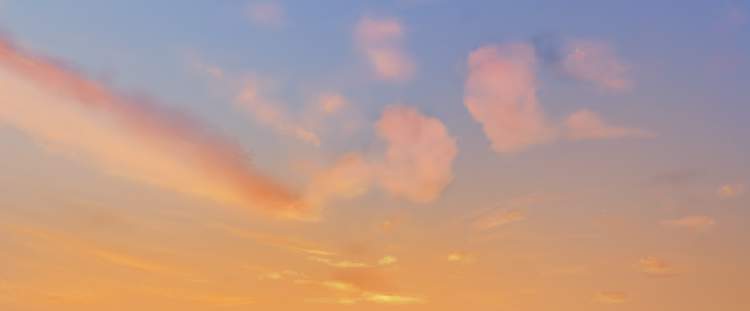
Make a new layer and use a soft brush with the color #975f61to paint on the long cloud on the left and around it. Change this layer mode to Overlay 100%.


On a new layer, use a soft brush with the color #da9073to paint on the clouds on the left. and thelower middle Alter this layer mode to Hard Light 100%.

Step 9
Make a new layer and use a soft brush with the color #90765d to paint more details on the sky. Change this layer mode to Overlay 100%.

Create a new layer and change the brush color #f6ef6dto paint some small highlight on the middle bottom as we aim to add the sun there.
Step 10
Create a Gradient Map adjustment layer on top of the layers and pick the colors #e10019and #00601b. Lower the opacity of this layer to 20%.

Step 11
Add a Color Balanceadjustment layer and alter the Midtones, Shadowsand Highlightssettings:


Step 12
Make a Curvesadjustment layer to increase the light and vibrance of the sky.

Create a Selective Coloradjustment layer and change the Reds, Cyans, Bluesand Magentasvalues:


Save as a jpgfile for the next steps and name it “sky” or whatever you want.
Step 13
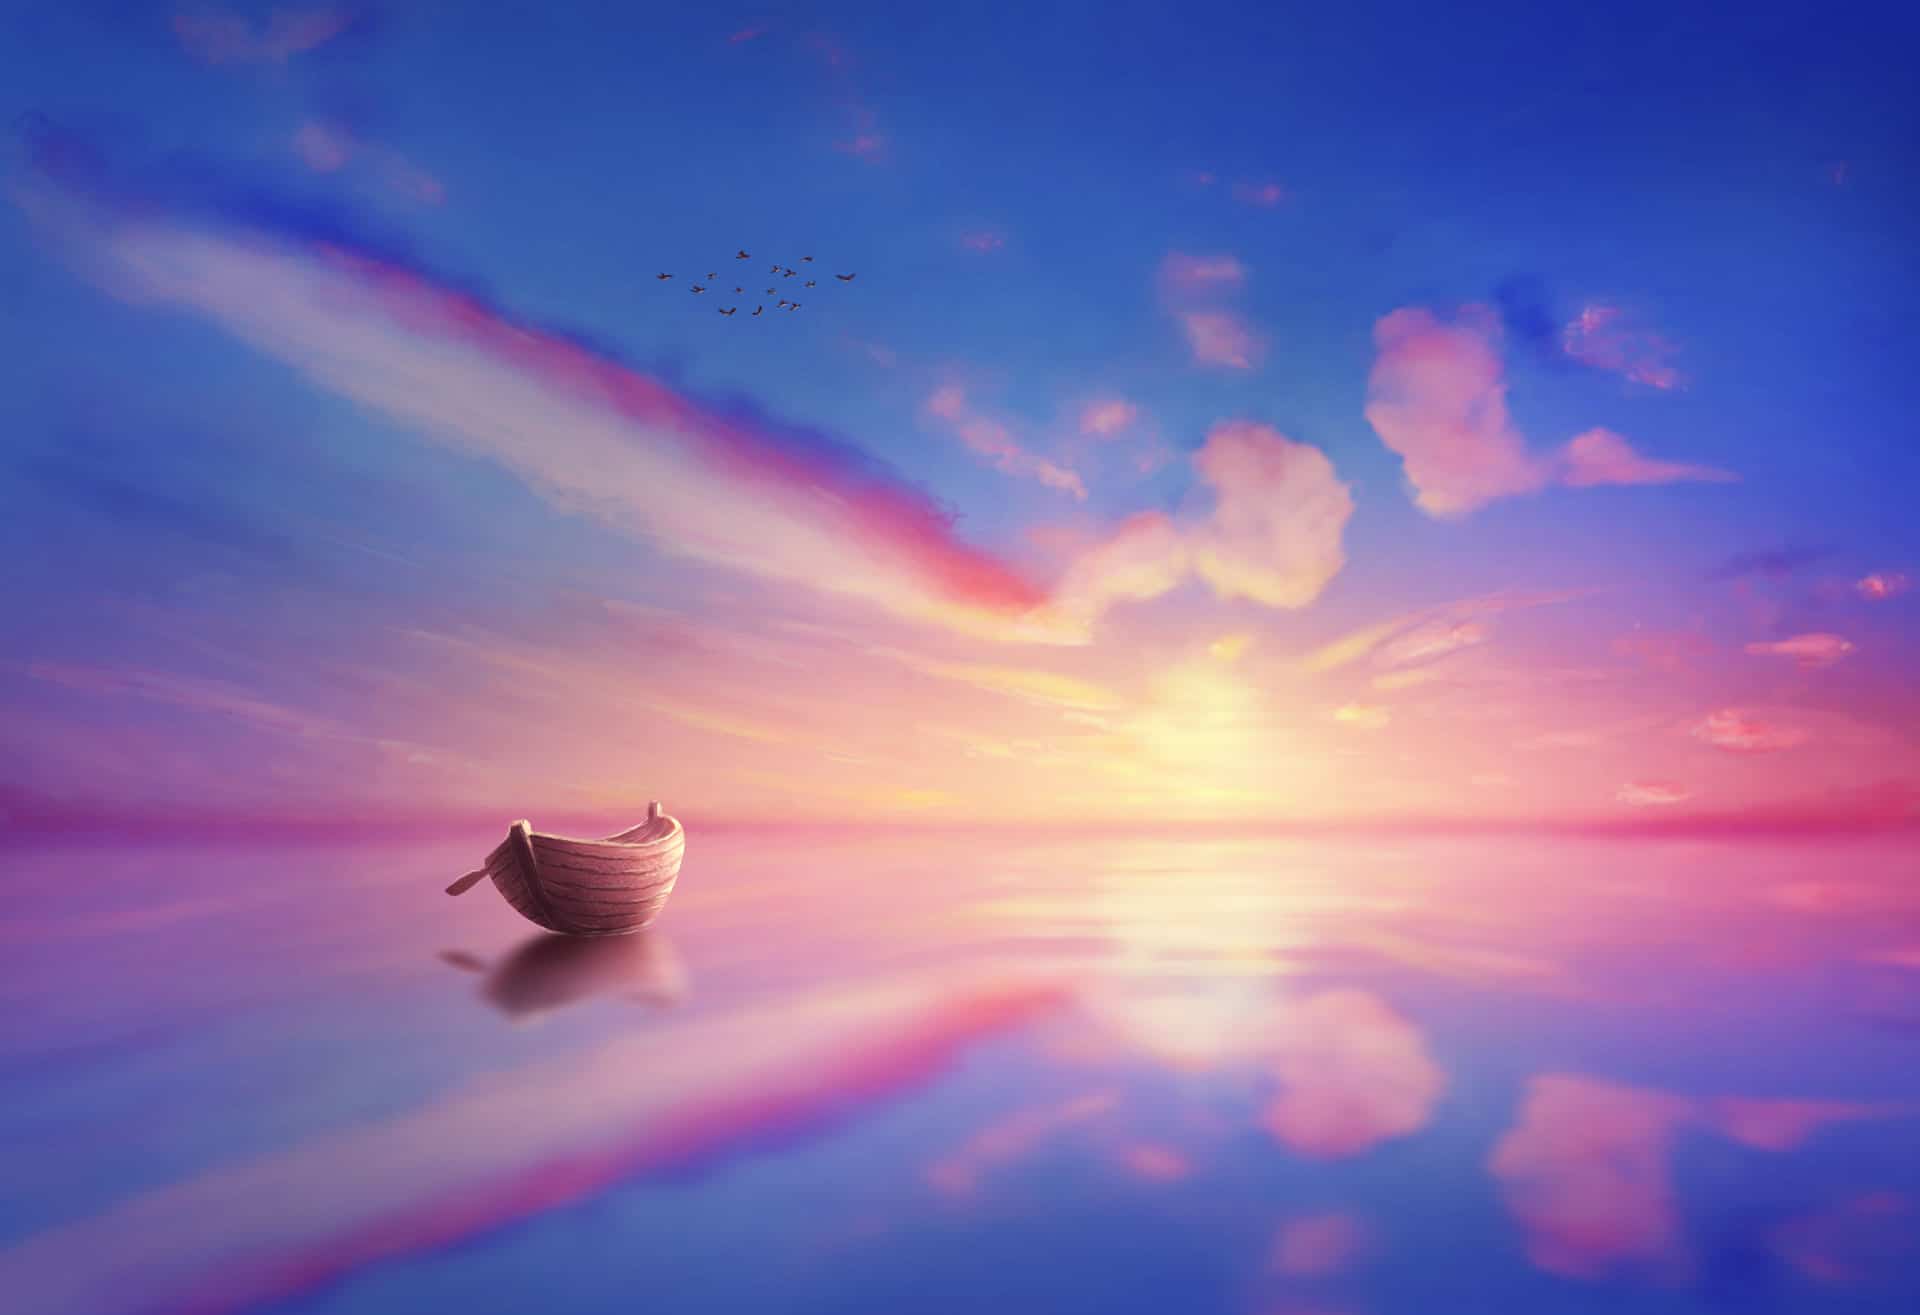
Create a new 3000×2055 px document in Photoshop and fill it with white. Drag the sky image into the white canvas using the Move Tool (V)and place itin the upper of the canvas. Convert this layer to a Smart Object.

Step 14
Duplicate this layer and flip it vertically (Edit > Transform > Flip Vertical) and move it down to the lower section of the white canvas. Use the Free Transform Tool (Ctrl+T)to enlarge the bottom of this part to fit the perspective of the lake.

Step 15
Go to Filter > Blur > Gaussian Blur and set the radius to 6 px:

Apply a Motion Blurwit the following settings to make the sky refectionblurred and appear like a lake.

Step 16
Create a Color Filllayer above the lake one and set it as Clipping Maskand pick the color #c66dbf. Lower the opacity of this layer to 20%.

Step 17
Make a new layer and use the Rectangular Marquee Tool (M)to grab a selection on the horizon between the sky and lake. Set the feather radius to 3 px and fill this selection with the color #687197 and change the layer mode to Color Burn 100%.
2 responses to “How to Paint a Sunset Scene with Adobe Photoshop”
-

An interesting idea, but some of the instructions are ambiguous. How big a brush? Is the opacity supposed to be for the brush or the layer?
-
Hello,
Het is erg veel werk maar ook zeer leerzaam.
Hartelijk dank. With regards, Hans Keijzer.
Leave a Reply