Download Lightroom presets and LUTs, absolutely free. Use the presets to add creativity and style to your photos.
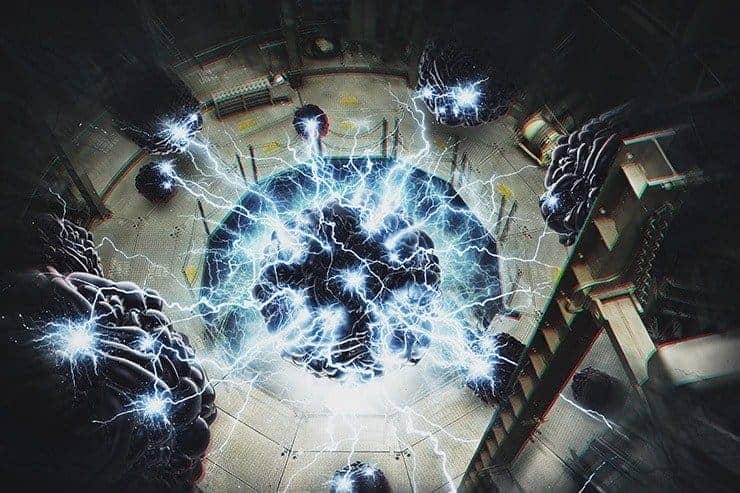
In this tutorial, you'll learn how to create abstract and fantastic photo manipulation with a immersive, 3-D and Radiation effects! You will learn how to working with Smart filters in Photoshop and use them, create your own brush from lightning's, quick and simple work techniques and many other! Then complete it with a dark or color tone effects, as you wish. This tutorial directed to improve your skills of work in Photoshop. Read this tutorial and immerse yourself in the wonderful universe of creativity!
What you'll be creating
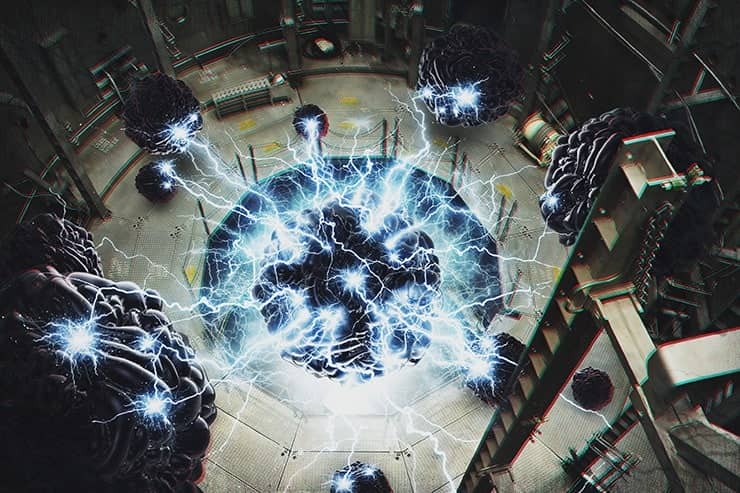
We'll start by adding the image of mine. Then add the spheres. The next step will adding glow and lightning. Create a special brush "exploding lightning". We will continue to work on the texture to create the effect of radiation. At the end of the work we will work on toning. I will show you two options of coloring and you can make them. You need attentiveness, diligence and good humor as possible, all version of Photoshop.
Tutorial Resources
Step 1
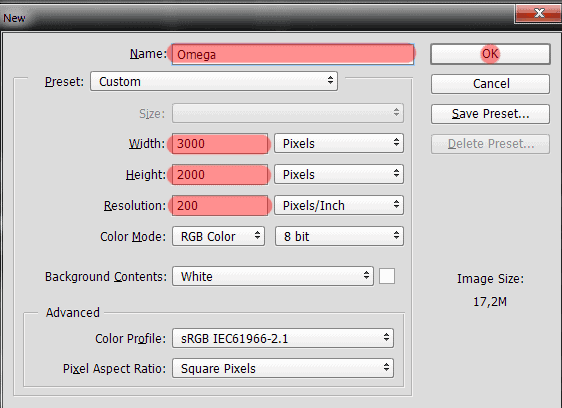
Create a new document. Go to File > New or the short key Cmd /Ctrl+ N. A blank document with size of 3000 pixels wide and 2000 pixels high, resolution 200 Pixels/Inch. I named the document "Omega".
Step 2
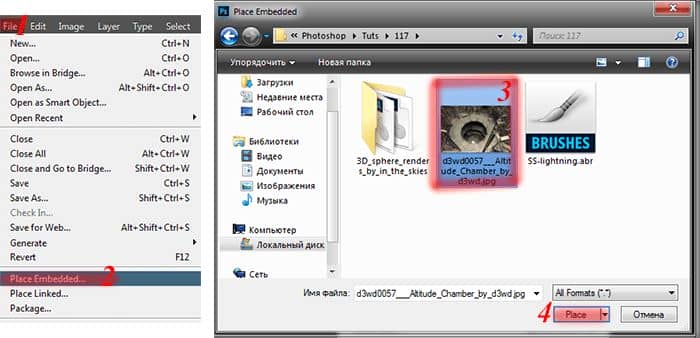
Now I have added a background picture. Go to File > Place and select the image "d3wd0057___Altitude_Chamber_by_d3wd".
Step 3
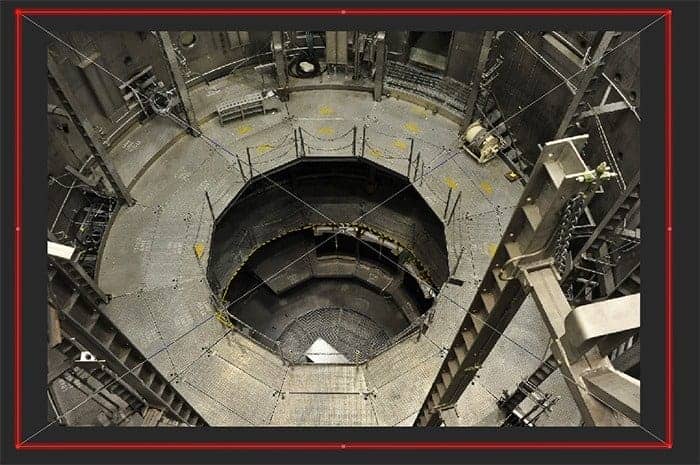
Use the Free Transform tool (Ctrl/Cmd+ T or Edit > Free Transform) to resize the layer like shown in the image. Increase the size of the image so that the outside of the working area remained mesh with the foreground.

Step 4
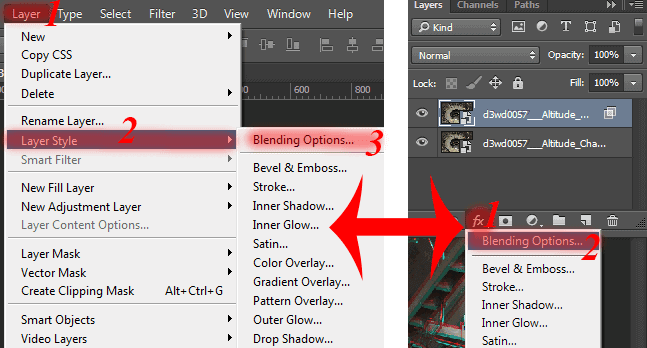
Duplicate this layer once (use the short key Cmd /Ctrl+ J or Layer > Duplicate Layer). Now make with the help of the duplicated layer, an effect 3-D. Go to Layer Style > Blending Options in a Layer panel.
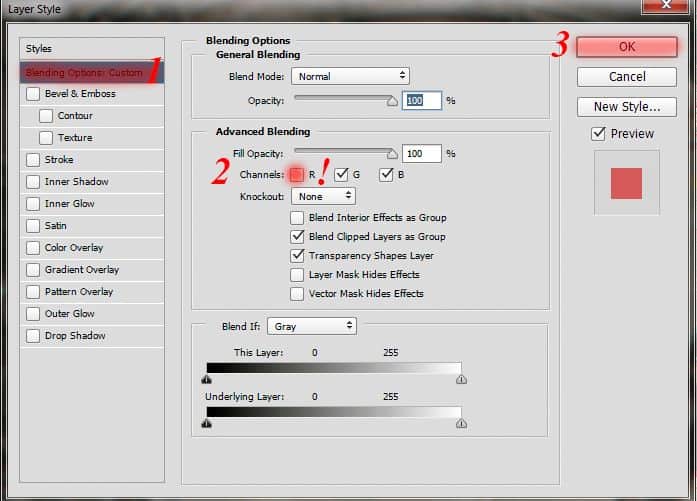
Now to get a 3-D effect need to remove the checkbox from red channel. You can experiment with other channels and get unexpected results!
Step 5
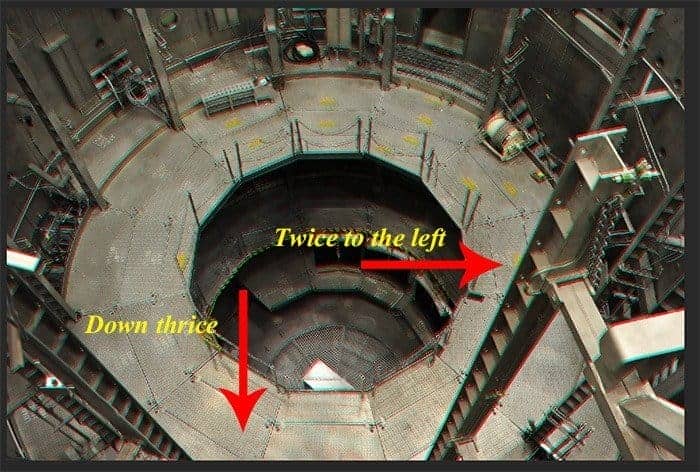
You have already seen the effect? No!? Do not worry! Now it appear. Set a Move Tool (V), using the arrow keys to move picture (My combination: down three times and twice to the left). That's it! Can try to move image, but do not overdo it :).
Step 6
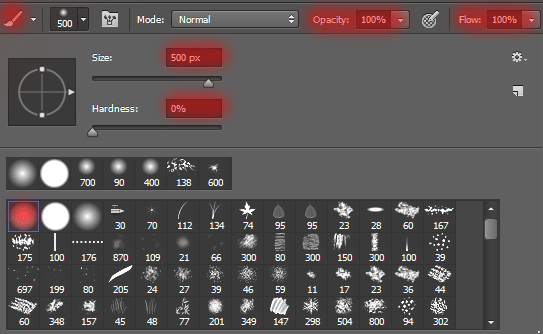
Add a Layer mask to this layer. Take a Brush Tool (B) with there settings: Size: 500px, Hardness: 0%, Opacity: 100% (Click D then X on keyboard to set background color to Black). Edge of the brush, remove effect from shaft.

Step 7
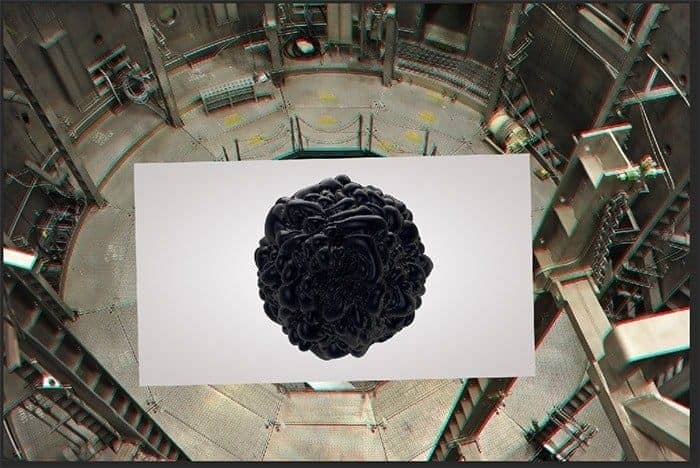
Time to add the spheres. In the resource that you have downloaded the 15 kinds of spheres. You can choose what you like. I used "tester sphere3" I liked it because of the interesting shape and unusual textures. Resembles a ball of energy or substance that changes its form. Go to File > Place and select the image "tester sphere3" in folder "3D_sphere_renders_by_in_the_skies". Do not worry about the format "TARGA (.tga)". Photoshop fully realizes its.
Resize the layer like shown in the image (Ctrl/Cmd+ T or Edit > Free Transform). Place the sphere inside the shaft, (place it in the center, and then lift up a little).

Step 8
Select a Magic Wand Tool (W) and click on white background of sphere. Then Invert selection (the short keys Cmd /Ctrl+ Shift + I). Selected to become a sphere, and not background. Add a Layer Mask to remove background.

13 comments on “Omega - Create this Abstract Composite Using Only Three Resources”
where is the material??
where is the material?
amazing ideas and creativity
Absolutely beautiful works.. This is what called “Creativity”.
i really love this website!
thank you Maria Semelevich
Vry nyc
Thank you veru much! I am very pleased! :) I hope it will be helpful to you!
like
Thank you veru much! I am very pleased! :) I hope it will be helpful to you!
amazing...
Thank you veru much! I am very pleased! :) I hope it will be helpful to you!
wonderful!