Step 6
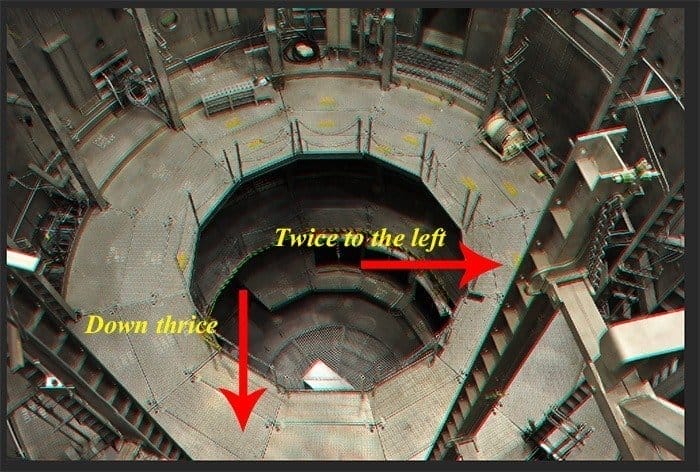
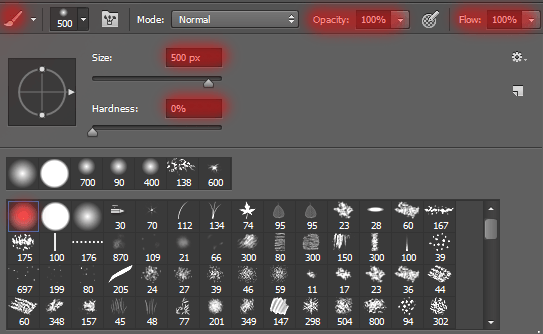
Add a Layer mask to this layer. Take a Brush Tool (B) with there settings: Size: 500px, Hardness: 0%, Opacity: 100% (Click D then X on keyboard to set background color to Black). Edge of the brush, remove effect from shaft.


Step 7
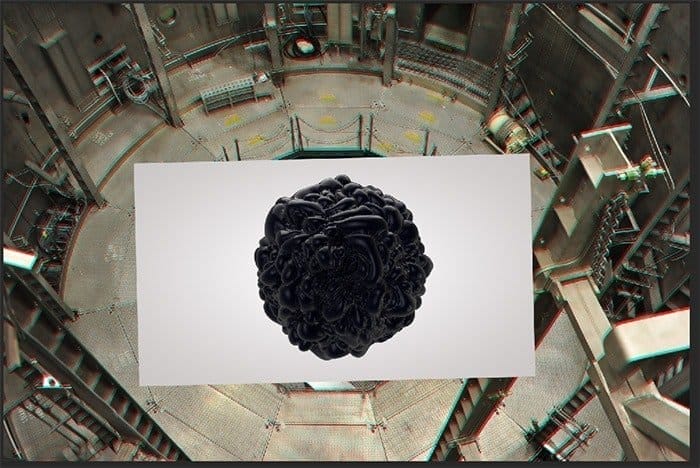
Time to add the spheres. In the resource that you have downloaded the 15 kinds of spheres. You can choose what you like. I used “tester sphere3” I liked it because of the interesting shape and unusual textures. Resembles a ball of energy or substance that changes its form. Go to File > Place and select the image “tester sphere3” in folder “3D_sphere_renders_by_in_the_skies”. Do not worry about the format “TARGA (.tga)”. Photoshop fully realizes its.
Resize the layer like shown in the image (Ctrl/Cmd+ T or Edit > Free Transform). Place the sphere inside the shaft, (place it in the center, and then lift up a little).


Step 8
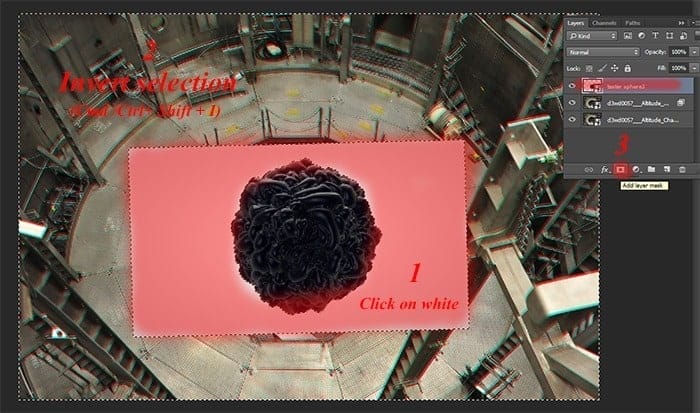
Select a Magic Wand Tool (W) and click on white background of sphere. Then Invert selection (the short keys Cmd /Ctrl+ Shift + I). Selected to become a sphere, and not background. Add a Layer Mask to remove background.


Step 9
Duplicate sphere layer once (use the short key Cmd /Ctrl+ J or Layer > Duplicate Layer). Change a Blending mode to “Linear Dodge (Add)”. This layer helps to give shiny effect to the sphere and make texture more “live”.

Step 10
Back to the first sphere to create a small spheres. To make this easier, use a Move Tool (V) + hold Option/Alt. Drag the the sphere to the right place. So you can quickly duplicate the sphere and work with them.
To resize spheres use Free Transform tool (Ctrl/Cmd+ T or Edit > Free Transform). Reduce the size of spheres depending on the close to floor. Rotate the sphere so that the lightest part is directed towards the central sphere.

So I endeared sphere. You can try to make your own version and arrange them differently. To make the picture a little more interesting, I made a double sphere.

Step 11
Merge all layers with the spheres (select layers and use Cmd /Ctrl+ E or Layer > Merge Layers…) except a central sphere and its additional layer.
13 responses to “Omega – Create this Abstract Composite Using Only Three Resources”
-
where is the material??
-
where is the material?
-
amazing ideas and creativity
-
Absolutely beautiful works.. This is what called “Creativity”.
-
i really love this website!
-
thank you Maria Semelevich
-
Vry nyc
-
Thank you veru much! I am very pleased! :) I hope it will be helpful to you!
-
-
like
-
Thank you veru much! I am very pleased! :) I hope it will be helpful to you!
-
-
amazing…
-
Thank you veru much! I am very pleased! :) I hope it will be helpful to you!
-
wonderful!
-


Leave a Reply