

Luminar AI lets you turn your ideas into reality with powerful, intelligent AI. Download the photo editor and see how you can completely transform your photos in a few clicks.
What you'll be creating
Created as something fun for a friend of mine, we'll be making a studio "portrait" of a dog. For this, I used some very simple techniques that should allow any pet owners here to use their own dogs as models! This will also serve as great practice for simulating studio lighting when doing photo manipulations in general. The rule to remember here is to take advantage of layers to produce dynamic and realistic shadows. So let's get started!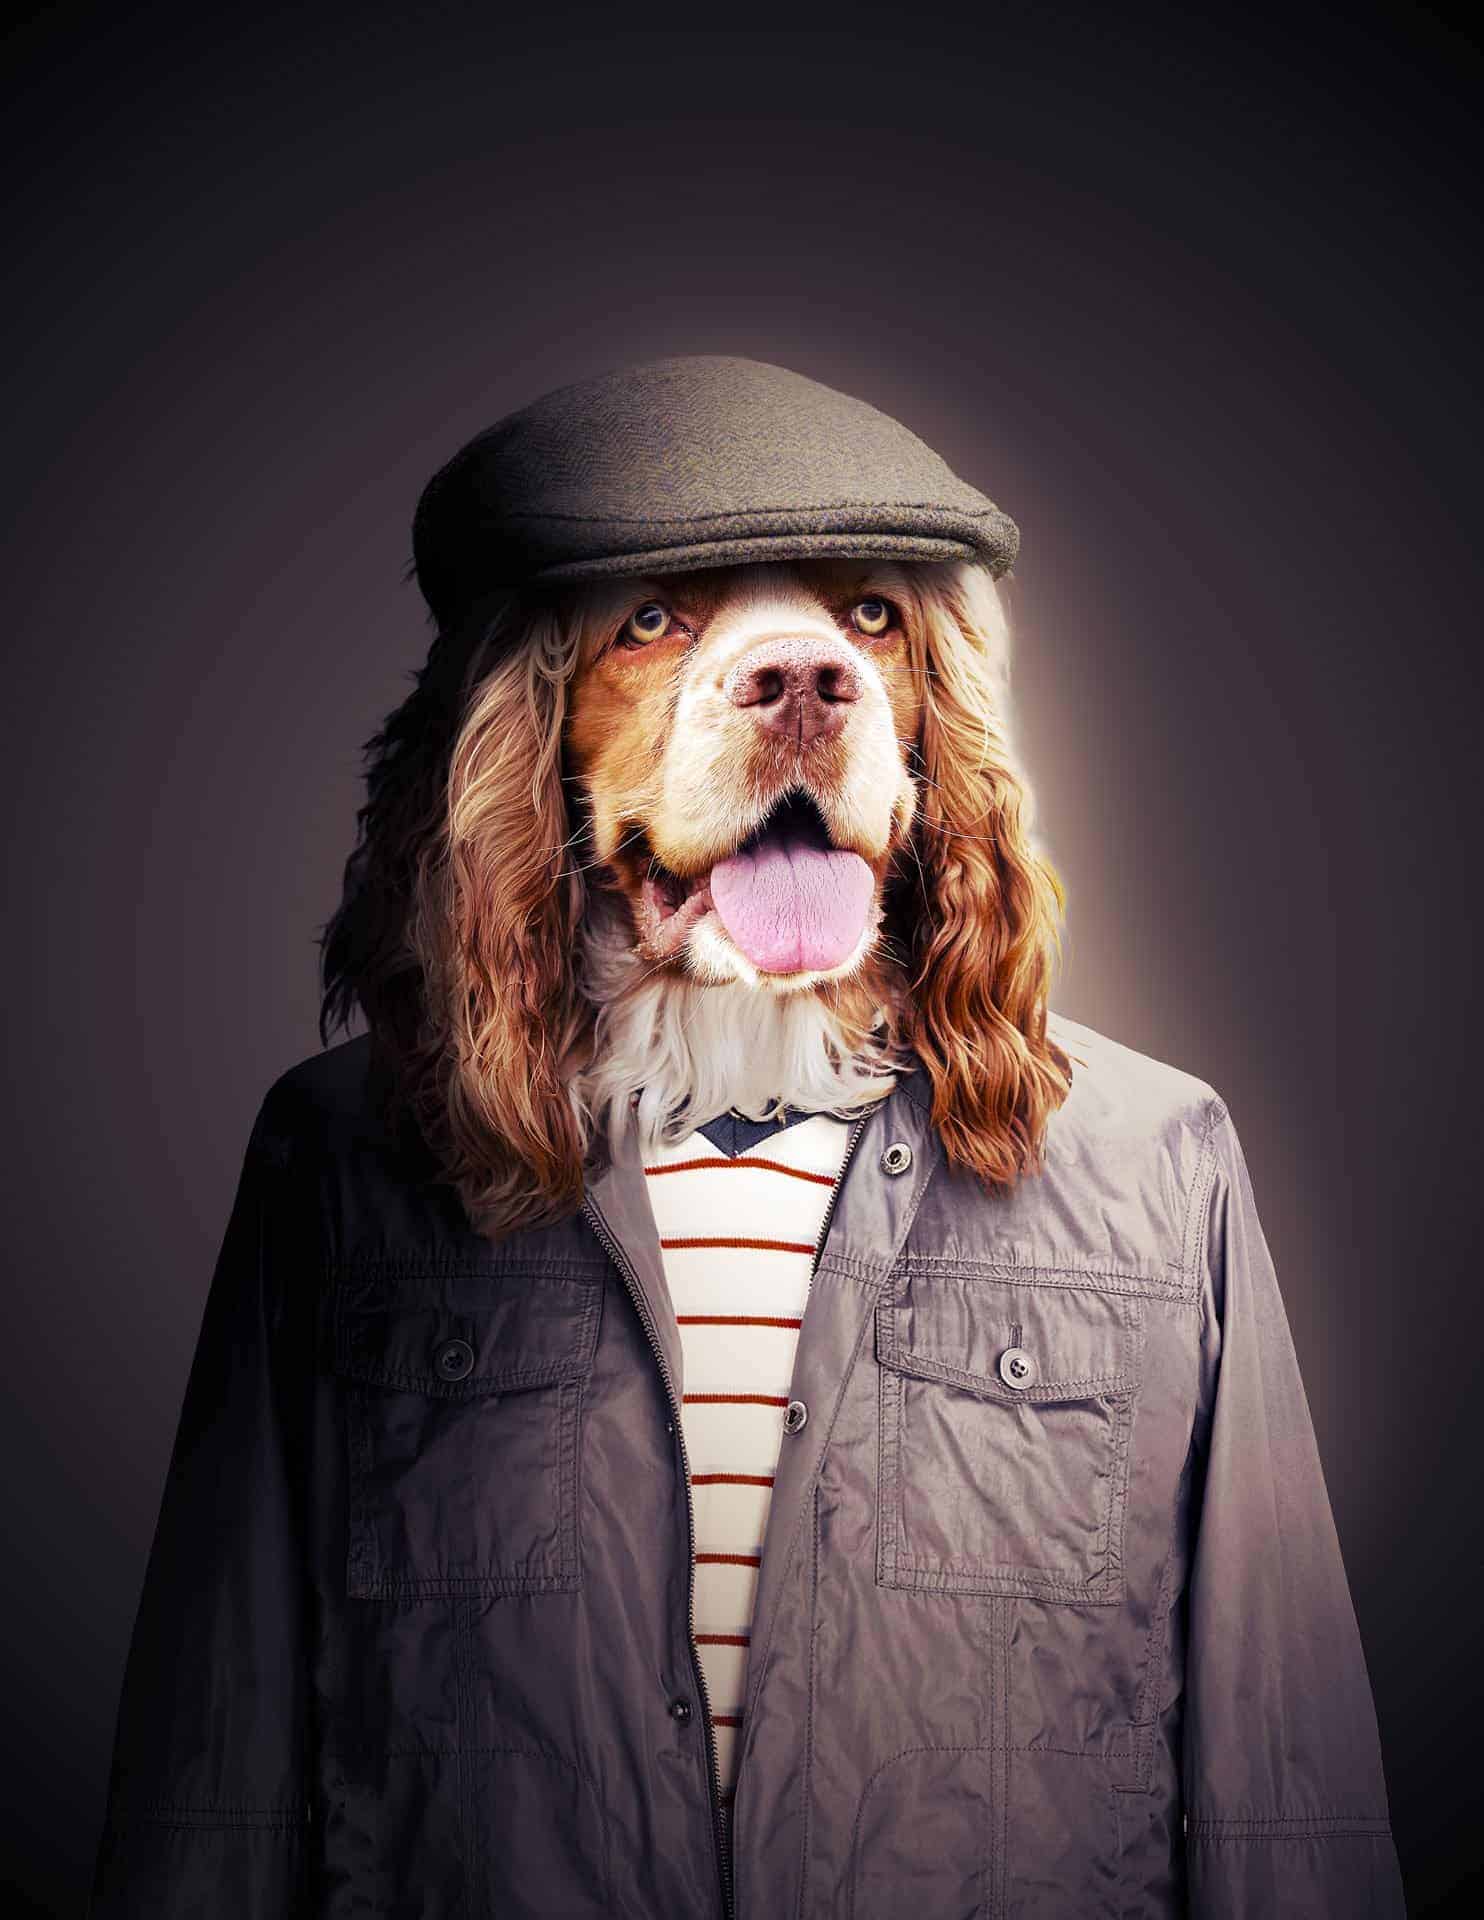
Tutorial Resources
Dog- Free Images(Alternative)Hat- Free Images(Alternative)- Jacket- Adobe Stock (Link to 10 free Adobe Stock images)
Step 1
Let's go ahead and make a new document in Photoshop (File > New) and go with a taller tabloid size. However its also helpful to work in sizes that perform better on your own computer, and with this project size isn't set in concrete.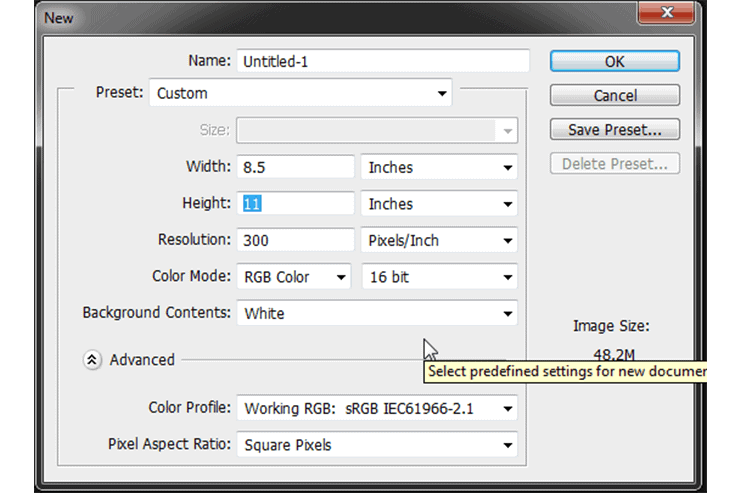
Step 2
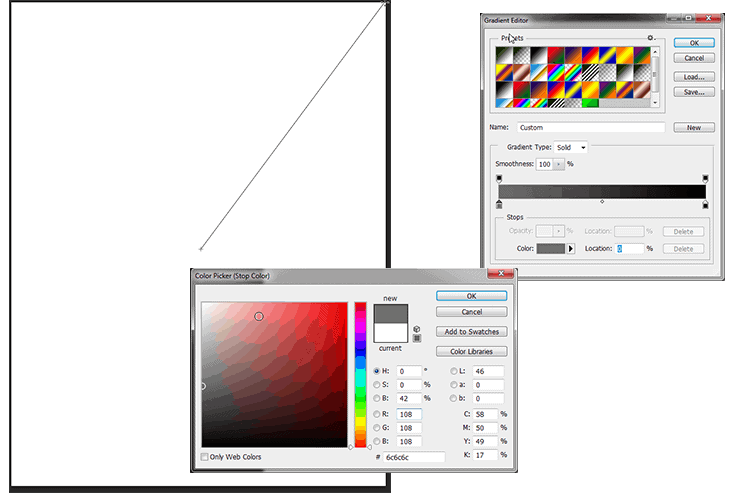
Now that we've got a document all set up, bring in a new layer ( Shft+Ctrl+N on PC and Cmd+Shft+N on Mac). Go ahead and name this layer "Background" or something similar for your own convenience. We're going to make this a nice dark gradient so bring up the Gradient tool (G) and set the left color to #6c6c6c and the right to complete black #000000. Make sure the tool is set to radial (on the top bar its located right under where it says Type, Second from the left). Click in the middle and drag out just past one of the corners. This will give us a nice soft base to work off of.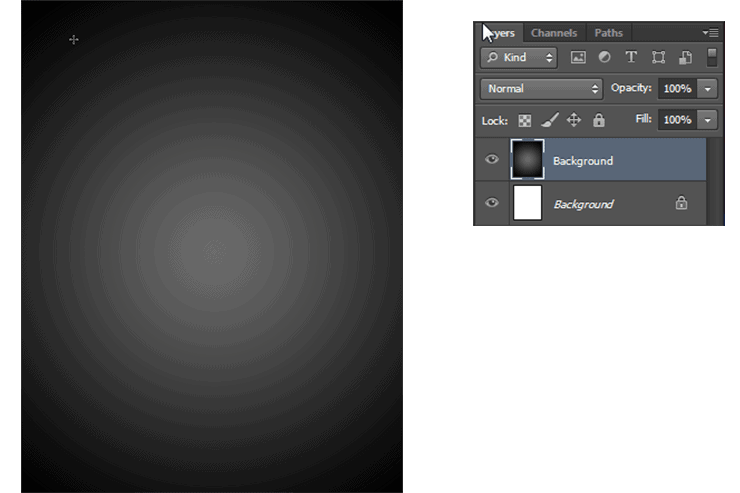
Step 3
Bring in your pet photo, remember the higher the quality you use here then the better it will look later. Even still there's a lot you can do with less than perfect pictures with time and effort. Go ahead and use the pen tool(P) to get a close cut around the edge of your pet. It doesn't have to be exact (especially with fur) just a nice close shape. Once your happy with the line you have Right Click and click on Make Selection. Now we can use a wonderful tool called Refine Edge.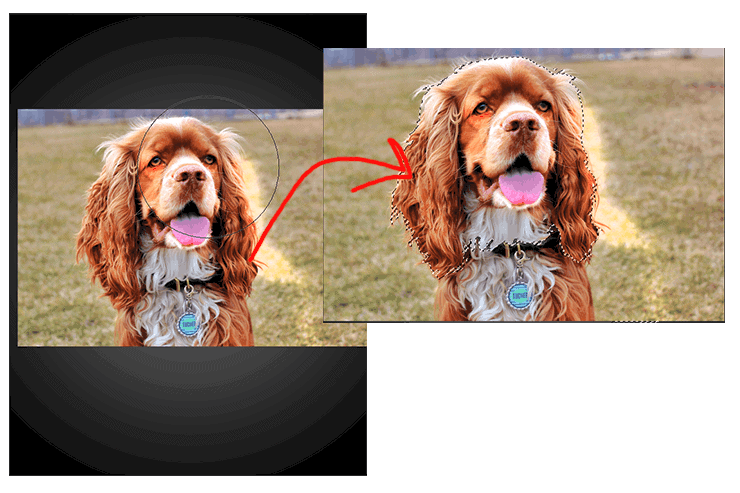
25 comments on “How to Create a Human Portrait of a Dog in Photoshop”
ima turn this project into a csgo texture and obliterate it
Amoooogus SUs
amogus
sus
do yo guys play fortnite chapter 3?
sus
Sus
I'm sorry but many of these tutorials are so lame.
Peter Smith Agree. I think is time to get out of this page
First I want to say I have no connection to this site... I just use it like thousands of others. I just had to say "Peter Smith you need to get a life". These tutorials are from talented people. If you don't like a site DON'T USE IT. I am sorry that you are so unhappy with your own life that you need to put other people down. I owned my own "very successful" 10 person marketing design firm for over 30 years. I know good design... and these tutorials are not lame. I may not use the tutorials step by step... but I always take away some technique I can use elsewhere. Social media has created an avenue for people like you to post comments "while sitting in your Mom's basement" that somehow make you feel superior. NOTE: don't bother sending back some nasty "made up" response to this comment... as I won't read it. Instead I will use my time enjoying life and expanding my knowledge. Why don't you create your own tutorial site and let people write you nasty comments. My guess is that you do not have the ambition to do something that helps make other people grateful. I am sure your comment back to me would be "I am just too busy creating great art" to create a site... but I could. If that was true... why try to tear down someone else's work. Go do your own thing and leave the people behind "Photoshop Tutorials" alone!
wanna Youtube Tutorials bro...its not easy for me ..?
Your Photoshop Tutorial is so helpful..and the dog is looking so nice...
Your Human portrait tutorial and the dog is so nice.I hope anyone learn it easily.Thanks for share an informative tutorial..
Hilarious! This effect would be good for any dog lover and I am sure they would love to see it on their wall as art.
Wow! This would be worth a lot to me
LOL awesome! My mom would love to see an image like this.
I love the results. great work
This is awesome! And I have friend who is absolutely nuts for her little pup. This would make a great gift for her! Thanks for providing the steps. :)
Oh, how funny! And something that would be perfect for my dad. Just would have to figure out which dog to do, either the English Bulldog or Boston Terrier.
Hey, it's really a funny and helpful tutorial. Thank you for sharing.
The dog link doesn't work :(
who cares
It doesn't look "real"
Best friend?
This would be what you'd look like if u were a dog Gill Gonzales bahaahaa with your hat