Make skin look perfect in one-click with these AI-powered Photoshop actions.
If you create a panorama from multiple images with Photoshop, you will be able to use the Panorama correction option which is designed to correct the arches in panoramas. You have to create the panorama with Photoshop’s stitch tool and have all the layers intact for this option to be visible – opening a panorama JPEG file won’t work.
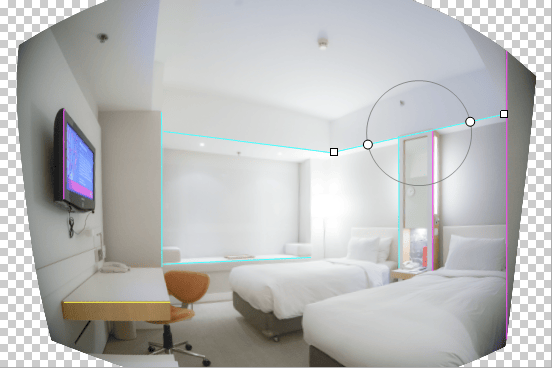
Simply draw lines to straighten edges. Hold the Shift key while drawing to make an edge perfectly horizontal or vertical.

This filter works great for fixing ultra wide angle photos. Slanted and curved lines were straightened in less than 1 minute. It also fixed the perspective of the image (ex. both beds are equal size in the after photo).
19. Using the Liquify tool on gigantic images
The Liquify tool is pretty much the same thing except that it’s now useful for your gigantic 15+ megapixels images. In CS5, liquifying an image isn’t real-time; you have to liquify then wait for Photoshop to render it. Now in CS6, you can liquify an image with no lag. This is possible with the new Mercury Graphics Engine which uses your GPU to do the work. You can even edit using the new max brush size of 15,000 pixels (up from 1500 pixels) without lag.
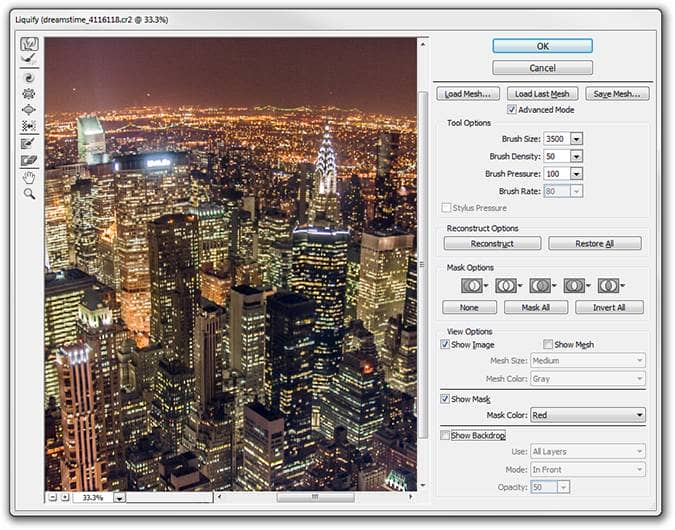
The performance improvement and larger brush sizes makes it easier to liquify high-res images.
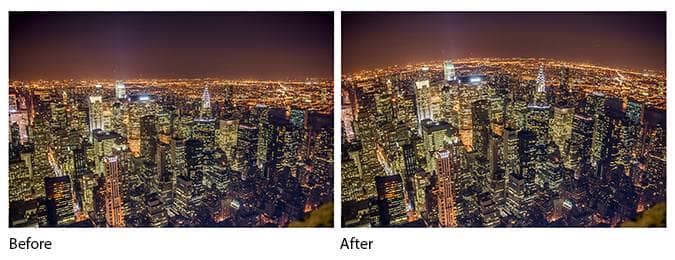
Using the larger brush sizes, you can create curved horizons on high-res photos.
20. Turning photos into oil paintings in seconds
This new artistic filter lets you easily turn photos into oil paintings and it works on Smart Objects. Unfortunately, it suffers the same problem that many other artistic filters – the settings don’t scale with the image size. That means that if you are working on a high-res photo, you might not get an effect that is strong enough. The only way around this is to resize your photo down, rasterize the layer (if you are using Smart Filters), then enlarge it back.
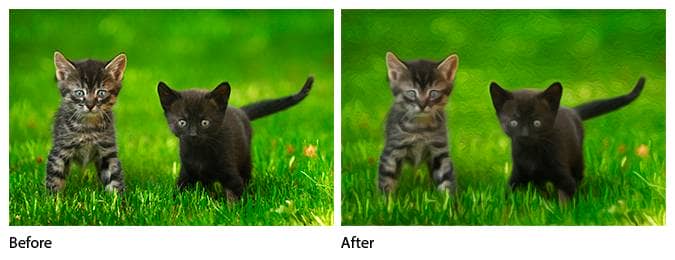
Turn photos to oil paintings in seconds
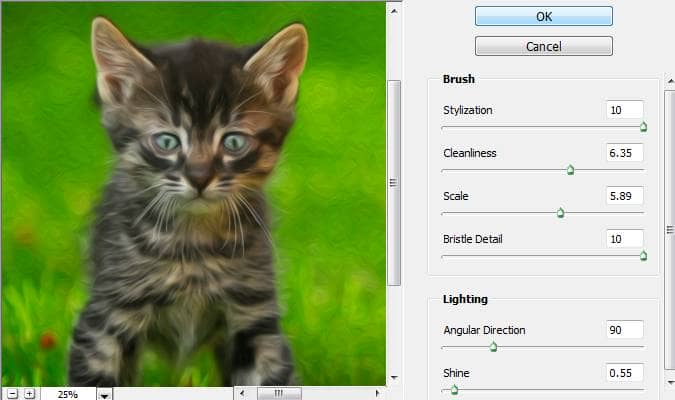
The Oil Paint filter
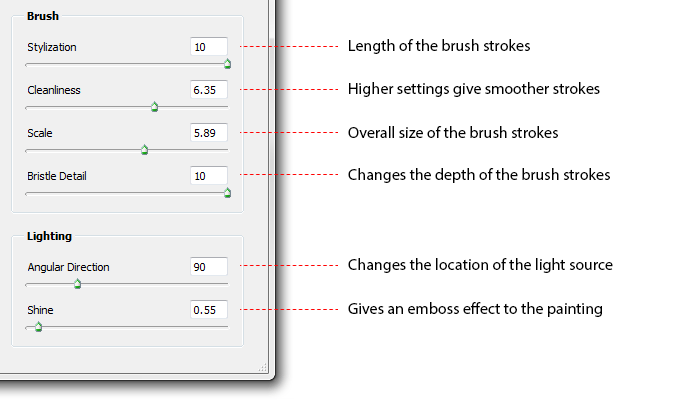
Settings you can adjust to get the look you like
21. Selective blurring with Field Blur, Iris Blur, and Tilt-Shift
Selective blurring has been popular in the last few years and Photoshop CS6 makes it even easier to do selective blurring. Unfortunately, these filters are not available as Smart Filters which means you can’t go back and edit the settings at a later time.


5 comments on “Switching To Photoshop CS6? 27 New Features and Changes You Need to Know”
Great. Thank you so much.
nice one! thanks again for your post.keep it up dear!
hey what do you mean by dear
hey what do you mean by dear
Thanks