
Erodible tip dulls the tip of your brush for realistic painting results

The new erodible brush settings can be found in the Brush palette (Window > Brush).

Comparison of the 5 erodible brush tips
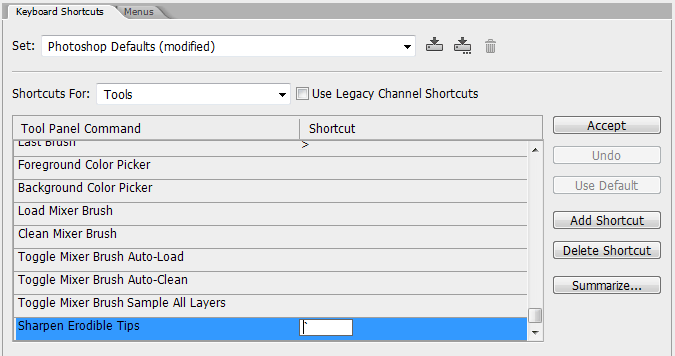
If you use Erodible brushes, you should set a hotkey to sharpen the tip. You can access this window by going to Edit > Keyboard Shortcuts. The tool is located at the very bottom of the Tools list.

The airbrush settings

Hold down the Alt/Option key then right-drag anywhere in your document to bring up the live brush settings. You can also hold the Ctrl + Option key and left-drag on a Mac. Drag horizontally to adjust the brush size and vertically to adjust the hardness.
12. Using the improved Gradient fills
Whether you’re doing it via the Gradient tool, layer styles, or Gradient Fill layers, you will like the new scale option that lets you scale up to 1000% (up from 150%).
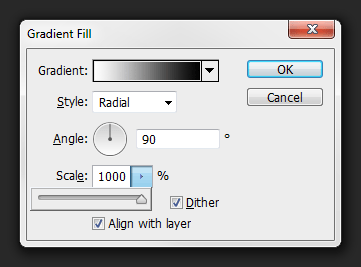
Scale gradients up to 1000% (compared to 150% in CS5)
13. Using the new Text features
There’s so many features with the Type tool that Photoshop CS6 now has a new Type menu. One awesome feature designers love is the Lorem Ipsum text generator. For those who don’t know, Lorem Ipsum is placeholder/filler text you can use instead of typing in random text. The new Character Styles and Paragraph Styles palettes let you create your own typography presets.
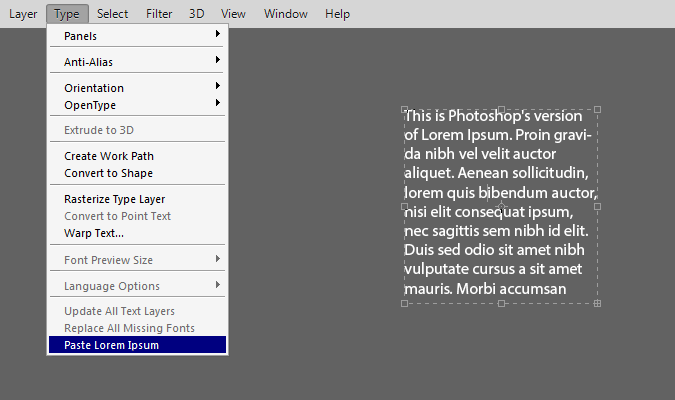
With the Text tool, draw a text box then go to Type > Paste Lorem Ipsum.
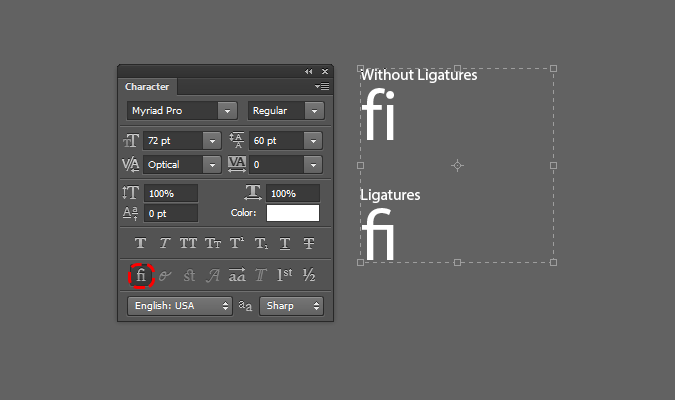
OpenType features are now built into the Character palette. In CS5, these were hidden inside the flyout menu.
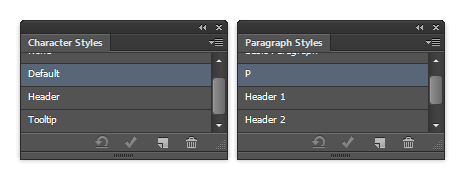
Use the new Character Styles and Paragraph Styles palettes (Window > Character Styles/Paragraph Styles) to create text and paragraph presets.
 t
t
Character Style Options
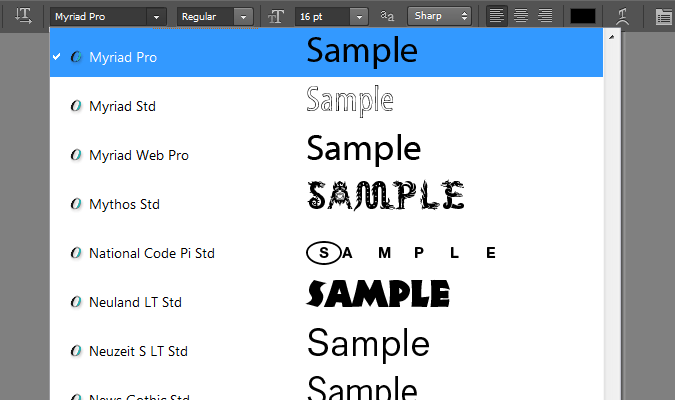
You can change the font preview size by going to the Type > Font Preview Size menu.
14. Making adjustments with the Adjustments and Properties palettes
In Photoshop CS5, you would change an adjustments settings in the Adjustments panel (Window > Adjustments). CS6 has a new panel for this called Properties (Window > Properties). Inside the Properties panel is a new Masks tab where you can adjust the layer mask.

15. The New “Enhance Brightness and Contrast” Auto Adjustment
There’s a new auto button in the Brightness/Contrast, Levels, and Curves adjustments and it works differently. Originally, it would adjust the contrast for each channel (red, green, and blue). In Photoshop CS6, it enhances the brightness and contrast and for more stable color results. It’s also easier to make adjustments afterwards because you can modify the black and white points without having to go into each channel.
5 responses to “Switching To Photoshop CS6? 27 New Features and Changes You Need to Know”
-
Great. Thank you so much.
-
nice one! thanks again for your post.keep it up dear!
-
hey what do you mean by dear
-
hey what do you mean by dear
-
-
Thanks


Leave a Reply