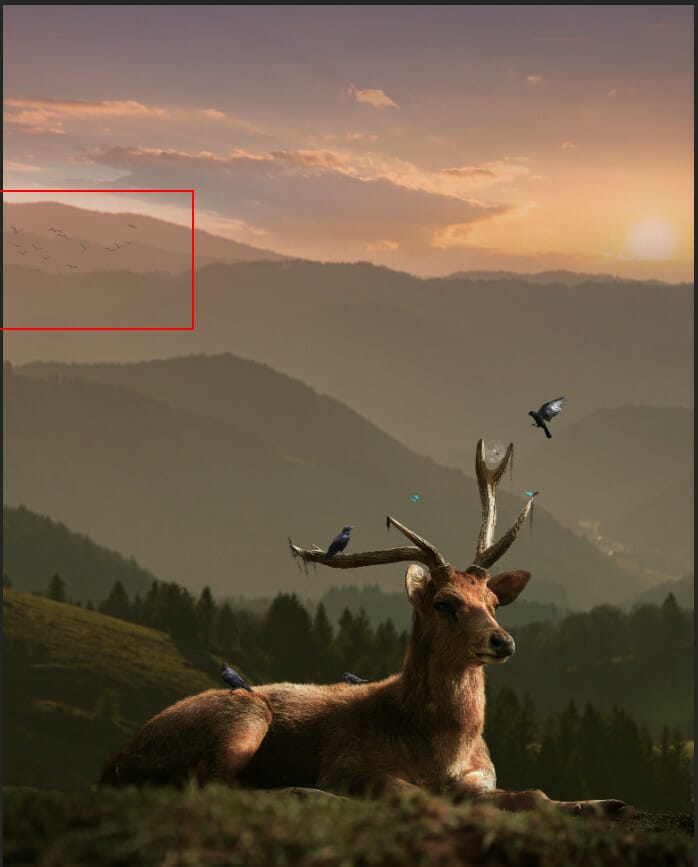
Add another Adjustment Layer “Curves” and press Ctrl/Cmd + I to invert. Then use Brush Tool(B) Soft Round with foreground color white and paint the right side of Bird.

Step 25
Open Birds and hold Ctrl/Cmd and click on layer and after the selection area has been created, simply copy (Ctrl / Cmd + C) and Paste (Ctrl / Cmd + V) it to our work canvas. Then position the image with the transform tool (Ctrl / Cmd + T). Hold Alt + Shift and resterize like image below. In Photoshop CC only hold Alt to resterize al sides together. Opacity reduce to 30%.


Step 26
Open another Birds and hold Ctrl/Cmd and click on layer and after the selection area has been created, simply copy (Ctrl / Cmd + C) and Paste (Ctrl / Cmd + V) it to our work canvas. Then position the image with the transform tool (Ctrl / Cmd + T). Hold Alt + Shift and resterize like image below. In Photoshop CC only hold Alt to resterize al sides together. Opacity reduce to 40%.


Step 27
Create a new layer and use Soft Round Brush with foreground color Yellow #f1dda0 then paint on right side, thats light source. Opacity set to 30%.

Step 28
Add Adjustment Layer “Gradient Map” and Blend mode change to Hue.

Step 29
Add Adjustment Layer Gradient Map and Blend mode change to Overlay with Opacity 15%.

Step 30
When we finished all this, now merge all layers to one. Select the last layer and hold CTRL/CMD + SHIFT + ALT + E. Now we have a final layer, right click on mouse and select Convert to Smart Object. Then go to Filter > Camera RAW Filter. At its most basic, the Photoshop Camera Raw filter allows you to use the functions of the ACR interface at any time within Photoshop.

Step 31
Now in Camera Raw Filter, set the Value: Basic
- Exposure: -0.10
- Contrast: +10
- Highlights: +20
- Shadows: +15
- Whites: +10
- Blacks: +10
- Texture: +10
- Clarity: +10
- Vibrance: +20
- Saturation: -7

Color Grading
- Midtones: H45 S21

Gradulated Filter
- Exposure: +0.35
- Highlights: +10
- Shadows: +8
- Whites: +5

And finally, everything should look like this.

Final Results

Download the PSD
One response to “Create a Warm Landscape Scene of a Deer Photoshop Tutorial”
-
wow this is really nice, do you have a youtube page


Leave a Reply