- Select the Pen tool.
- Position the Pen tool where you want the straight segment to begin, and click to define the first anchor point (do not drag).
- Click again where you want the segment to end
- Continue clicking to set anchor points for additional straight segments.
- The last anchor point you add always appears as a solid square, indicating that it is selected. Previously defined anchor points become hollow, and deselected, as you add more anchor points
- Complete the path by doing one of the following:
- To close the path, position the Pen tool over the first (hollow) anchor point. A small circle appears next to the Pen tool pointer
 when it is positioned correctly. Click or drag to close the path.
 - To leave the path open, Ctrl-click (Windows) or Command-click (Mac OS) anywhere away from all objects. To leave the path open, you can also select a different tool.


Step 7
Add Adjustment Layer “Curves”

Step 8
Add Adjustment Layer “Color Balance”

Step 9
Add Adjustment Layer “Curves” and press Ctrl/Cmd + I to invert. Then use Brush Tool(B) Soft Round with foreground color white and paint surface on which the deer lies.


Step 10
Next, we add SpiderWeb but first we need to import brushes. Select a Brush Tool(B) and right click on background. Now click on the gear icon and Import Brushes (Select a downloaded brush).


Now we can paint SpiderWeb on Horn. Create a new layer and Foreground color use White.

Next, import another Brush( Spider). Create a new layer and brush with foreground color black than place Spider on Web.


Step 13
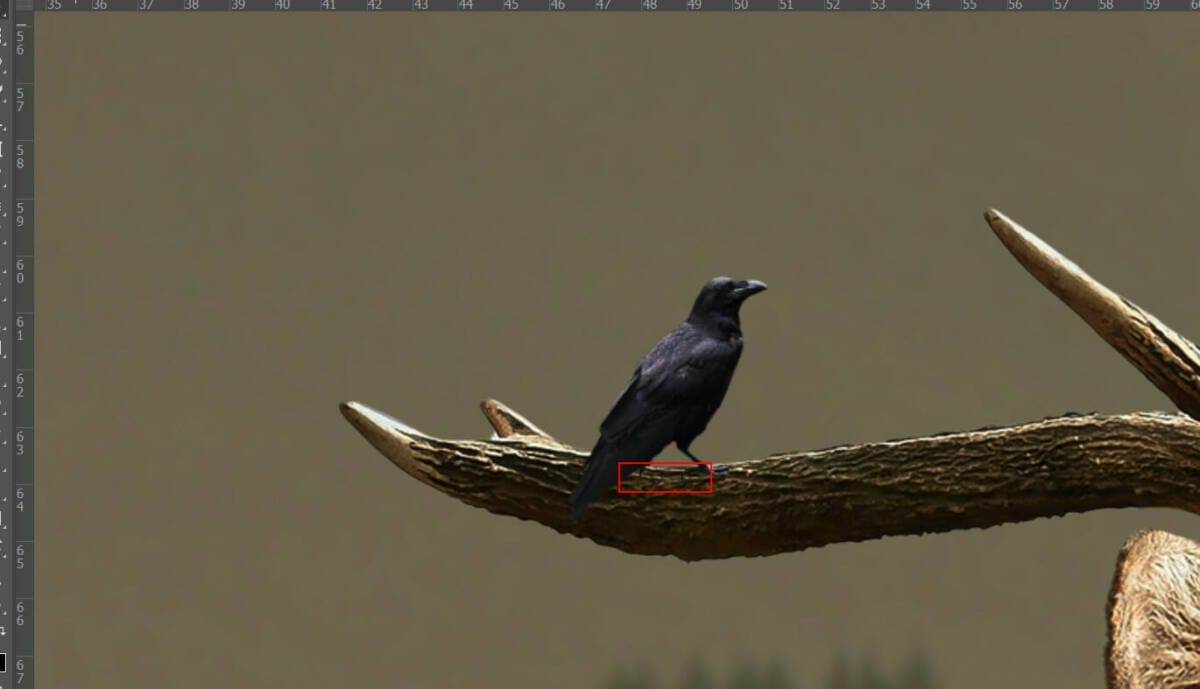
Next we will open Bird 2. After you open the image, use Quick Selection Tool(W) and select the left bird. After the selection area has been created, simply copy (Ctrl / Cmd + C) and Paste (Ctrl / Cmd + V) it to our work canvas. Then position the image with the transform tool (Ctrl / Cmd + T). Hold Alt + Shift and resterize like image below. In Photoshop CC only hold Alt to resterize al sides together.


Step 14
Now create a shadow, create a new layer under Bird layer and use a Brush Tool(B) Soft Round with foreground color black and start painting the shadow but first drop a flow to 10%. Blend mode change to Multiply. Opacity of layer set to 49%.


Step 15
Add Adjustment Layer “Curves” and press Ctrl/Cmd + I to invert. Then use Brush Tool(B) Soft Round with foreground color white and paint the left side of Bird.

Add another Adjustment Layer “Curves” and press Ctrl/Cmd + I to invert. Then use Brush Tool(B) Soft Round with foreground color white and paint the right side of Bird.

Step 16
Now create a new layer and paint a some Moss. First import new brush and select one then paint on horn. Foreground color use Black.


Step 18
Open Bird 2 and hold Ctrl/Cmd and click on layer and after the selection area has been created, simply copy (Ctrl / Cmd + C) and Paste (Ctrl / Cmd + V) it to our work canvas. Then position the image with the transform tool (Ctrl / Cmd + T). Hold Alt + Shift and resterize like image below. In Photoshop CC only hold Alt to resterize al sides together.
One response to “Create a Warm Landscape Scene of a Deer Photoshop Tutorial”
-
wow this is really nice, do you have a youtube page


Leave a Reply