Luminar AI lets you turn your ideas into reality with powerful, intelligent AI. Download the photo editor and see how you can completely transform your photos in a few clicks.
Step 47
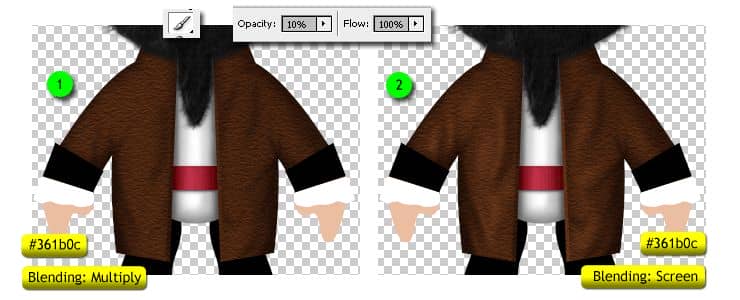
Then start to paint indentation on the jacket. Use #361b0c, for its shadow use multiply blending, and for its highlight use screen blending. See image below for reference.
Step 48
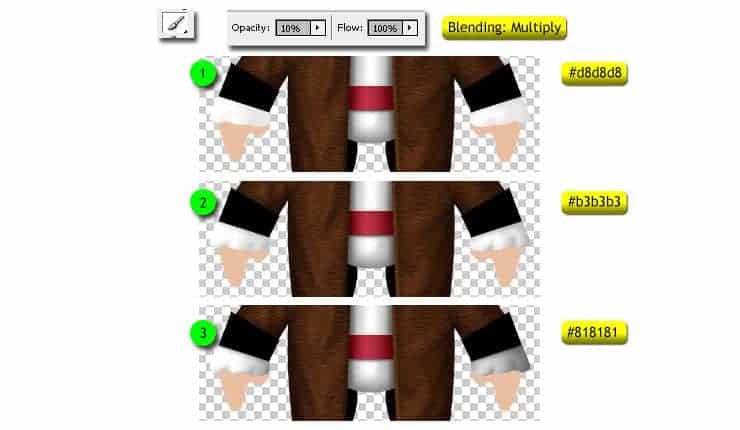
Add shadows for the white part of cuff.
Step 49
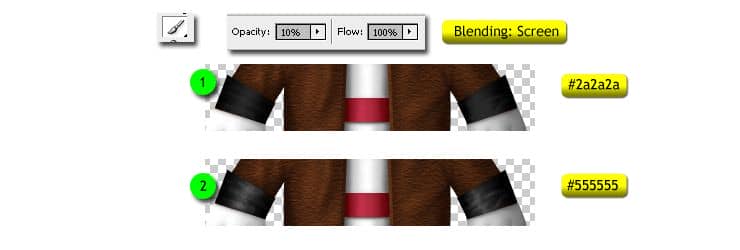
And add highlights for the black part.
Step 50
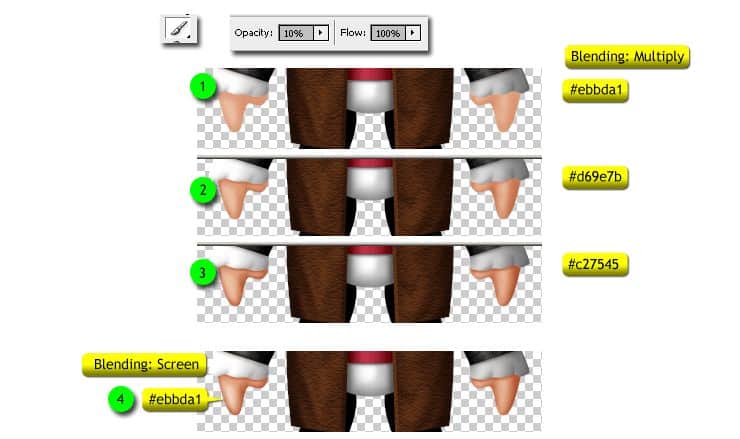
For the hand, paint the shadow using #ebbda1, #d69e7b and c27545 with multiply blending. Then paint its highlight using #ebbda1 with screen blending.
Step 51
Next go to the legs, add only the highlight using #2a2a2a and #555555 with screen blending.

Step 52
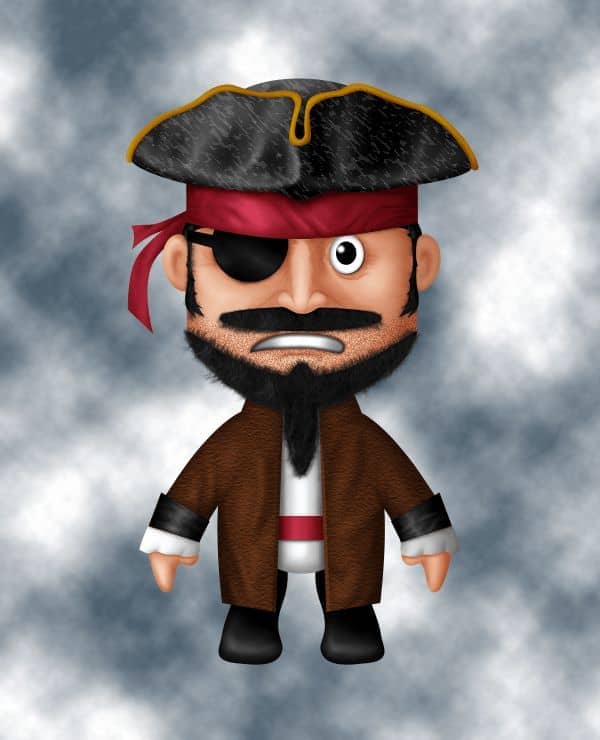
Double click on the Background layer to turn it into plain layer. Set foreground color to #4e606e and background color to white. Then go to menu Filter > Render > Clouds. To make the clouds background sharper, hold "Opt/Alt" when you access the menu filter. And you have to hold your left click while you hold "opt/Alt".
Just like this, hold your "Opt/Alt" key, then put your cursor onto menu Filter, then click and hold, move to Render > Cloud, release your click. Your clouds result will be sharper.
Step 53
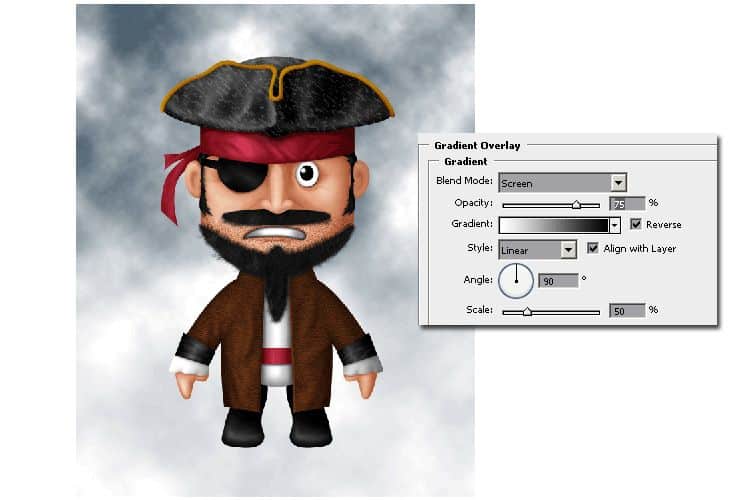
Add layer style for this clouds background, that is Gradient Overlay. Enter following settings shown on image below.
Step 54
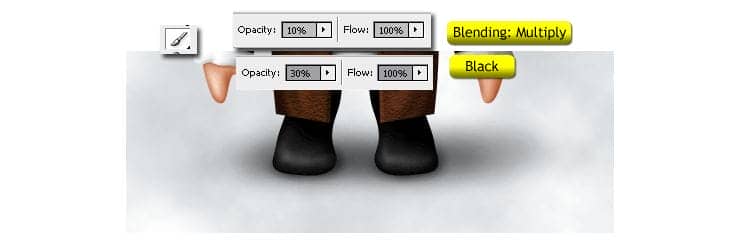
Paint the shadows under the pirate on new layer behind legs. Note that there are two shadows here. First, the thinner shadow, it is wider and softer. And the second one is the thicker shadow, it is closer to the legs. Paint them all with soft black.
Step 55
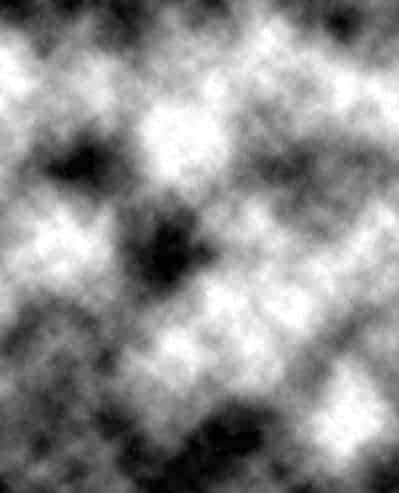
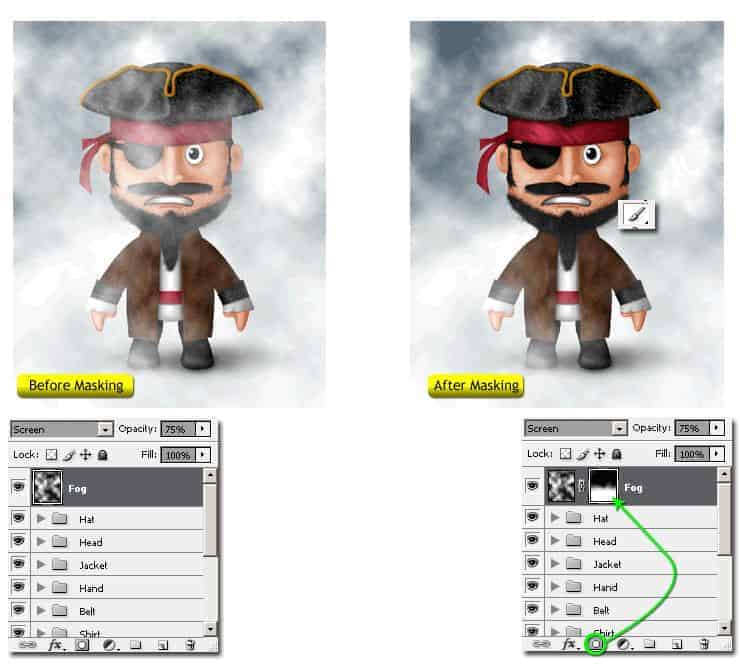
Go to the uppermost layer, then create a new layer (Cmd/Ctrl + Shift + N) above it. Set the background and foreground color to default black and white by pressing "D". Then add clouds using menu filter like before. Filter > Render > Clouds.
Step 56
Set its blending mode to "Screen" then reduce its opacity layer to 75%. Add layer mask by clicking layer mask icon on layer palette. And then use Brush Tool (B) with soft round brush, 0% hardness and black color to mask the upper parts of the image.
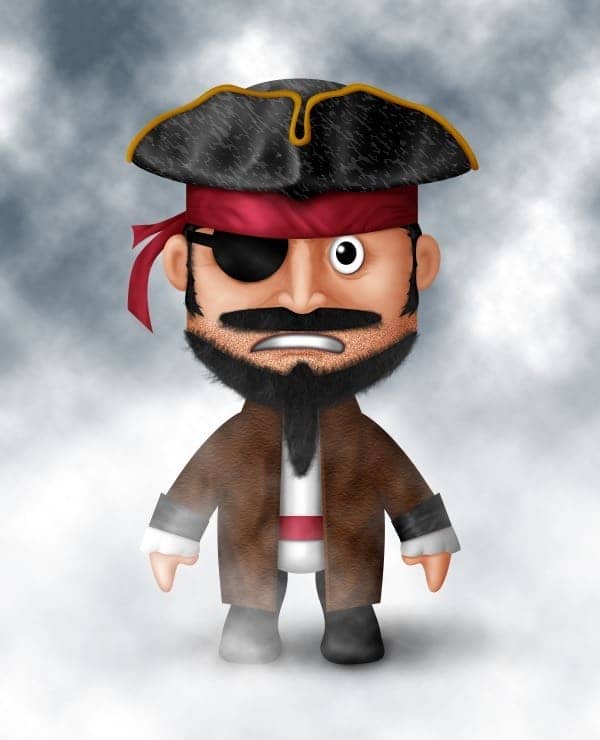
Final Results
![final-results[1] final-results[1]](https://cdn.photoshoptutorials.ws/wp-content/uploads/2014/04/final-results1.jpg?strip=all&lossy=1&quality=70&webp=70&avif=70&w=1920&ssl=1)
 Thank you for following this tutorial! We hope you will get inspirations about character design or image creations from blank page after you read this tutorial.
30 comments on “How to Draw a Cute Pirate Character in Photoshop”
Great tutorial thanks for sharing .pls we need more of this,and little more details on reasons for choice of colours
Scary
you're not alone bud
i hate this
Great tutorial it was fun and entertaining so much that i couldnt do it
awful. I hate this so much.
terrible tutorial.
boo!
pls is ps use for publishing comics
quite interesting :)
It is hard for me to comprehend the detail that is needed for this to go through photoshop.
Thanks for sharing
nice demo
awesome
Some pen instructions could be clearer on how to do them
yes i can't do the anchor selection on headband
TOOOOO GOOOD . This site made me to learn photoshop,i love these tutorials
I like the idea of this tutorial, it’s very creative and the result looks great.
This is a really inspiring collection for all, I like it, thanks for shearing!
Thanks a lot for this tutorial! I learnt a lot from this! Keep posting more! <3
hello guys! i'm new on photoshop and i having trouble at textures in step 19, can anyone tell more details about this step? thanx! :)
Go to layer palette, put your cursor on the black "front part" of the hat, click to activate it. Then Create a new layer using "Ctrl+Shift+N". Fill it with black, and then create clipping mask using “Ctrl + Alt + G”. Click menu "Filter > Sketch > Chalk & Charcoal" and set like the example.
Thanks, I learned a lot from this
Hey, thanks for the pirate. I have learned some new blending techniques and fogging
I have to do this in class and I find it extreamly difficult so i decided to copy and paste it.
I will try.
Great tutorial, can't wait to try it. Thank you so much for putting so much work and effort into making it clear.
Happy Photoshoping,
M.
helo:)
wow
It wasn't as hard as it initially felt like it would be. Thank you for the another amazing tutorial, might pass this on to some of my game dev friends :)