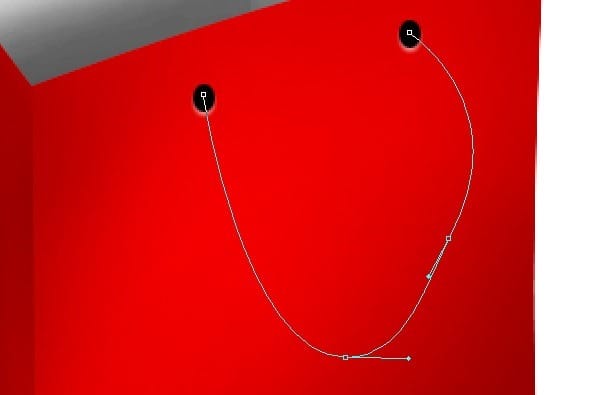
Step 21
While choosing Pen tool right click on the path and select Stroke Path with Brush setting white color, 8px and hard brush..

Step 22
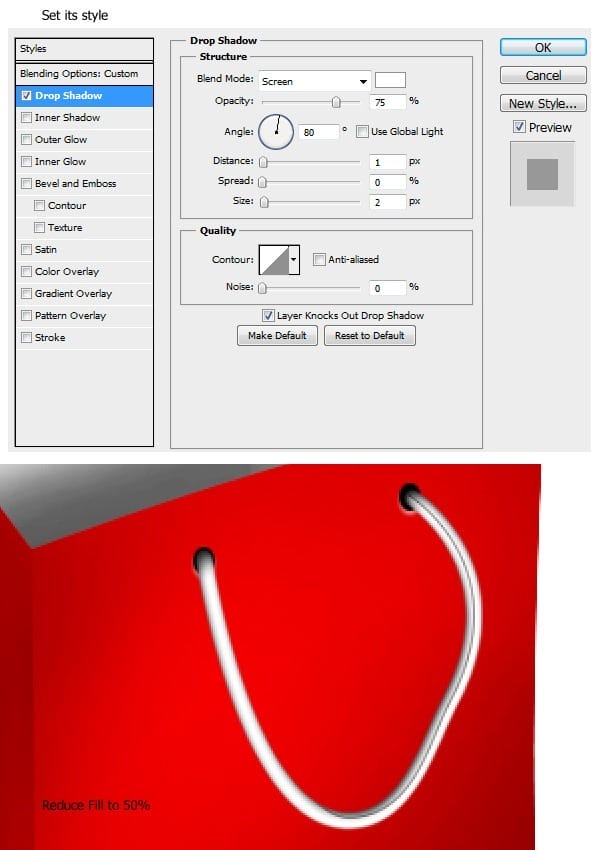
Set its style as image show below.
![clip_image002[4] clip_image002[4]](https://cdn.photoshoptutorials.ws/67a1da0e39cc_137EC/clip_image0024.jpg?strip=all&lossy=1&webp=82&avif=82&w=1920&ssl=1)
Step 23
Use Burn tool to add more details to “front string”.

Step 24
Create new layer upon “string bag”, call it “black line”. Use Pen tool to draw the following as show below.
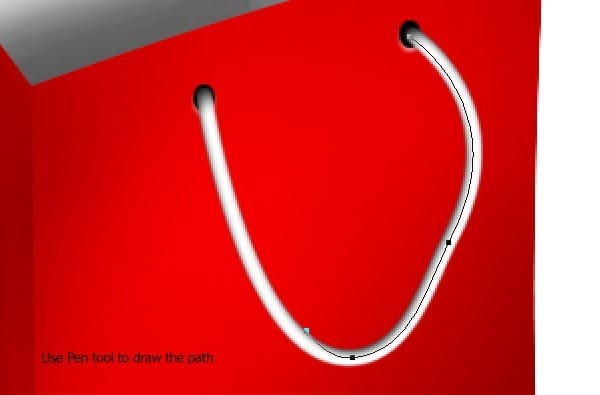
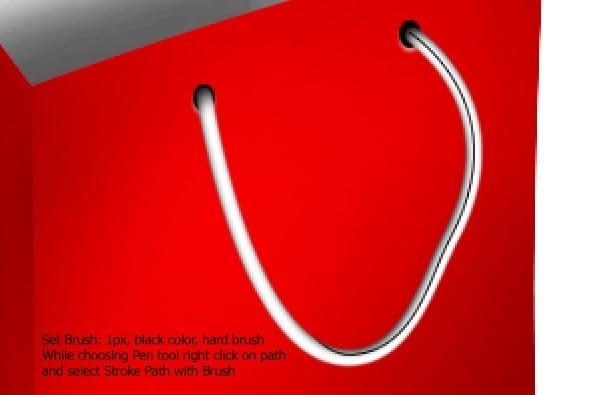
Step 25
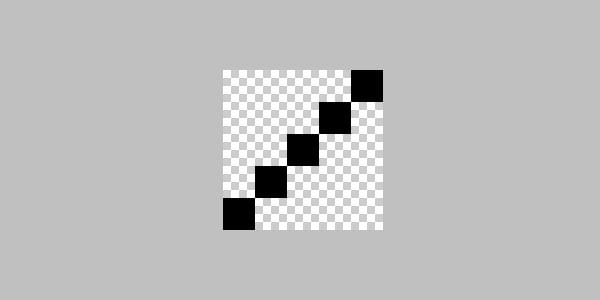
Open new document size 5px x 5px and draw the diagonal as show below. Then go to menu Edit > Define Pattern and save it to the name which you want. Close this document and come back to main document.
Step 26
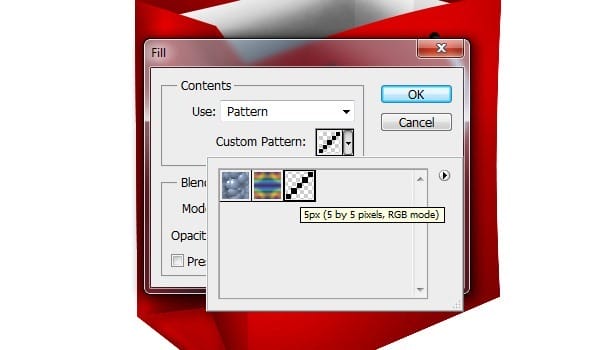
Create new layer upon “front string”, call it “front diagonal”. Go to menu Edit > Fill and recall the Pattern that you just save.

Step 27
Press Ctrl + T to transform it as image show below.

Step 28
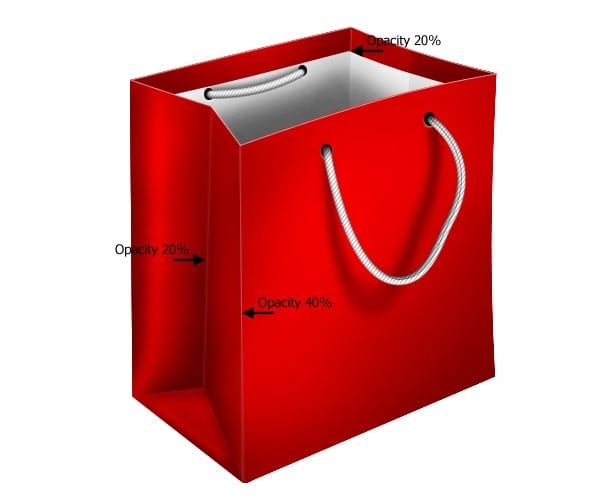
While holding Ctrl click on “front string” to obtain its selection. Press Ctrl + Shift + I to reverse the selection and go to press Delete. Then change its Blending Mode to Multiply and reduce Opacity to about 40%.

Step 29
Create new layer, call it “front string shadow”. Use Pen tool to draw following as show below.


Step 30
Create new layer upon “inside bag”, call it ” back holes”. Draw 2 holes and add to it the same style as “front holes”.

Step 31
Create new layer upon “back holes”, call it “back string”. Use Pen tool to draw the string as image below.

Step 32
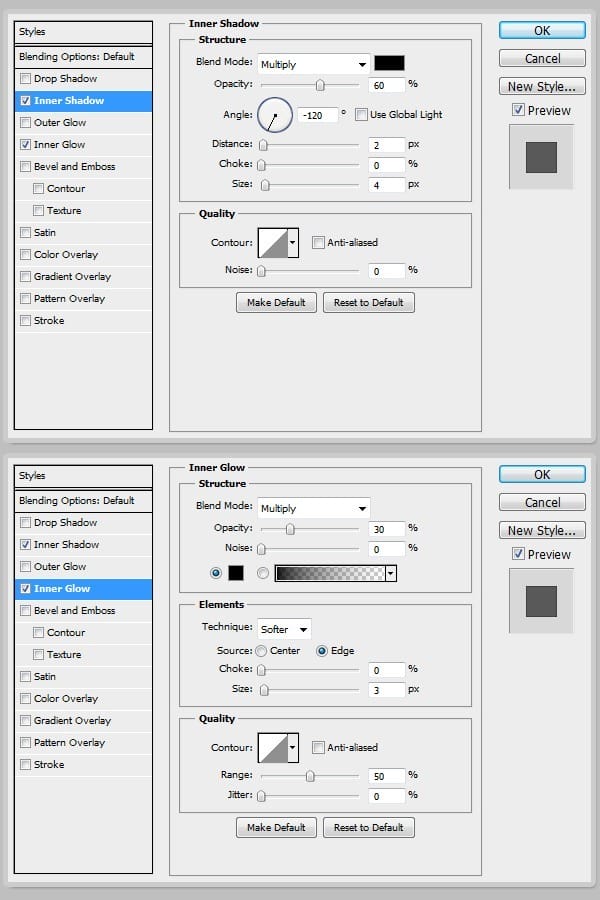
Add the layer style to it.

Step 33
Create new layer upon “back string”, call it “back diagonal” and make the “back diagonal” as the same way to make the “front diagonal”. But reduce its Opacity to 30%.

Step 34
Create new layer under “back string”, call it “back string shadow” and use Pen tool draw it as the following show below.


Step 35
Create new layer on top, call it “white line” and use Pen tool to draw the path as show below.
![clip_image002[8] clip_image002[8]](https://cdn.photoshoptutorials.ws/67a1da0e39cc_137EC/clip_image0028.jpg?strip=all&lossy=1&webp=82&avif=82&w=1920&ssl=1)
Step 36
Set Brush as image show below. While choosing Pen tool right click on the path and select Stroke Path with Brush. Then reduce Opacity to about 70%.
![clip_image002[10] clip_image002[10]](https://cdn.photoshoptutorials.ws/67a1da0e39cc_137EC/clip_image00210.jpg?strip=all&lossy=1&webp=82&avif=82&w=1920&ssl=1)
Step 37
Repeat step 35 and step 36 to make another white lines.
Step 38
Create new layer upon “main bag”, call it “reflection”. Make the selection as image show below and fill it red color.
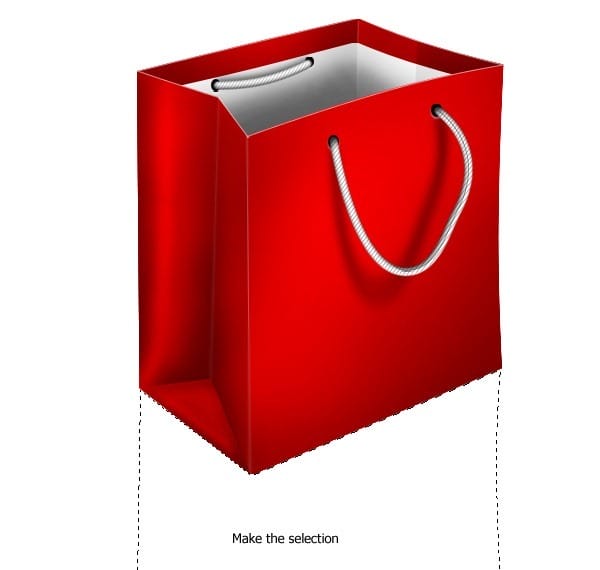

Step 39
Draw the “white lines” with color #e31d1d. Then reduce Opacity of “reflection” to 25%.
3 responses to “How to Draw a Shopping Bag Icon in Photoshop”
-
This tutorial is very useful for me…Thanks you very muchhh………
-
درس افضل من رائع
-
Great tutorial!!! Enjoyed doing this.


Leave a Reply