Download Lightroom presets and LUTs, absolutely free. Use the presets to add creativity and style to your photos.
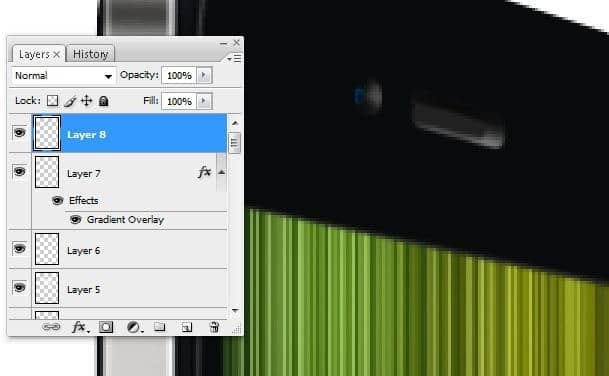
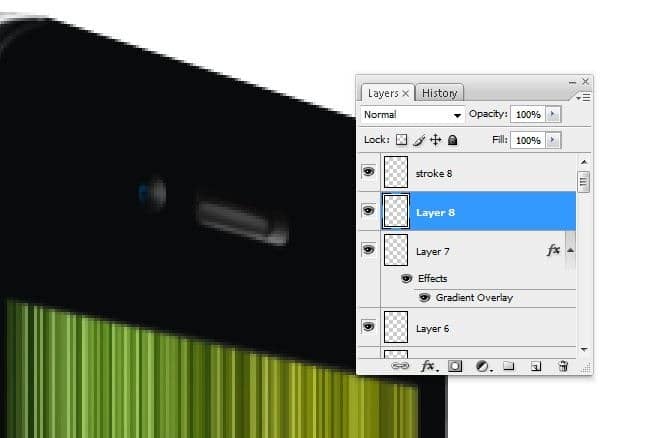
Step 33 – Create a bevel on the speaker
Create a new layer then use the Pen tool to add a 1 pixel black stroke like shown in the image below.
![33a[3] 33a[3]](https://cdn.photoshoptutorials.ws/images/stories/4896530f36e1_112DE/33a3.jpg?strip=all&lossy=1&quality=70&webp=70&avif=70&w=1920&ssl=1)
Use the Eraser tool (E) to erase around the edge to fade the stroke out.
![33b[3] 33b[3]](https://cdn.photoshoptutorials.ws/images/stories/4896530f36e1_112DE/33b3.jpg?strip=all&lossy=1&quality=70&webp=70&avif=70&w=1920&ssl=1)
Select the Lasso tool to create a selection like shown in the image below.
![33c[3] 33c[3]](https://cdn.photoshoptutorials.ws/images/stories/4896530f36e1_112DE/33c3.jpg?strip=all&lossy=1&quality=70&webp=70&avif=70&w=1920&ssl=1)
Switch to the Dodge tool (O) to add some highlights to the speaker.
Step 34 – Create the glass reflection
Create a new layer then rename it to “light”. This will hold the reflection for the iPhone. Creating the reflection is easy. Start by creating a selection like shown in the image below. It is easiest to do this using the Pen tool (P) then right clicking on the path and selecting Make Selection.
![34a[3] 34a[3]](https://cdn.photoshoptutorials.ws/images/stories/4896530f36e1_112DE/34a3.jpg?strip=all&lossy=1&quality=70&webp=70&avif=70&w=1920&ssl=1)
Select the Gradient tool (G) then apply the option bar settings shown in the image below.
![34b[4] 34b[4]](https://cdn.photoshoptutorials.ws/images/stories/4896530f36e1_112DE/34b4.jpg?strip=all&lossy=1&quality=70&webp=70&avif=70&w=1920&ssl=1)
Create a gradient from top to bottom to create a reflection like shown in the image below. It may take a few tries. Just undo (Ctrl+Z) and create the gradient again until you get it right.
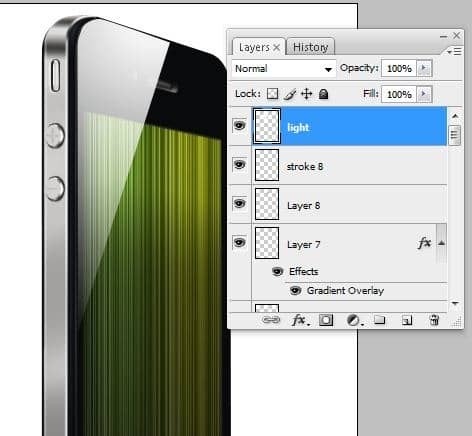
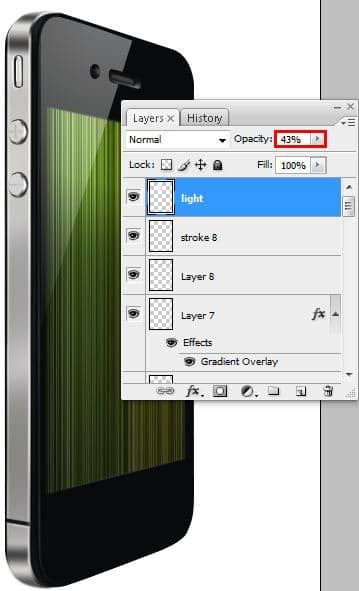
Reduce the opacity of the current layer to 43%.
Step 35 – Create a reflection for the upper left area of the bevel
Create a new layer and name it “stroke 9”. Make a path like shown in the image below.
![35a[3] 35a[3]](https://cdn.photoshoptutorials.ws/images/stories/4896530f36e1_112DE/35a3.jpg?strip=all&lossy=1&quality=70&webp=70&avif=70&w=1920&ssl=1)
Create a 2 pixel white stroke.
![35b[3] 35b[3]](https://cdn.photoshoptutorials.ws/images/stories/4896530f36e1_112DE/35b3.jpg?strip=all&lossy=1&quality=70&webp=70&avif=70&w=1920&ssl=1)
Like before, use the Eraser tool to erase the edges so that the edges fade out. This is what your image should look like.
Step 36 – Create the iPhone home button
Select the “Base” layer then use the Elliptical Marquee tool (M) to create an oval like shown in the image below.
![36a[3] 36a[3]](https://cdn.photoshoptutorials.ws/images/stories/4896530f36e1_112DE/36a3.jpg?strip=all&lossy=1&quality=70&webp=70&avif=70&w=1920&ssl=1)
Select the Dodge tool (O) and dodge the right side of the button.
![36b[3] 36b[3]](https://cdn.photoshoptutorials.ws/images/stories/4896530f36e1_112DE/36b3.jpg?strip=all&lossy=1&quality=70&webp=70&avif=70&w=1920&ssl=1)
Create a new layer then name it “stroke10”. Right click on the selection then choose Stroke Path. Add a 1 pixel white stroke.
![36c[3] 36c[3]](https://cdn.photoshoptutorials.ws/images/stories/4896530f36e1_112DE/36c3.jpg?strip=all&lossy=1&quality=70&webp=70&avif=70&w=1920&ssl=1)
Reduce the opacity of the current layer to 5%.
Step 37 – Create the home button icon
Create a new layer then use the Rounded Rectangle tool (U) to create a white rounded rectangle like shown in the image below.
![37a[3] 37a[3]](https://cdn.photoshoptutorials.ws/images/stories/4896530f36e1_112DE/37a3.jpg?strip=all&lossy=1&quality=70&webp=70&avif=70&w=1920&ssl=1)
In the Layers palette (Window > Layers), set the Fill of this layer to 0%. The Fill setting is located underneath the Opacity setting. Now go to Layer > Layer Style > Stroke and apply the settings shown below:
- Size: 2 px
- Position Inside
- Blend Mode: Normal
- Opacity: 100%
- Fill Type: Color
- Color: White
![37c[4] 37c[4]](https://cdn.photoshoptutorials.ws/images/stories/4896530f36e1_112DE/37c4.jpg?strip=all&lossy=1&quality=70&webp=70&avif=70&w=1920&ssl=1)
Move the rectangle to the center of the home button then use the Warp tool (Edit > Transform > Warp) to distort it so that it fits into the home button. Reduce the opacity of the current layer to 49%.

2 comments on “How to Draw a Photorealistic iPhone 4 in Photoshop”
I realy like your site and get what i looking for thank you very much.
thank yhu