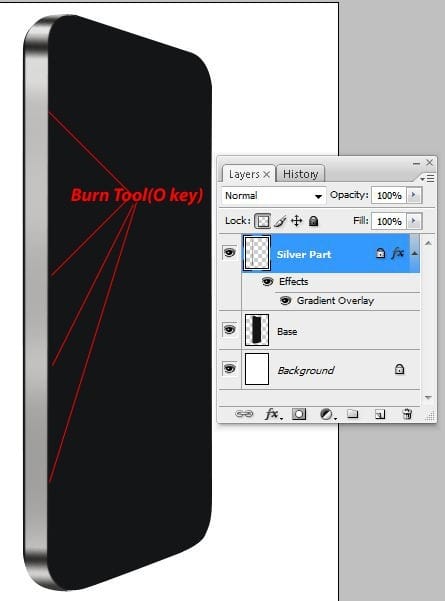
- Master Diameter : 164 pixels
- Range : Highlights
- Exposure : 63% (4A)

Use the Burn tool on the areas indicated in the image below.
Step 5 – Create a bevel for the metal band
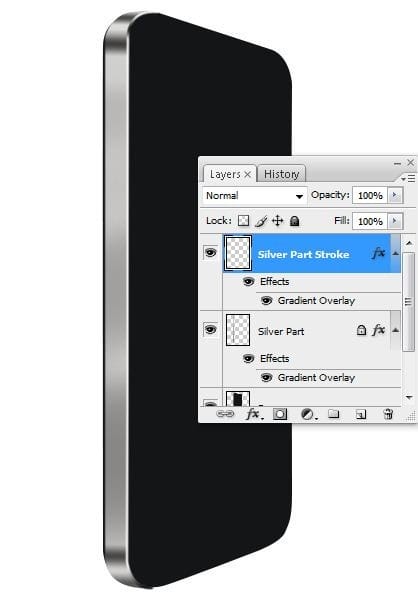
Create a new layer rename this layer to “Silver Part Stroke”. Select the Pen tool then create a path like shown in the image below.
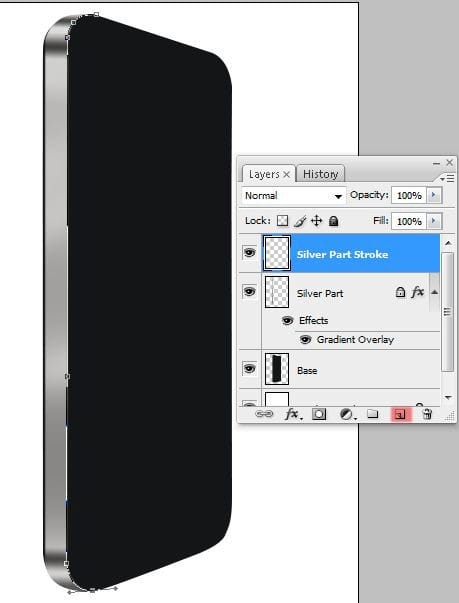
This layer will be used to create the edge of the metal band on the iPhone.
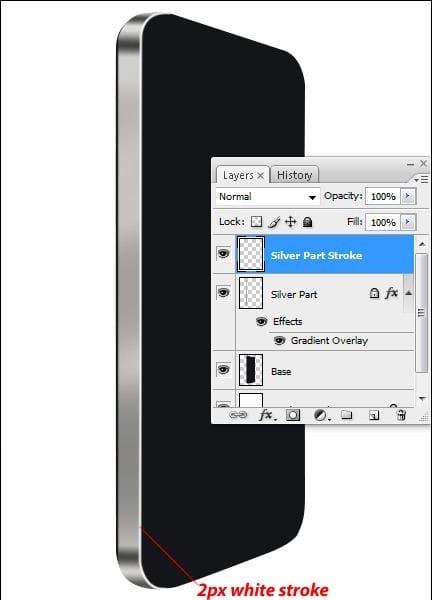
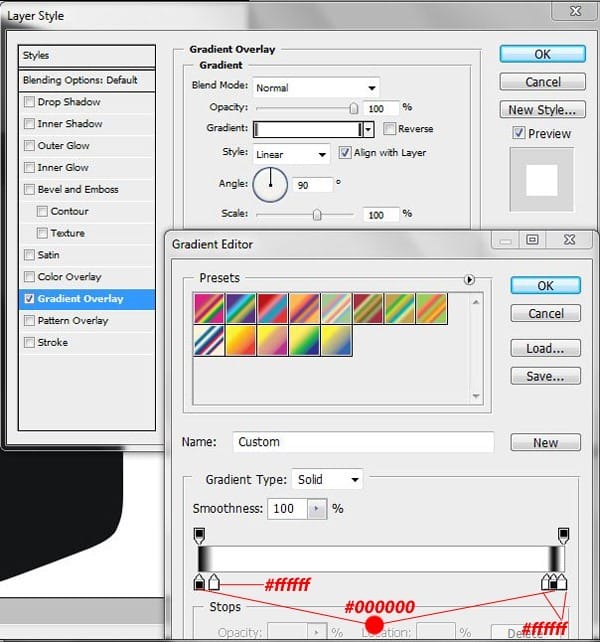
Add a Gradient Overlay layer style to this layer by choosing Layer > Layer Style > Gradient Overlay. Apply a gradient like shown in the image below.
This is what your image should look like.
Step 6 – Finish the bevel
Select the Eraser tool (E) then erase the bottom corner of the metal band so that it blends in.
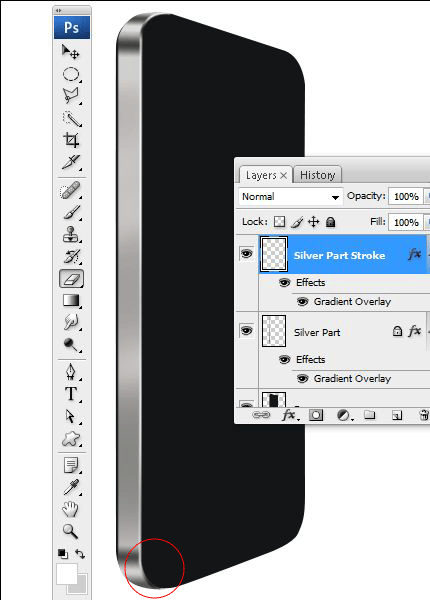
Below is a before and after image of this step. It is a small change but it makes the metal band look like it is wrapping around the whole phone.

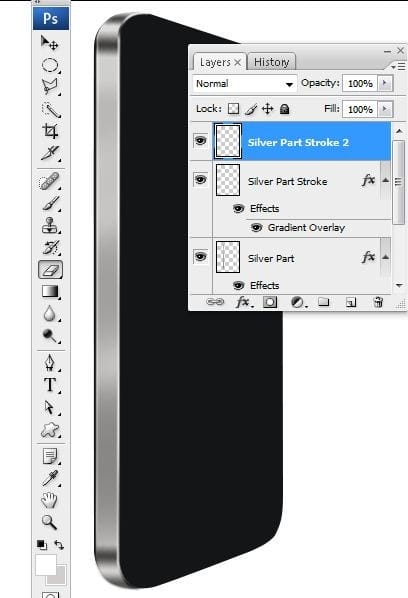
Create a new layer and name this layer “Silver Part Stroke 2”. Select the Pen tool then create a path like showin in the picture below. Apply a 2 pixel white stroke. To do this, first select the Brush tool and set the brush size to 2 px and hardness to 100%. Set the foreground color to white then switch back to the Pen tool. Right click on the Path then choose Stroke Path.
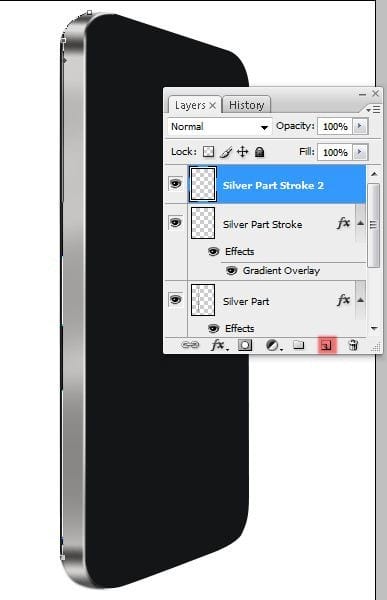
Select the Eraser tool and set the hardness of the eraser brush to 50%. You can right-click anywhere in the document window to bring up the eraser brush settings. Erase a little of the top and bottom of the stroke so that the edges fade.
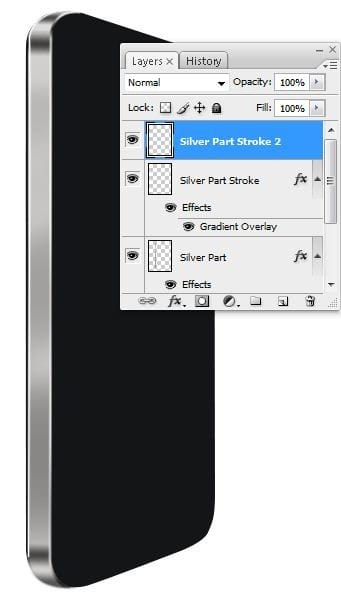
Using the Eraser tool and a large eraser brush (about 50 pixels), use the eraser tool on the stroke to reduce its opacity. You can freehand this to adjust the results.
Step 7 – Create the iPhone vibrate on/off switch
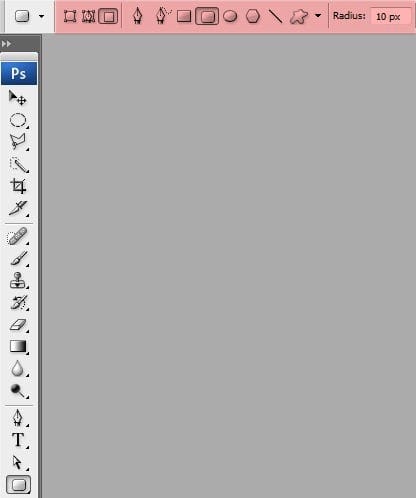
Select the Rounded Rectangle tool (U) then apply the option bar settings shown in the image below.
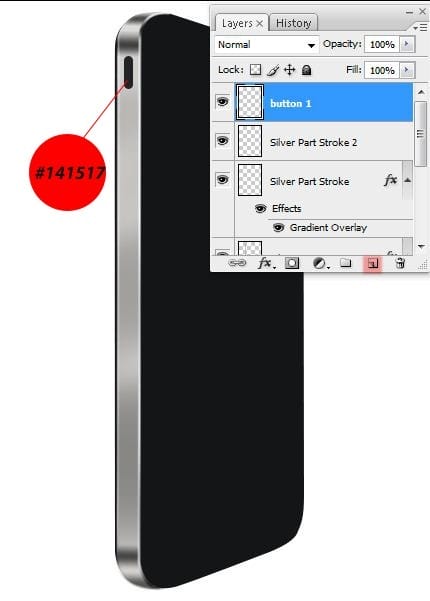
Create a new layer then rename it to “button1”. Use the Rounded Rectangle tool (U) to create a shape like shown in the image below.
Step 8 – Add a bevel to the vibrate on/off switch
Create another new layer then rename this layer to “Button 1 stroke”. Select the Pen tool (P) and create a path like shown in the image below. Select the Brush tool and set the brush size to 1 px and foreground color to white. Switch back to the Pen tool (P), right click on the path, then choose Stroke Path.
2 responses to “How to Draw a Photorealistic iPhone 4 in Photoshop”
-
I realy like your site and get what i looking for thank you very much.
-
thank yhu
-


Leave a Reply