Preview of Final Results

Dreamy Photo Manipulation of a Girl Looking Out a Window Photoshop Tutorial
Resources
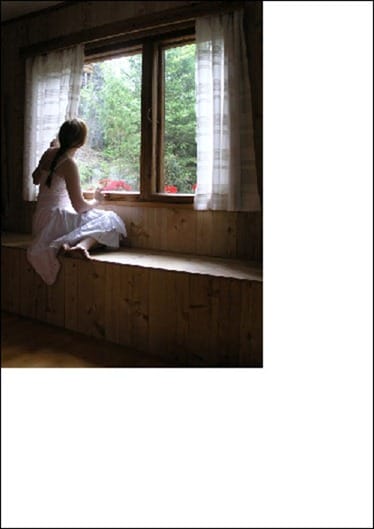
- By the Window II – Eirian stock
- Snowy weather stock 11 – SimplyBackgrounds
- Clouds II Photoshop Brushes – redheadstock
- FREE STOCK Swing – mariamurphy
- Bear – kristal29
- Fish Stock 0008 – phantompanther stock
- Metal Texture 15 – Wojtar stock
- Paper Texture 1 – Wojtar stock
Step 1: Create a New Photoshop Image File
Let’s start by creating a new image file, go to the Menu bar and click File > New, and then input the following values on their respective fields:
- Presets: International Paper
- Size: A4
- Width: 2480 pixels
- Height: 3508 pixels
- Resolution: 300 pixels/inch
- Color Mode: RGB Color; 8 bit
- Background Contents: White

Step 2: Create the Background
In this step, we will be creating the background. To start, let’s open “By the Window II” by Eirian stock. Once open, activate the Rectangular Marquee Tool by pressing M on your keyboard and create a selection area around the image, but disregard the little black border. See image below:

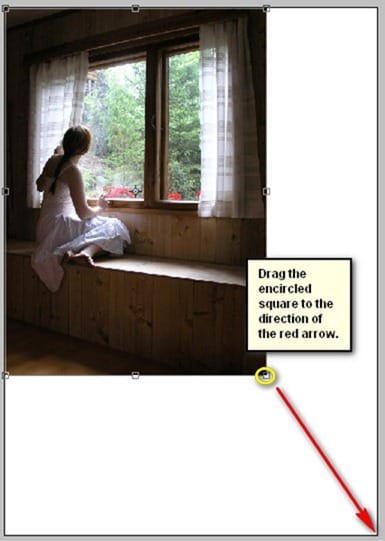
Move tool by pressing V on your keyboard. Now, drag that image into our canvas. It should appear like this:

Once on the canvas, we would need to rename the layer to Background. To rename a layer, simply double-click on the words: “layer 1” (which is our layer – “By the window II”) to prompt a text box to appear. Once that appears, you may now rename the layer.
See sample below:

Next, activate the Transform tool (Ctrl/Cmd + T) and resize that image as shown below:

The result of that should be like this:

Next, we will be removing the view through her window. Let’s start by activating the Polygonal Lasso Tool (L).

Once you’ve activated the Polygonal Lasso Tool (L) we will now create a selection area around the windows. To do that, follow the instructions shown on the image below:

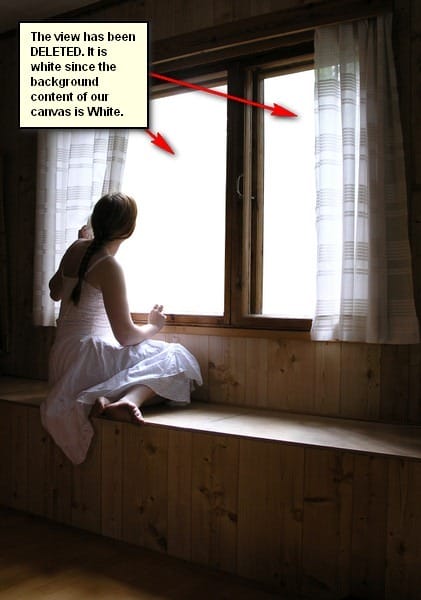
Now, after you’ve created the selection area, press Delete to remove the views through the windows. The result should be like this:

Before we proceed to adding another image through her window, there is something we need to remove. Look carefully at the image below:

Now, how do we remove that? We can’t use the Eraser tool (E) since it would look fake through the white background. So, what we will do is, we will paint on it!
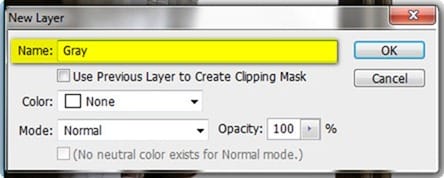
To start, make sure that the Background layer is active and then create a new layer (Ctrl/Cmd + Shift + N), this will automatically put the layer above the Background layer – when the New Layer box opens, input “Gray” on the name field.

When you’re done, activate the Brush tool (B), make sure that the brushes are the default Photoshop brushes. See image below:
One response to “Dreamy Photo Manipulation of a Girl Looking Out a Window”
-
you are professional with Photoshop and really I liked lessons so I put your website in my favorite to learn from your tutorial
thank you very much


Leave a Reply