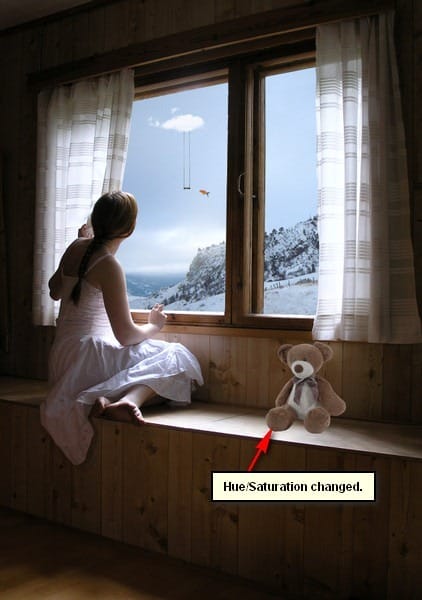
Now, activate the Move tool (V) and drag this to our canvas. We will not be putting this in the “Through the window” group instead we will be dragging this onto the top of all the layers and groups that we’ve created.
Position the bear here:

Rename this layer now to “Teddy bear”.
Next, activate the Transform tool (Ctrl/Cmd + T) and then resize this image as shown below:

After that, let’s fix the hue/saturation of the bear to make it blend with the light of the image. To do that, make sure the “Teddybear” layer is selected and then go to Image > Adjustments > Hue/Saturation. Once it is open, input the following:
- Edit: Master
- Hue: 0
- Saturation: -50
- Lightness: -25
The result of that should be similar to this:

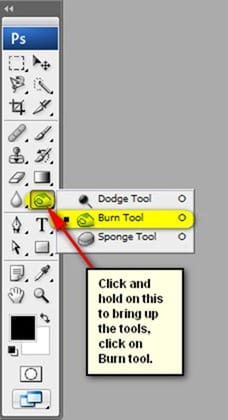
Next, we would need to darken some parts of the teddy bear to make it blend with the shadows and the overall ambient light of our image. To do that, we would need the help of the Burn tool (O).

Once the Burn tool (O) is activated input the following settings:
- Brush size: 175px
- Hardness: 0%
- Range: Midtones
- Exposure: 25%

Now, let’s start Burning!


The result of that should be similar to this:

If you would still like to darken the shadow on the bear because sometimes the Burn tool isn’t enough, we will need to paint on it. To do that, create a new layer (Ctrl/Cmd + Shift + N) and name this layer “Darken”. Put this layer above the “Teddy bear” layer and then right click on this layer and click on “Create Clipping Mask”. This Clipping mask will clip itself to the layer so that the paint applied to this layer will only be seen on the teddy bear. See image below:


Now, activate the Brush tool (B). If you would notice upon right clicking on the canvas, the Brushes that are still active is the “Clouds II” or “SS-clouds II” brushes but we need the default brushes. To reset that click on the button highlighted below:
![image017[2] image017[2]](https://cdn.photoshoptutorials.ws/images/stories/c876f3d2a1eb_5AA/image0172.jpg?strip=all&lossy=1&webp=82&avif=82&w=1920&ssl=1)
Then click on “Reset Brushes” from the contextual menu.
![image018[1] image018[1]](https://cdn.photoshoptutorials.ws/images/stories/c876f3d2a1eb_5AA/image0181.jpg?strip=all&lossy=1&webp=82&avif=82&w=1920&ssl=1)
With the brushes reset, input the following settings:
- Brush size: 35px
- Hardness: 0%
- Opacity: 25%
- Flow: 100%
- #: 000000
- Zoom: 200%
Now, let’s brush!
Brush in on the region shown below:

The result of that would be like this:

Next, let’s create the shadow of the teddy bear.
To start, let’s create a new layer (Ctrl/Cmd + Shift + N) and name it “Shadow”. Put this layer below the “teddy bear” layer so it would be easier to create the shadow.
One response to “Dreamy Photo Manipulation of a Girl Looking Out a Window”
-
you are professional with Photoshop and really I liked lessons so I put your website in my favorite to learn from your tutorial
thank you very much


Leave a Reply