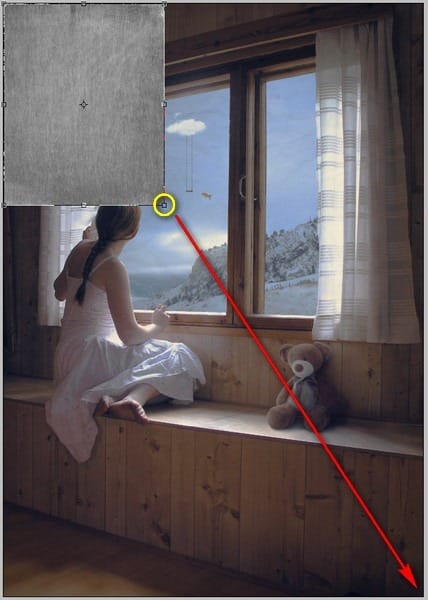
Once positioned, activate the Transform tool (Ctrl/Cmd + T) and resize it as shown below:

The result:

We don’t want that covering our whole image, so change its Blending Mode and Opacity to the following:
- Blending mode: Multiply
- Opacity: 40%

Next, let’s add our second texture. Open “Metal Texture 15” by wojtar stock; activate the Move tool (V) and drag this to our canvas. Position it like this:

Activate the Transform tool (Ctrl/Cmd + T) and resize it as shown below:


Change its Blending mode and Opacity to the following:
- Blending Mode: Soft Light
- Opacity: 100%
The result of using those two textures would be like this:

Finally, let’s darken the edges of the photo to bring the focus to the center of our image. To start, create a New Layer (Ctrl/Cmd + Shift + N) and then name it “Darken sides”.
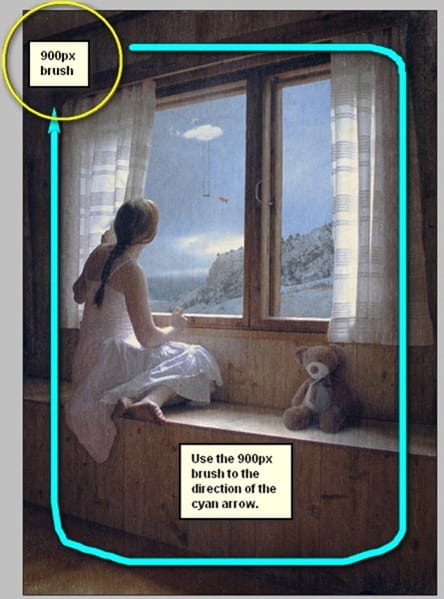
Activate the Brush tool (B) and then input the following:
- Brush size: 900px
- Hardness: 0%
- Opacity: 25%
- Flow: 100%
Now, let’s paint!

The result of that would be like this:

Final Results

Authors Comment
One response to “Dreamy Photo Manipulation of a Girl Looking Out a Window”
-
you are professional with Photoshop and really I liked lessons so I put your website in my favorite to learn from your tutorial
thank you very much


 When I was younger, I always thought I saw odd things floating outside in the sky, no I wasn’t on drugs I just daydreamed too much, I guess. Anyway, thank you for visiting this page and using my tutorial, if you want to see more of my art works, give me a shout at my website:
Leave a Reply