
Step 19
Next, open flying flamingos. After you open the image, use the Object Selection Tool(W) and select birds. After the selection area has been created, simply copy (Ctrl / Cmd + C) and Paste (Ctrl / Cmd + V) it to our work canvas. Then position the image with the transform tool (Ctrl / Cmd + T). Hold Alt + Shift and resterize like image below. In Photoshop CC only hold Alt to resterize al sides together. Opacity set to 78%.


Step 20
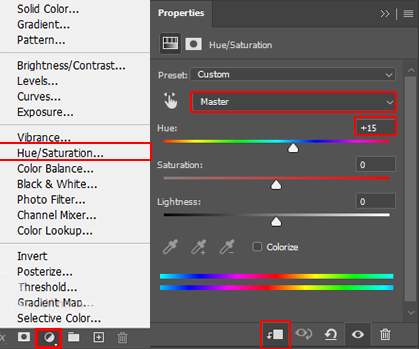
Add Adjustment layer “Hue/Saturation”

Step 21
Add Adjustment Layer “Curves” and press Ctrl/Cmd + I to invert. Then use Brush Tool(B) Soft Round with foreground color white and paint highlight parts.


Step 22
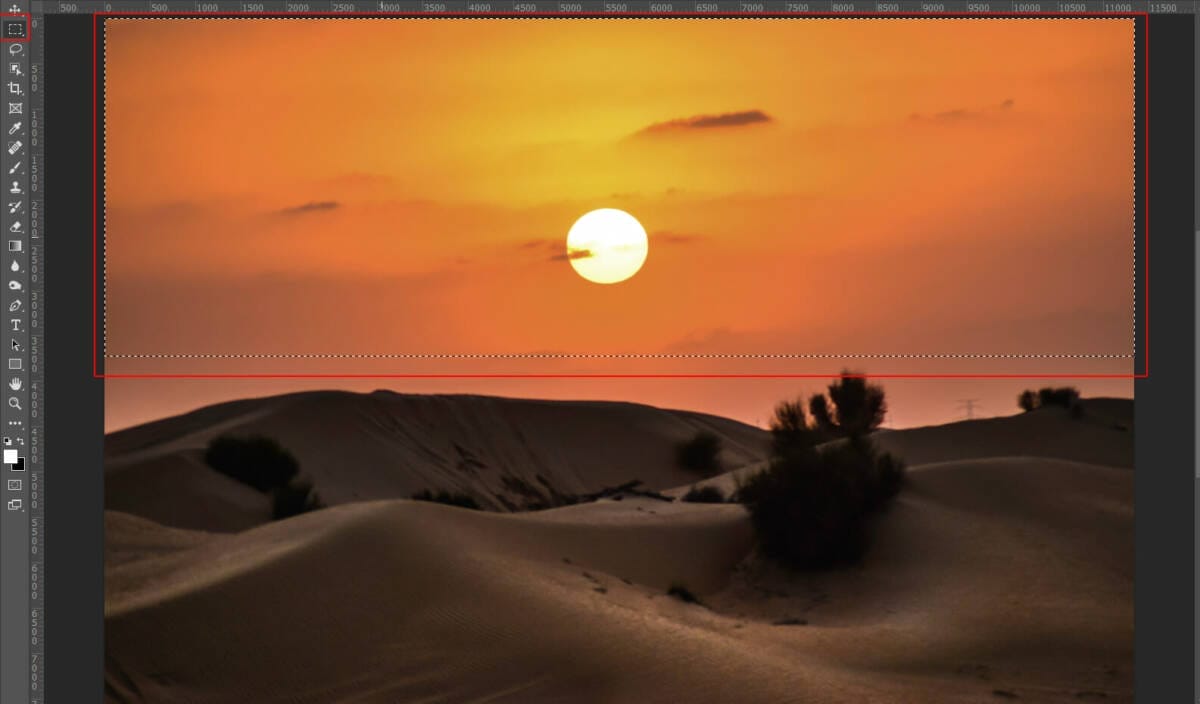
Next, add Sun. After you open the image, use Rectangular Marquee Tool(M). With the Rectangular Marquee tool, drag over the area you want to select. Hold down Shift as you drag to constrain the marquee to(release the mouse button before you release Shift to keep the selection shape constrained).


Next, open Blending Options and on Underlying Layer hold Alt and move the left slider to right and right slider to left.


Step 23
Now open again Flying flamingos image and with Object Selection Tool(W) select the first flamingo and copy (Ctrl / Cmd + C) and Paste (Ctrl / Cmd + V) it below the window layer. Then position the image with the transform tool (Ctrl / Cmd + T). Hold Alt + Shift and resterize like image below. In Photoshop CC only hold Alt to resterize al sides together. Opacity set to 65%.


Go to Filter > Blur > Gaussian Blur and set the radius to 9.8px.

Step 24
Add Adjustment Layer “Hue/Saturation”

Step 25
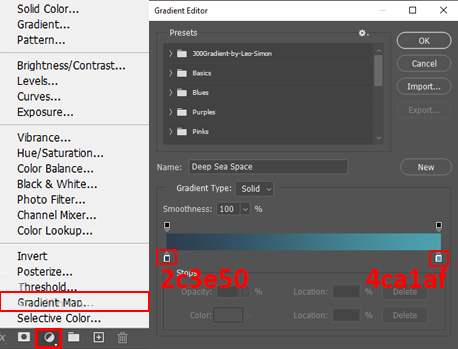
Next, select the last layer and add the adjustment layer “Gradient Map” Soft Light 30%.

Step 26
Add Adjustment Layer “Gradient Map” Soft Light 20%

Step 27
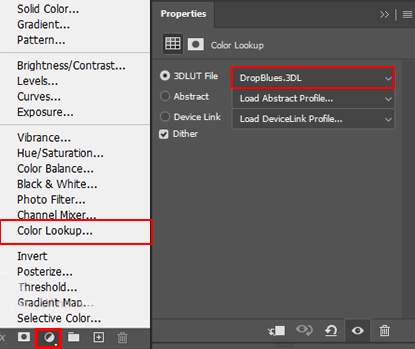
Add Adjustment Layer “Color Lookup” and 3DLUT File set DropBlues and set Opacity 30%.

Step 28
When we finished all this, now merge all layers into one. Select the last layer and hold CTRL/CMD + SHIFT + ALT + E. Now we have a final layer, right-click on the mouse and select Convert to Smart Object. Then go to Filter > Camera RAW Filter. At its most basic, the Photoshop Camera Raw filter allows you to use the functions of the ACR interface at any time within Photoshop.
2 responses to “Create a Surreal Photomanipulation Flamingos above the Clouds”
-
where da first page?


Leave a Reply