Turn any photo into a dot grid artwork with these Photoshop actions. You'll get great results with dots that change size. They get larger in brighter areas and smaller in darker areas. Free download available.
- #: 25beb9
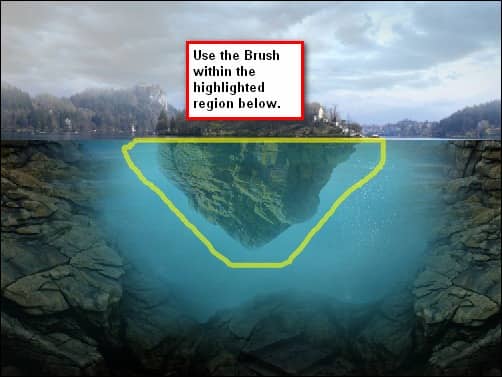
Use the following brush settings:
- Brush size: 600px
- Hardness: 0%
- Opacity: 15%
- Flow: 100%
See image below for instructions:
After that we would start adjusting the colors and brightness/contrast of the overall image. First, let’s create a Solid Color adjustment layer. To do that, click on the black and white circle button on the Layer window or better known as the Create New Fill layer/Adjustment layer button and click on Solid Color once the contextual menu opens.
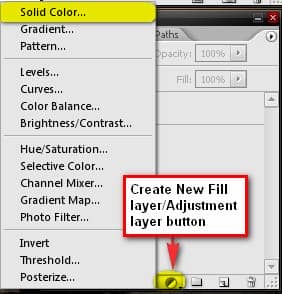
Once the Solid Color box opens, input the values below:
- #: 000228
Your workspace would now be filled with a dark blue color but in order to apply that to our image, let us change its Blending mode to Exclusion and its Opacity to 40%.
Note: The Blending modes are available at the Layer window just to the left of the Opacity value. (The text shown is simply Normal) Click on the drop-down menu to see the Blending modes.
Let’s create another Solid Color but this time input the value below:
- #: 2f6e89
Set its Blending mode to Overlay and its Opacity to 25%.
Next let’s create a Curves adjustment layer. When the Curves box opens, follow the instructions below:
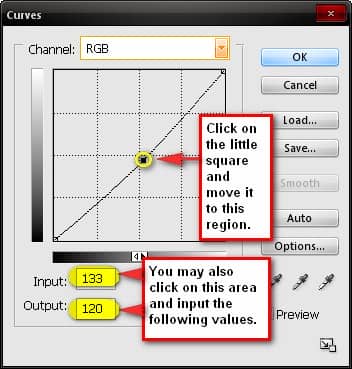
Then let’s create another Solid Color adjustment layer, and then when the box opens, input the following value:
- #: b4f9ff
- Blending mode: Soft Light
- Opacity: 20%
Then after that, let’s create a Color Balance adjustment layer and then let’s input the following values:
- Color Levels: 23, 0, -24
- Tone Balance: Midtones
- Preserve Luminosity: Checked
Finally, let’s create a Brightness/Contrast adjustment layer and when the box opens, let’s input the following values:
- Brightness: 6
- Contrast: 6
Step 6 - Make the image look dreamy
In this step, we would creating an effect which would make our image look dreamy or in more technical terms to soften the contrast. To do that, I advise you to save your file first as a PSD file, so in the future you could edit the image. Now, the process is like this, right click on any layer to bring up the contextual menu and when the menu pops up click on Flatten Image. As soon as it is Flattened duplicate that layer (Ctrl/Cmd + J), and then go to Filter > Blur > Gaussian Blur on the Menu bar and input these settings:
- Radius: 16.0 pixels
Then change its Blending mode to Lighten and its Opacity to 40%. After that just right click on any of those two layers and click on Flatten image. Finally, let’s sharpen the pixels to make the image look crisp. To Sharpen the image, go to Filter > Sharpen > Smart Sharpen and input the following values:
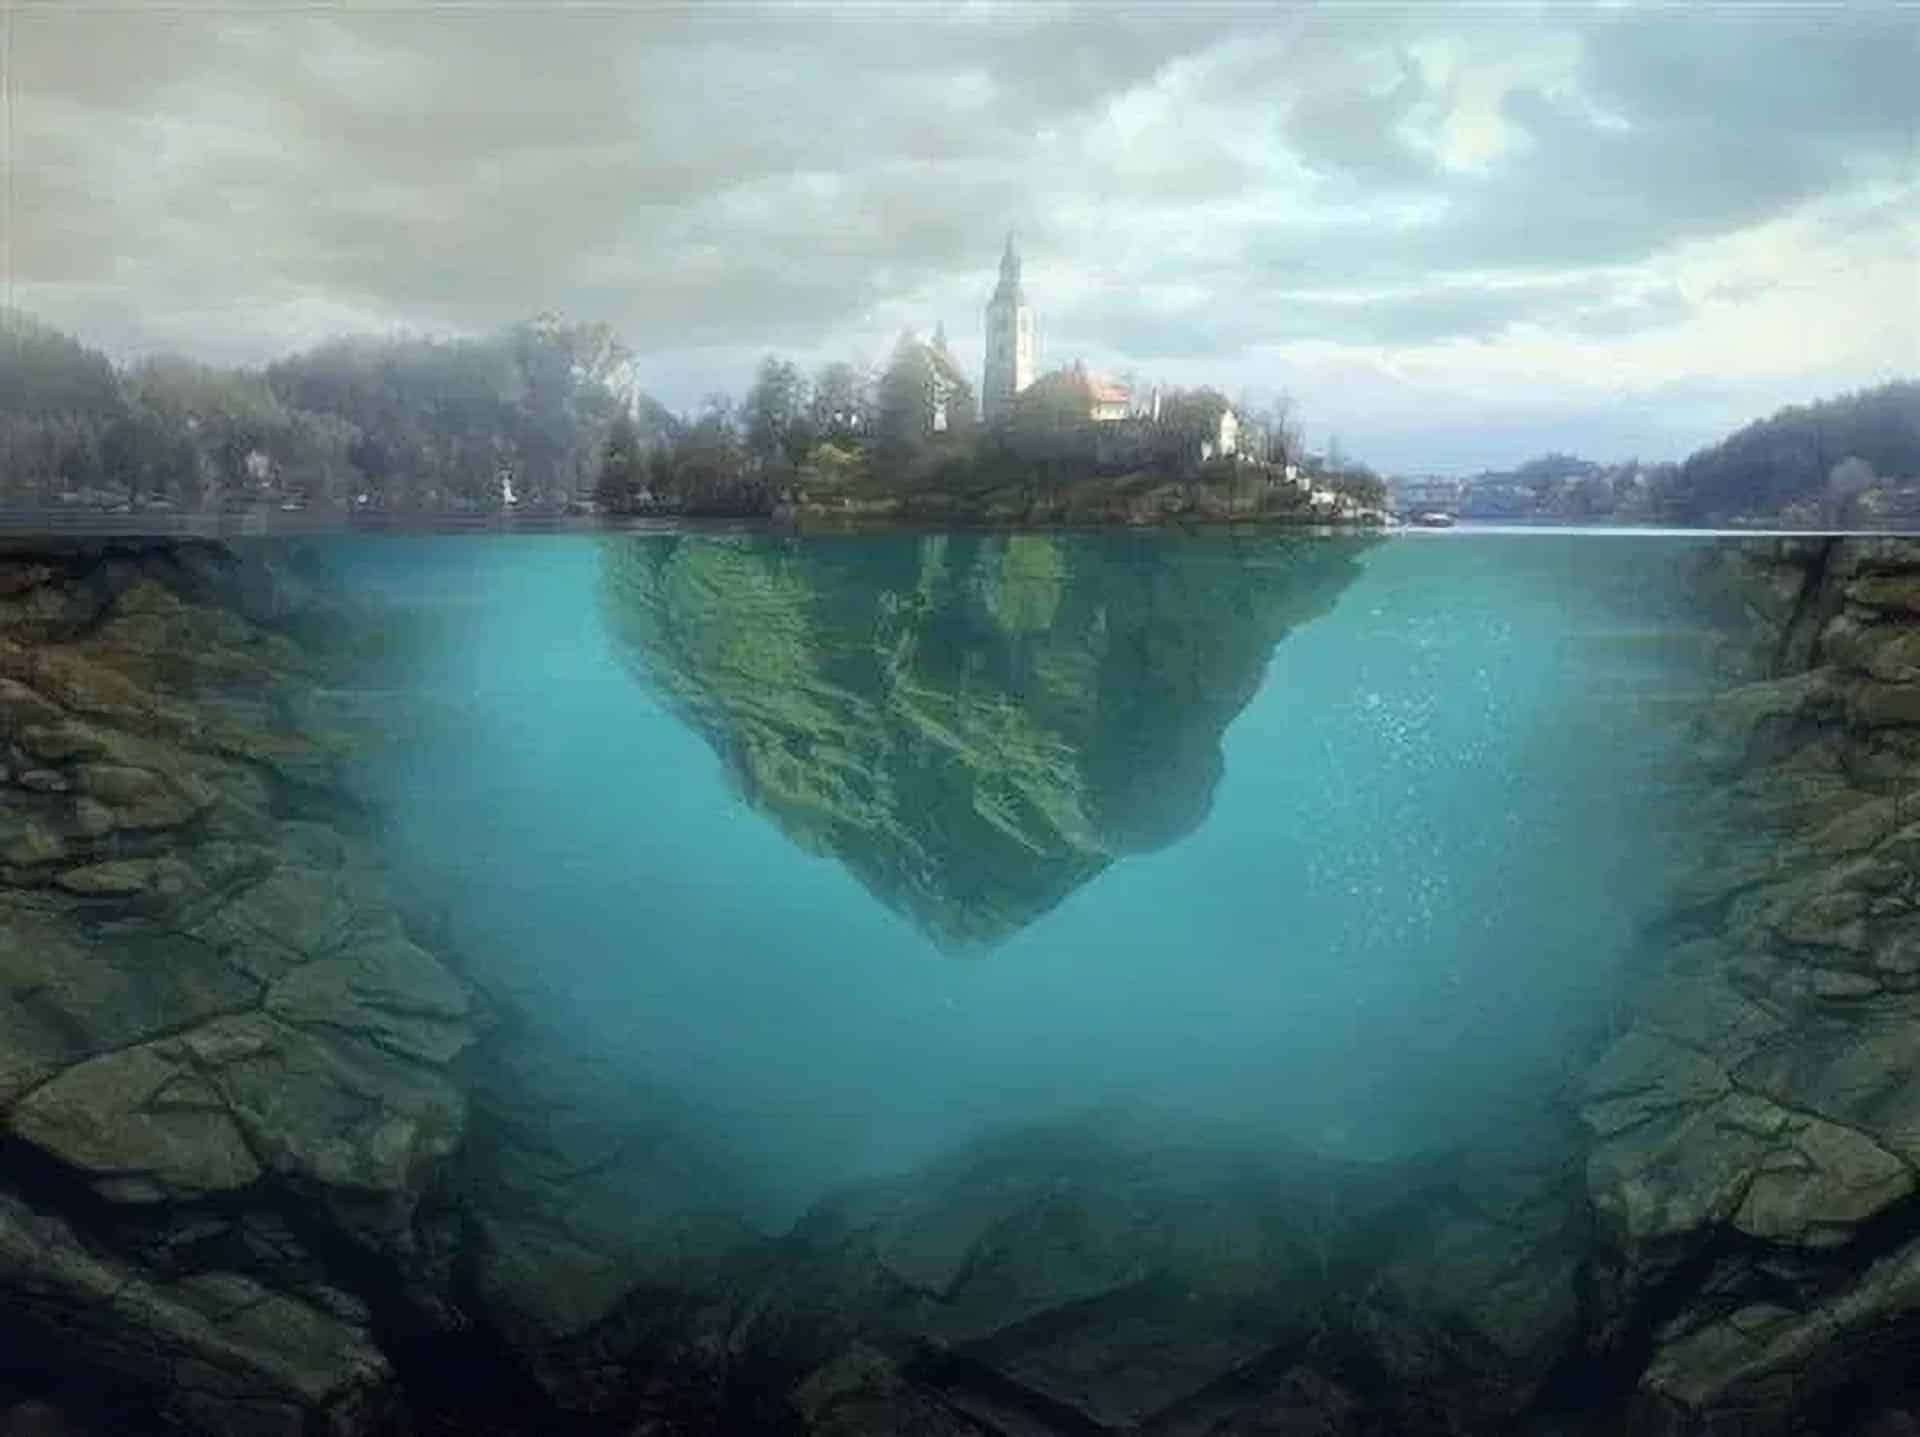
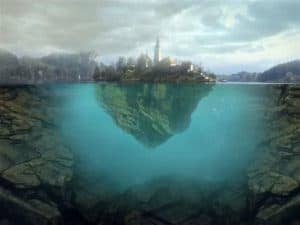

10 comments on “Floating Island on Water”
amazing tutorial.
The mysterious island
this is hard
way to go
nice
Cool im doing it right now
I don't get how you went from “water texture†to cloning that image.
It's like you skipped a step or two.
Nice photoshop manipulation. Top picture "Island" is from Slovenia - lake Bled.
Thanks for this tutorial! This is my version
http://silvialorica.tumblr.com/post/59341356745/floating-island-lisola-che-galleggia-made-by
Thts not yours cheater ..
im so gonna try this!