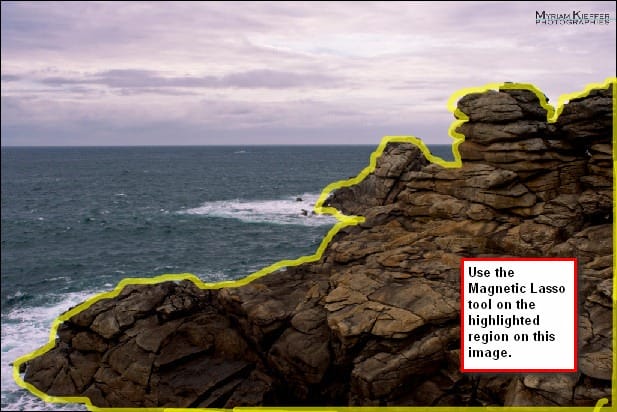
Once you’ve finished selecting the image, let us now move this pile of rocks to the canvas. Once it is in the canvas, rename that layer to “hill under the seaâ€.
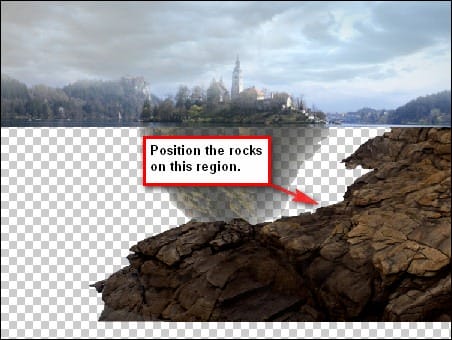
Now activate the Polygonal Lasso tool (L) for we are going to take away a part of this huge hill to as not to distract the viewer’s attention to the center of the image.

Next we would be erasing some parts of the “hill under the sea†layer to make it look like it really is underwater. Activate the Eraser tool (E) and input the values below:
- Brush size: 700 px
- Hardness: 0%
- Opacity: 100%
- Flow: 100%

Now, we would need to reduce the Saturation of the hill, because its red color is quite distracting. Click on the “hill under the sea†layer and then from the menu bar go to Image > Adjustments > Hue/Saturation or simply press Ctrl/Cmd + U while the “hill under the sea†layer is selected. When the Hue/Saturation box opens, input the following values:
- Edit: Master
- Hue: 0
- Saturation: – 35
- Lightness: 0
Next, what we need to do is we would need to create another hill without using another stock image. To make that happen, we just need to duplicate our “hill under the sea†layer by pressing “Ctrl/Cmd + J†then activate the Transform tool (Ctrl/Cmd +T) , right click on the canvas and pick “Flip Horizontal†from the contextual menu. When you have flipped it, activate the Transform tool once again and resize the duplicated layer and erase its region below. Note: Use the same Eraser tool values above.

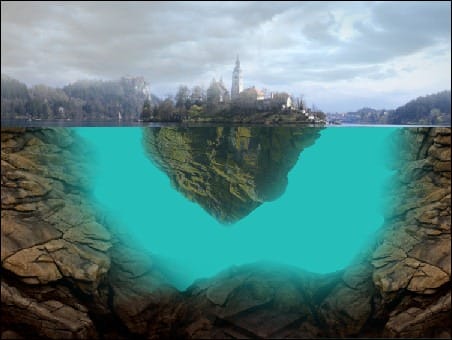
Now we will be adding another stock image and this image would serve as our water texture. Open 36…Underwater stock and move it to our canvas, and then rename the layer to “water texture†and then put this layer above all the layers on this step. Transform it as needed. See image below:

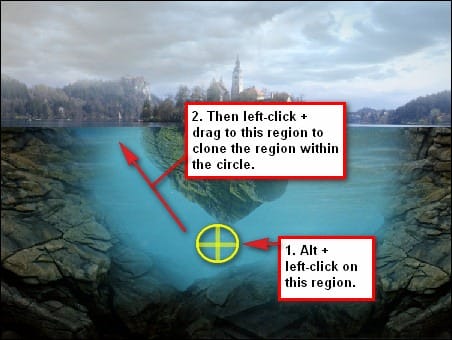
Obviously, the waves from the stock image are very distracting, so we would need to remove it. To do that, activate the Clone Stamp tool (S) and use the following values:
- Brush size: 600 px
- Mode: Normal
Opacity: 100% - Flow: 100%
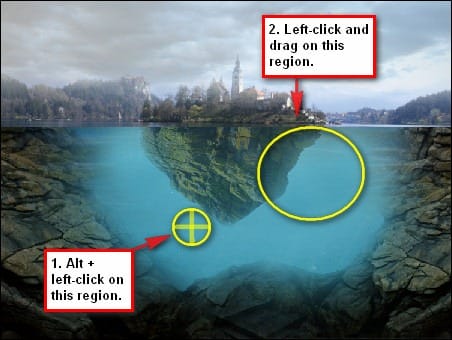
Now that we’re done, let’s group the layers that we’ve created. Select the layers: “island belowâ€, “hill under the seaâ€, and the duplicated “hill under the sea†layer and then press Ctrl/Cmd + G to group them. You may also try pressing the folder icon on the Layer window which is the Create a New Group button and then drag the layers for this step on to that group. When you’re done rename the group to “Under the seaâ€
10 responses to “Floating Island on Water”
-
amazing tutorial.
The mysterious island -
this is hard
-
way to go
-
nice
-
Cool im doing it right now
-
I don’t get how you went from “water texture†to cloning that image.
It’s like you skipped a step or two.
-
Nice photoshop manipulation. Top picture “Island” is from Slovenia – lake Bled.
-
Thanks for this tutorial! This is my version
http://silvialorica.tumblr.com/post/59341356745/floating-island-lisola-che-galleggia-made-by-
Thts not yours cheater ..
-
-
im so gonna try this!


Leave a Reply