Download Lightroom presets and LUTs, absolutely free. Use the presets to add creativity and style to your photos.
Alice in Wonderland is one of the most popular fantasy stories told all over the world! In this tutorial you will learn how to create a Wonderland inspired photo manipulation using masks, blending modes, and adjustments. You'll be taken through using transform, warp, and blur to create perspective and the effect of movement. Finally, a series of adjustments are applied to give the image a unified tone and style.
Preview of Final Results
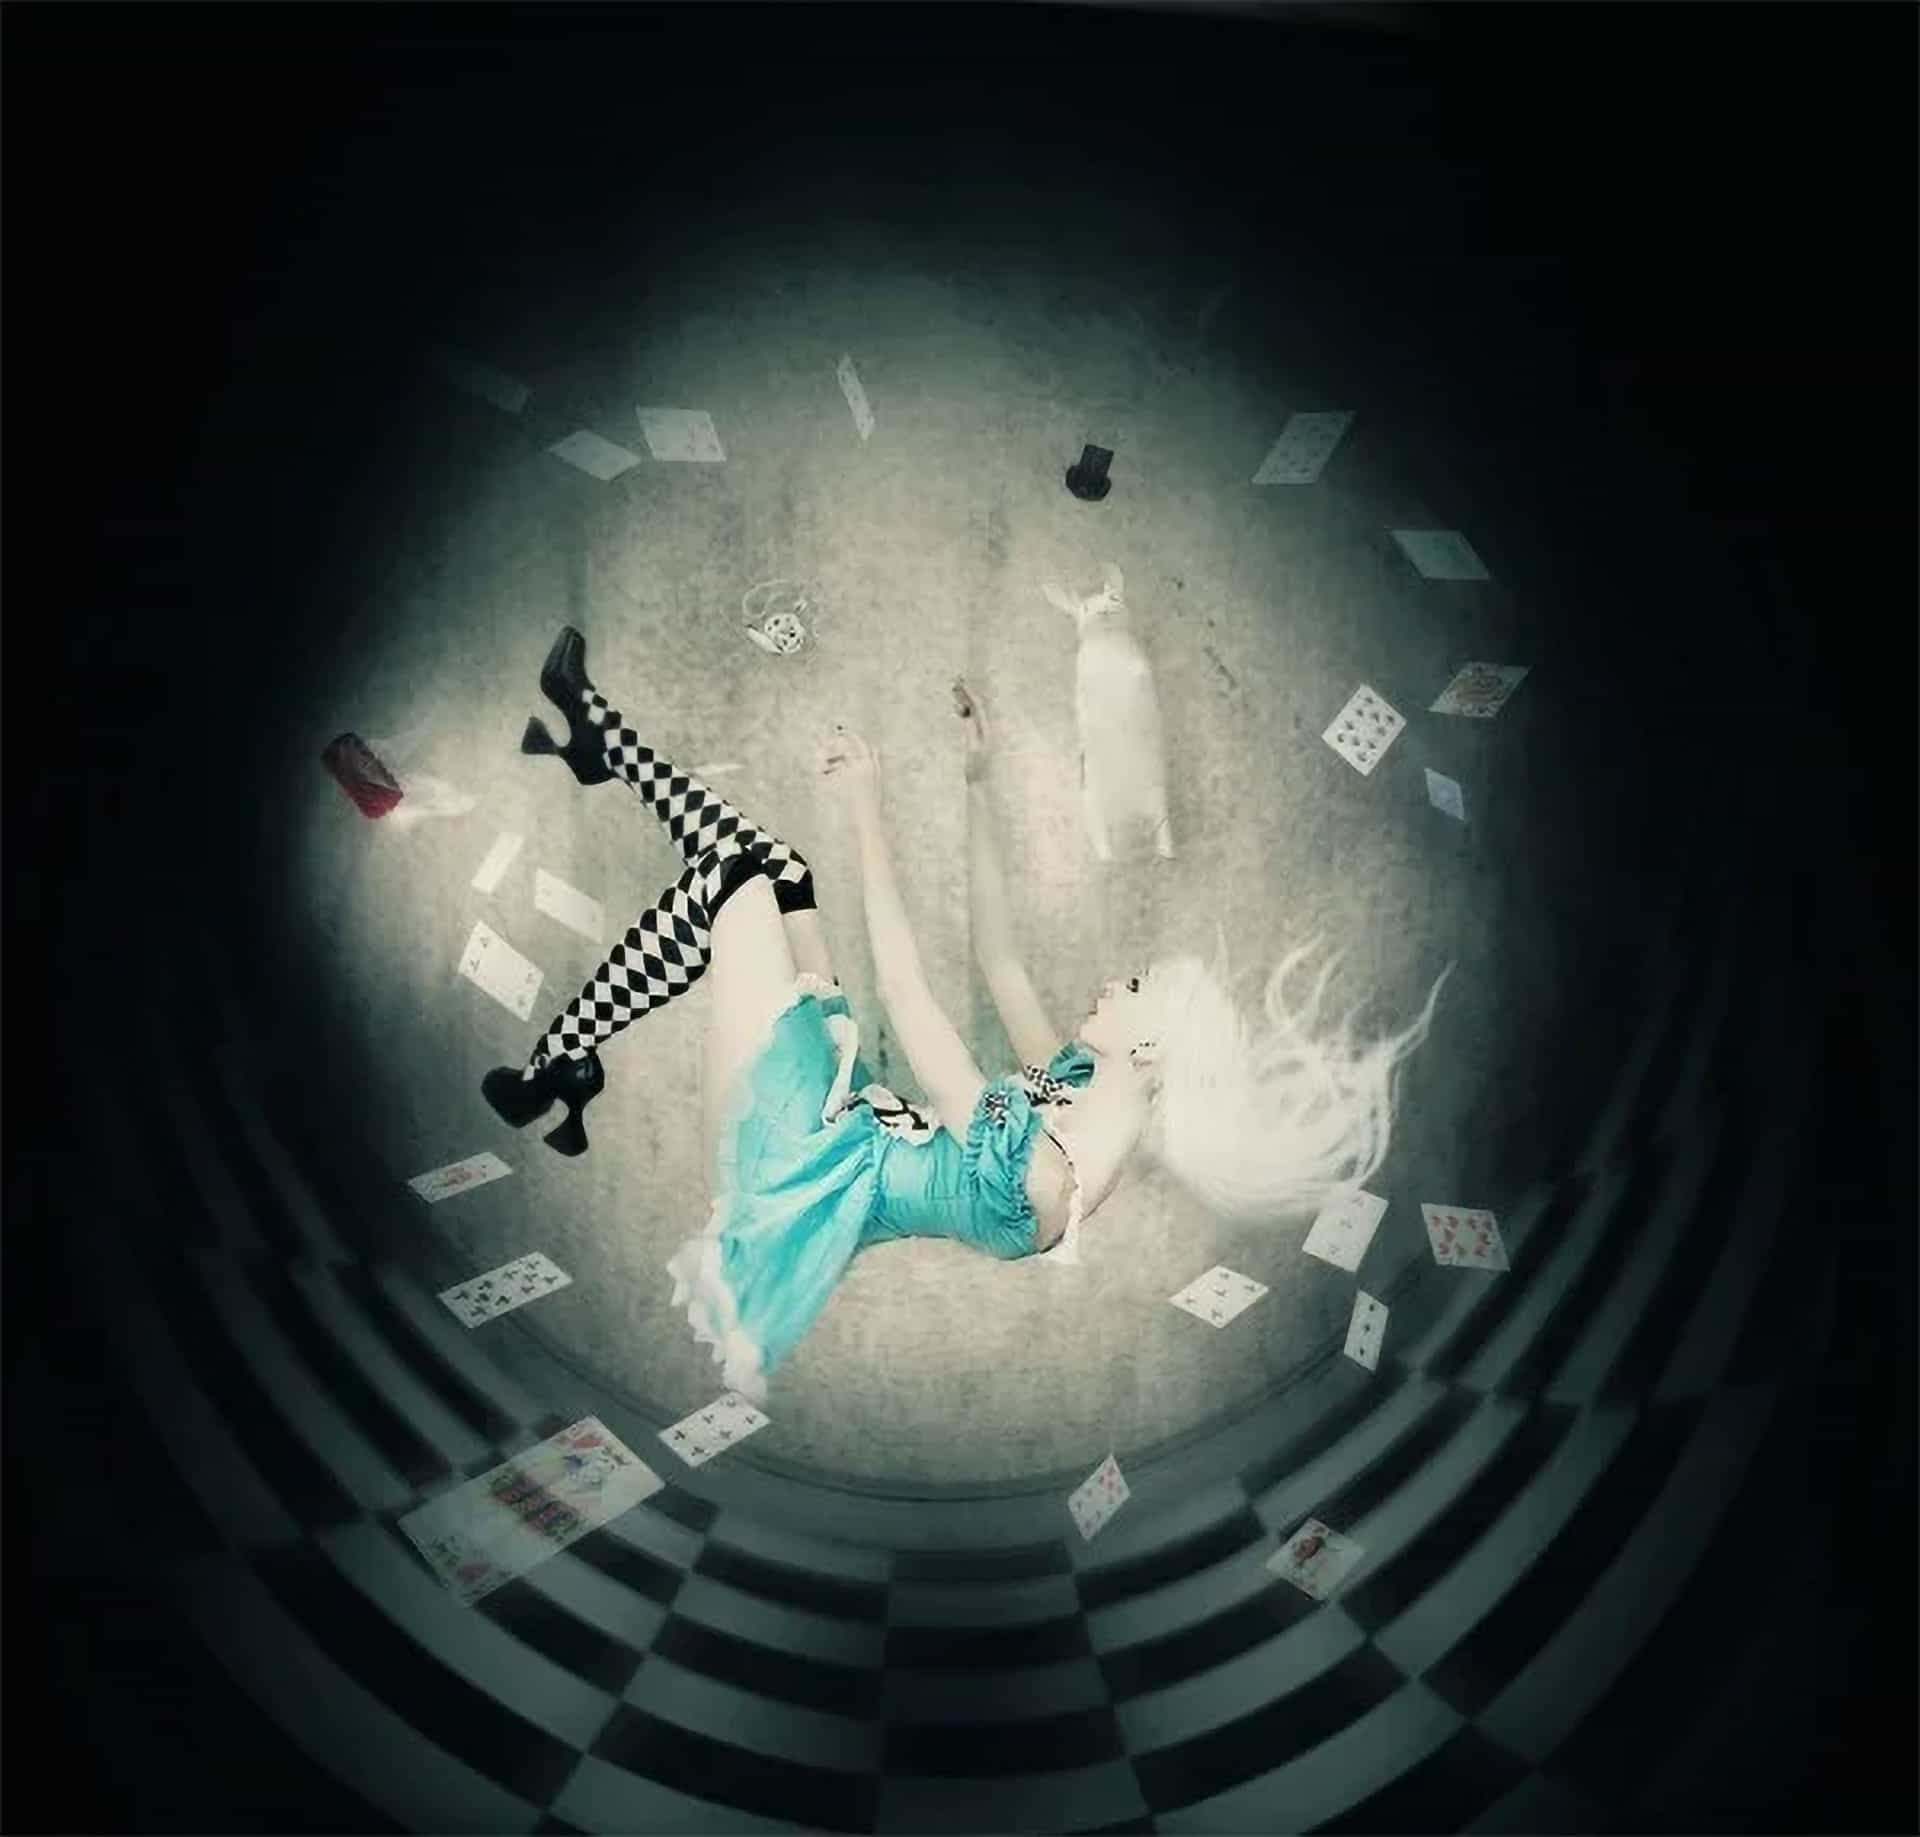
“Alice in Wonderland” Inspired Artwork Photoshop Tutorial
Resources
- Victorian background- Enchanted Stock
- Alice Model - Lor Myers
- Rabbitby Thomas Nicot
- Smoke Brushes- Grace Callaghan
- Hair Brushes- Falln Stock
- Pocket Watch- CC
Candle- Lindsay Coffman(Alternative)- Playing Cards- Shadowelement-Stock
Top-Hat - Luna-8-Stock(Alternative)
Helpful Shortcuts
- During this tutorial, you will be making a lot of layers. As a shortcut, use Cmd+Shift+N (MAC) or Ctrl+Shift+N(PC).
- Add masks by clicking "Layers > Layer Mask > Reveal All."
- To raise and reduce your brush diameter when painting your masks, use the [ and ] keys.
- Use B and V to switch rapidly between the Brush and Move/Transform Tools.
Step 1
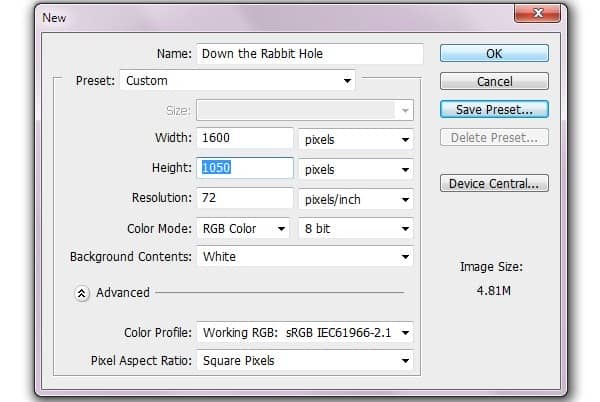
Launch Photoshop and create a new document. for the purpose of practice, we are creating a web-ready image. Therefore, choose 72 "pixels/inch" and set the Width and Height to a wallpaper size such as 1680 x 1050.
Step 2
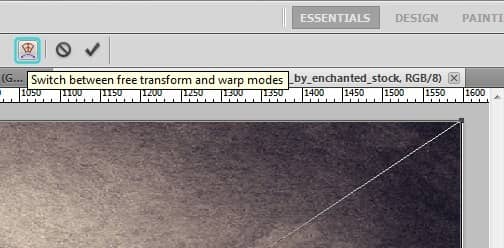
Choose the Bucket Tool and fill the background with black. Click on "File > Place" and browse to choose the Victorian background. Click the Warp button in the selection toolbar to enable Warp Mode.
Step 3
Warping the background is the most difficult part of this process, and likely what you will spend the most time perfecting. Don't worry if you don't make it perfect now - you can continue to adjust it as you build the rest of the image, so it fits around the other elements you will be adding.
Begin warping the background into a circular shape starting with the top nodes. Pull them up and inward, and then do the same with the bottom corners.
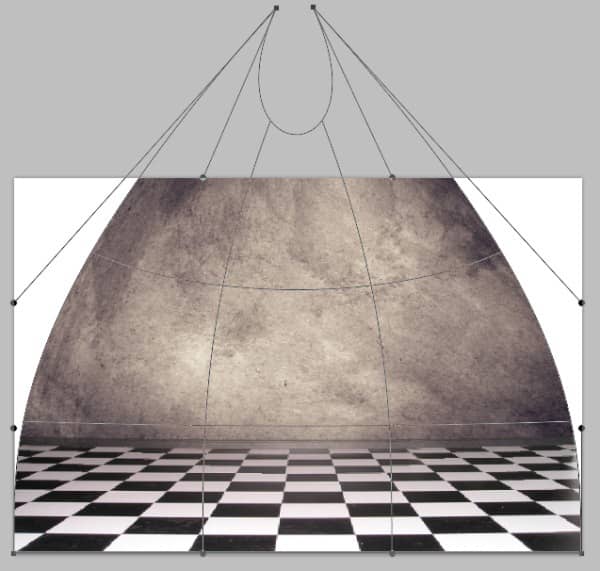
Proceed to create a sort of person outline, which bends the background into a teardrop shape.
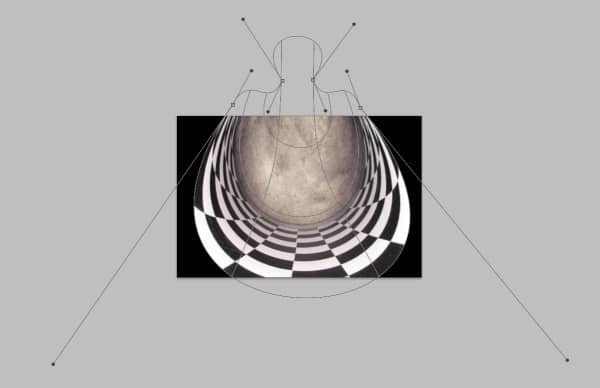
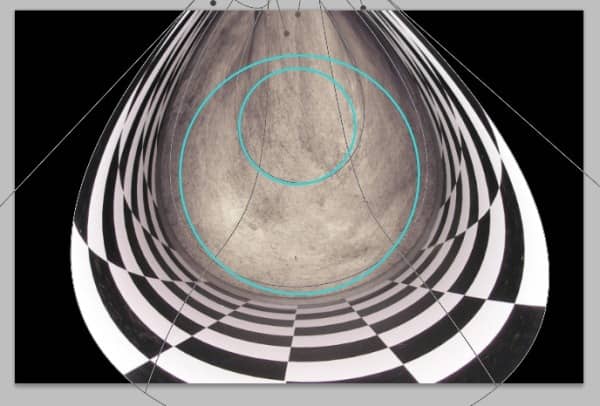
Imagine two circles in the center like the following example. Continue working with the nodes until the center lines are evenly spaced and bent into a circular shape, leaving an opening at the top. To create perspective towards the bottom and "front" of the image, click the bottom "fat" part of the background and drag it outwards. Try to keep both sides symmetrical by positioning your lines and nodes evenly.
Step 4
Once you have warped your background to a point you are satisfied with, for now, click on "File > Place" and choose the Alice model photo. Scale her down slightly if using my suggested document dimensions. To help create the idea of motion, drag upwards on the top node to elongate the photo by about 70 pixels and position it so the model is above the curve line at the "back" of the room, about 250 pixels from the top of the document.


8 comments on “How to Create an “Alice in Wonderland” Inspired Artwork with Photoshop”
Love it
dank je wel voor deze super tutorial
AMAZING but I did it myself and it was 10x better
what an awesome tutorial!!
c_oOl n_-eX+ d_0 j_Us)+_iN_n b_iE_-Be_r
amazing tutorial thanks
AWESOME TUTORIAL!~
LOOKS WICKED!~
Thanks Vail Joy, its helpful on me!