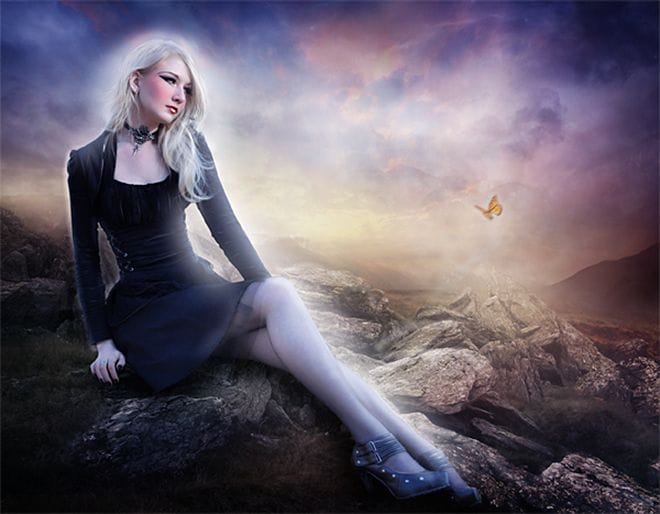
Learn how to create this artwork of a mysterious lady in desolate environment with Photoshop! This tutorial will teach you how to place a model into a mystic landscape, apply makeup to her, and add mystic lighting effects.
Preview of Final Results
Tutorial Resources
- Model – Mariaamanda
- Stones – Compot-stock
- Mountains – Resurgere
- Mountains2 – Kuoma-stock
- Forest – Riktorsashen
- Sky – Frozenstarro
- Butterfly – Madetounique
- Hair – Trisste-brushes
Step 1 – Open a New File
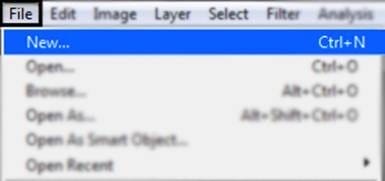
Go to File – New (Ctrl+N).
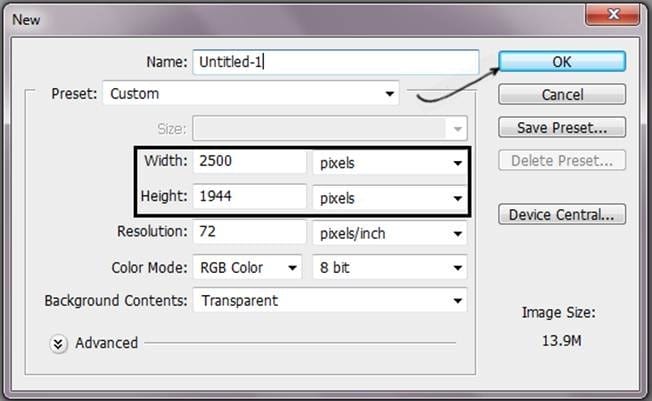
Then change the resolution of the new file to Width 2500 pixels and Height 1944 pixels.
Step 2 – Select the Model
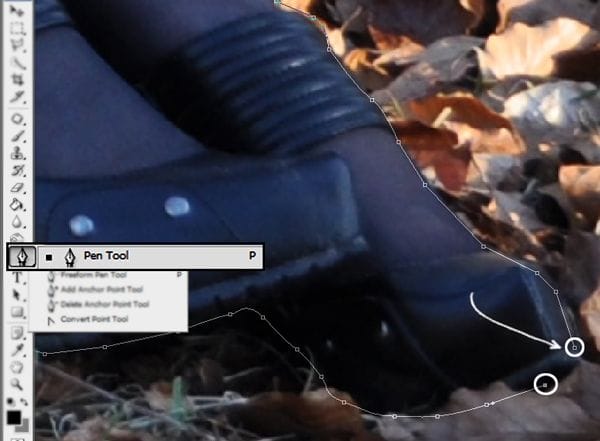
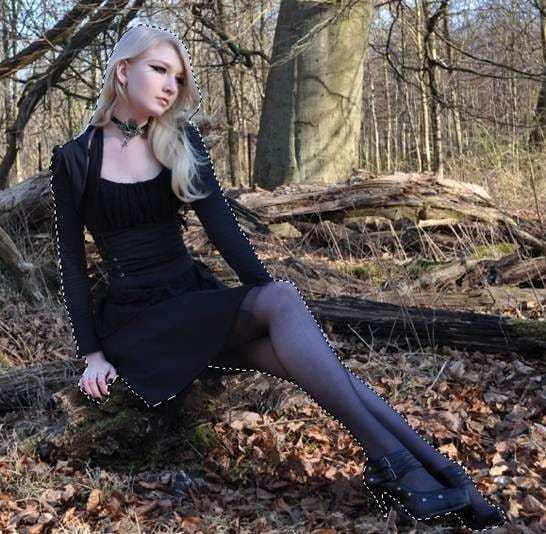
Open the model’s file and used the pen tool to select the model. Pass all over the edges and make sure you end the selection in the same point you started, closing the path like this:
Step 3 – Making the selection
After you close the path press right click and you will see a menu on the screen then choose the option Make Selection.

Then choose the option New Selection and press ok

The end result has to be like this one:
Step 4 – Duplicate the Selection
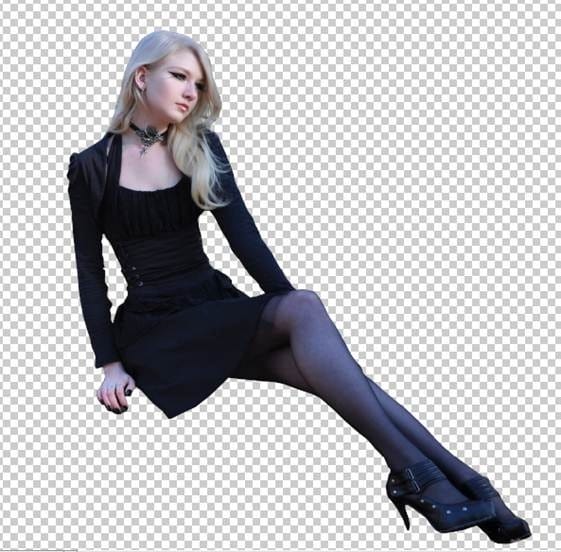
Now Press Ctrl + J on your keyboard or press right click and select the option Layer via Copy.
Step 5- Add a base
Add base image for the background, In this case you can use a blue tone, with not to much saturation and reduce the opacity to 90%.

Step 6 – Stones
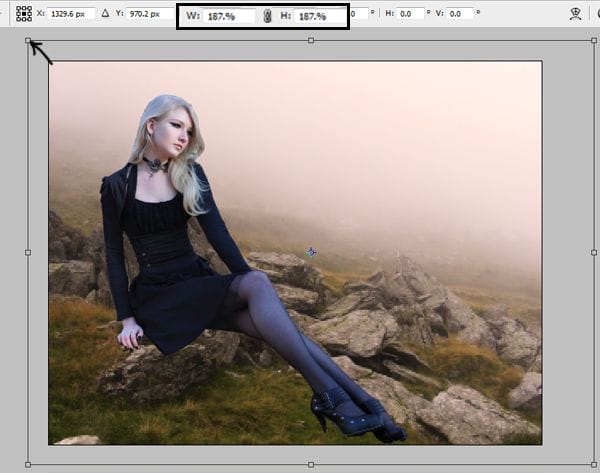
Add the layer with the stones to the background. Resize the layer pressing Ctrl + T in the option free transform to fit the image. Press enter to apply the transformation. Make sure you press Shift and with the mouse on one of the corners change the size of the image in that way the Width and the Height are always going to be the same, and the image will never be distort.
Step 7 – Reduce Saturation.
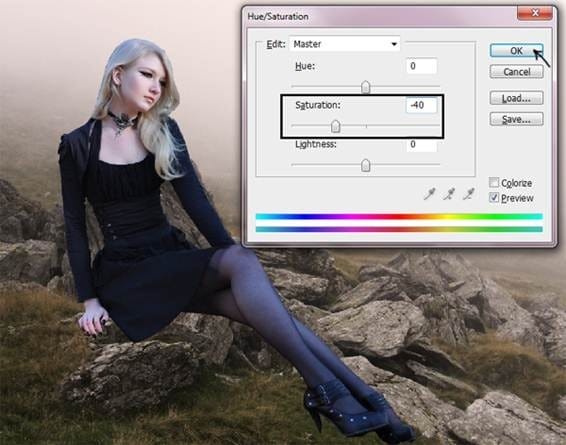
Go to menu: Image – Adjustments – Hue/Saturation (Ctrl+U) and in the option Saturation reduce to -40. Press ok to save the changes.
Step 8- Erase
Now pick the Eraser tool (E) and pass over the sky, just leave the rocks. Choose a soft round brush of 600px.

Step 9 – Change Layer Mode
Change the rocks layer mode to hard light.

Step 10 – Mountains
Add a new layer, this one has mountains and nice colors. Add that to the image. You can always modify the size with free transform (Ctrl+T)
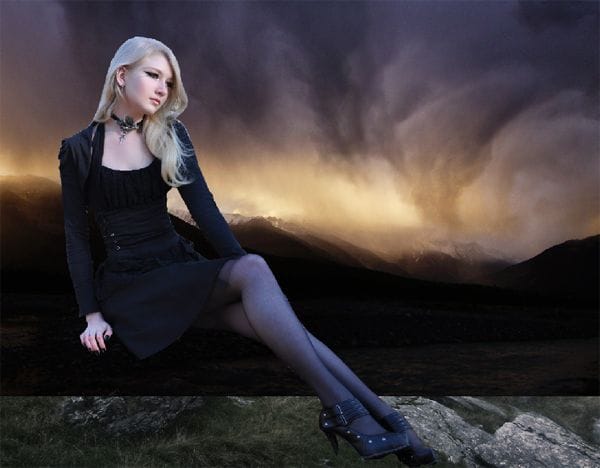
Step 11- Erase
Reduce the opacity of the layer to 80% and pick the eraser tool (E) and pass over the rocks.
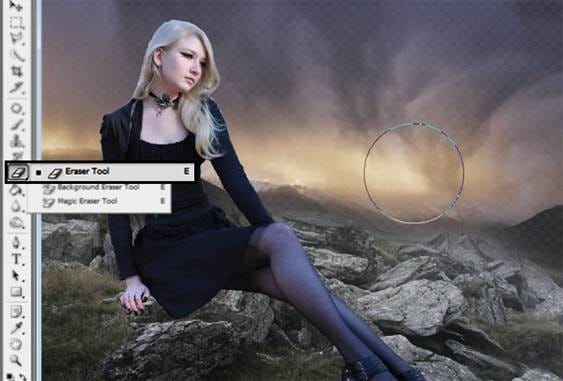
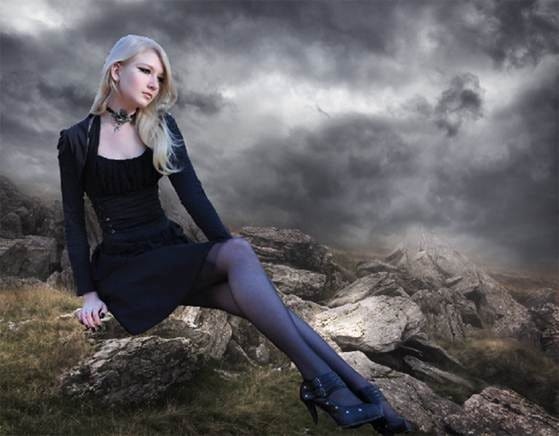
Step 12 – Clouds
Add a sky to the image to create the effect of more clouds in the sky.
Step 13- Soft Light
Now change the layer mode to soft light
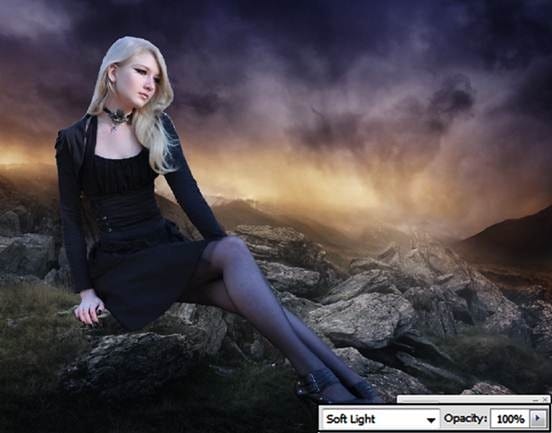
Step 14- More mountains.
Add more mountains to the image. Erase the undesired parts with the eraser tool.
25 responses to “How to Create This Mystical Scene and Add Makeup to a Girl in Photoshop”
-
Awesome job… This is a well detailed tutorial, I will try it out
-
This is a very interesting tutorial, I love it.
-
I love your tutorials they are fantastic
-
i love it
-
love the fanpage
-
<3handheld power tools ?
-
yep<3
-
-
have nice work….thanks for sharing.
-
im fan of your site. :) :) :)
nice tutorials. helps a lot in learning things -
Hi
I’m a newbie at Photoshop and all I have to say is : Wow.
You’re Tutorial is awesome (Y) -
LOVE IT! :3 i wish i could edit in that way one day… :) thanks for shared it with us :)sorry for my english xD
-
Great tutorial…
May I ask in step 41 – texture, why I can’t find it in resource, could you mind to reupload it? Thanks so much for useful tut..:)-
A.A.
How are you?
Please information to share me ,who can you make this pitchers.I am a Photographer of fashion shoot.
Multan (Pakistan).
-
-
Nice work
-
What is a fractal texture?
-
No link to it in the resources… probably means this:
http://browse.deviantart.com/resources/textures/abstract/?q=fractal
-
-
I love your tuts! Thank you
-
great as before i am a fan of your website.go on
-
The butterfly is a nice touch. The glow… mmm.. it not very natural looking
-
She’s so pretty
-
thanks you for share
-
THaaanks so much for this type of tutorials. I have never used photoshop but today I came to know such great demonstration. Now I am going to learn photoshop …
Thanks Again…
-
The glow around the girl looks more like the halos you see in HDR photos than a glow that’s emitting from the girl. I would make it glow only around the parts where her skin is revealed… so not so much around the hair and none around the arms but only in the parts where her skin is.
Also, I would use a vector mask instead of making a selection and duplicating the layer in step 3.
-
Yeahhhh looks fake and overall amateur tutorial. No usage of layer masks or smart filters. You can do it anyway you like but teach it properly so people don’t end up like you.
-
Ok I agree with some of the things you said but as a whole this tutorial is great! Well explained.
PS: ARIGATO Andrea!!
-


Leave a Reply